Micromouse Wins 2011 Maze Race In Under 4 Seconds

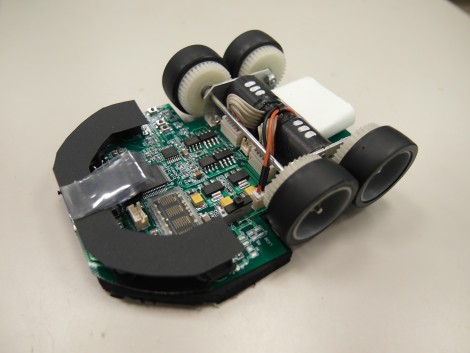
It’s off to the races once again with the Micomouse maze solving contest at the 2011 RoboGames. This is a picture of the winner, a bot called Min7 (main page) which was built by [Ng Beng Kiat]. Using four phototransistors and a flash sensor it managed to first map the contest maze, then speed run it in under four seconds. See both runs in videos after the break. He’s certainly got a leg up on the bots we saw last year. Min7 beats them both in time, and overall control during the speed run.

[Ng] mentions that this year is the first time he’s built a micromouse with four wheels instead of two. There’s a gyro on board which aids navigation by feeding the orientation data to the STM32 chip which controls the device. We took a moment to page through his past designs. It’s remarkable how they’ve evolved through the years. Continue reading “Micromouse Wins 2011 Maze Race In Under 4 Seconds”

MSP430-based Palm Size Quad Copter

palm_sized_quadcopter_msp430

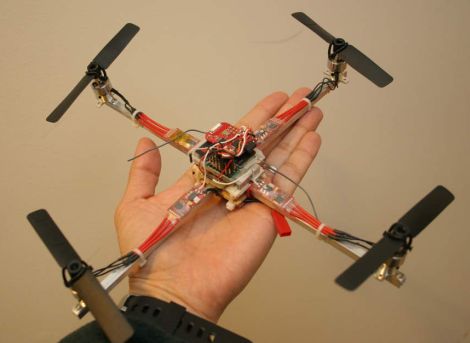
[Thanh] has spent some time flying quad-copters measuring 12” motor to motor, but wanted to build something smaller so that he could fly indoors. Instead of building just one, he actually constructed five different quad-copters, with motor to motor arm spans ranging from 10” to just 3”.

In his forum post, he highlights the construction process of his 10” copter, covering each step in great detail. While he breaks down his component lists into two categories based on motor to motor span, the one common item is the TI MSP430-based controller board. In particular, he used the eZ430-RF2500 development kit, which has the added benefit of a built-in 2.4 GHz wireless radio. His quad-copter uses a Wii Motion Plus gyro board to help keep it aloft, as well a handful of other components which should be pretty familiar to most of our readers.

It’s great to see the construction broken down in such detail, we imagine it will be a great resource for anyone else looking to build their own quad-copter.

Stick around to see a quick video demonstration of his mini quad-copter in action.

[Thanks, Panikos]

Continue reading “MSP430-based Palm Size Quad Copter”

Watch Out Segway, Here Comes Tilto

tilto_demo

While the Segway enjoyed a few years of fame before falling off the radar, [Marcelo Fornaso] is hoping his creation has quite a bit more staying power. Inspired by the Segway’s ability to balance itself, he started thinking about how the concept could be improved. He felt that one of the Segway’s shortcomings arose out of the fact that the base platform was rigid and required the user to lean back and forth outside the device’s frame in order to turn it. He thought that this made the riding experience uncomfortable as well as risked causing the rider to fall over.

His creation, the Tilto, aims to both improve on the turning ability of the Segway while eliminating the need for handlebars. Based on a tilting mountain board design he had been tossing around for a while, the Tilto uses accelerometers and gyros to keep its balance, much like the Segway. His goal was to keep the vehicle balanced while traveling forwards and backwards, but also allowing the device to tilt from side to side without tipping over. This design keeps the rider mostly upright, allowing the user to direct the vehicle by leaning much like you would on a bicycle.

As you can see in the video below, the Tilto works pretty well, even in its prototype form.

Finally, a people mover that lets us get our gangsta lean on!

Continue reading “Watch Out Segway, Here Comes Tilto”

Easy Quadrotor Helicopter Instructions

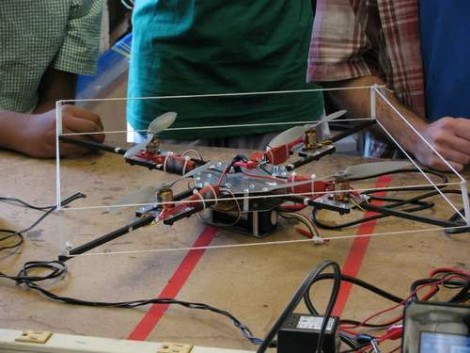
Here’s a great tutorial on building your own quadrotor helicopter. This build isn’t necessarily less expensive than others we’ve seen since quality motors, propellers, and control circuitry aren’t cheap. But the design and assembly is well documented and presents a well-planned building procedure. The carbon-fiber tubes that make up the frame have extensions to protect the motors and propellers in the event of a crash. The Arduino, IMU, and transceiver are all tucked away between two aluminum body plates as well. They only thing missing is a solid methodology for tuning the four motors, a critical procedure that is just touched up at the end of the article.

AeroQuad – Build Your Own Quadcopter

It hurts us to look at this quadcopter, agonizingly so when we watch the video after the break. That’s because we feel the unstoppable compulsion to build one. This four-rotor helicopter has a lot to be proud of; it features Gyro stabilization, Xbee remote control for very long distance operation, and computer interface for data graphing and calibration.

We like the quadcopter that we came across at CES but building one of our own is more fun than buying it ready-made. The pain we’re feeling is mostly in our pocketbook. To help ease the agony we scoured the parts list and the assembly instructions in order to get an estimate of what this might cost. We’re looking at around $415 plus shipping, not including transmitter and receiver for controlling it.  Yep, that’s a sharp stabbing pain but we’re not sure we can just let it go.

Continue reading “AeroQuad – Build Your Own Quadcopter”

3D Magnetometer Mouse In Processing

FFB4SV5G0SD7J7G_MEDIUM

[etgalim] works in Solidworks extensively and wanted a more intuitive way of rotating objects onscreen. To do this, he created a mouse that responds to rotation. He put a 3D compass module inside an old mouse and wired it up to an Arduino. The Arduino then relays the I2C sensor data to the computer. So far, he has a Processing script that uses the mouse to rotate a cube, but eventually he wants to write a Solidworks plugin. It’s a bit shaky, and we think it would be a bit smoother (and cheaper) if he used gyros like the jedipad. Video after the jump.

Continue reading “3D Magnetometer Mouse In Processing”

Wii MotionPlus + Arduino

wiimoteplus

[knuckles904] was able to use the new Wii MotionPlus with an Arduino. Nintendo has released the WM+ in order to detect the motion of the controller better. The Wiimote only detects acceleration, whereas the WM+ detects rotation along 3 axes. The Arduino communicates with it over I2C, the same protocol that is used with the Nunchuk. To connect the two devices, he used jumper wires, but breakout boards are also available. He was able to create some example code with help from wiibrew.org. When paired with a Nunchuk, which contains a 3-axis accelerometer, you can have a 6 degrees-of-freedom IMU for under $40, perfect for controlling your robots or logging data.

[via adafruit]