Hands On: Inkplate 6 MOTION

Over the last several years, DIY projects utilizing e-paper displays have become more common. While saying the technology is now cheap might be overstating the situation a bit, the prices on at least small e-paper panels have certainly become far more reasonable for the hobbyist. Pair one of them with a modern microcontroller such as the RP2040 or ESP32, sprinkle in a few open source libraries, and you’re well on the way to creating an energy-efficient smart display for your home or office.

But therein lies the problem. There’s still a decent amount of leg work involved in getting the hardware wired up and talking to each other. Putting the e-paper display and MCU together is often only half the battle — depending on your plans, you’ll probably want to add a few sensors to the mix, or perhaps some RGB status LEDs. An onboard battery charger and real-time clock would be nice as well. Pretty soon, your homebrew e-paper gadget is starting to look remarkably like the bottom of your junk bin.

For those after a more integrated solution, the folks at Soldered Electronics have offered up a line of premium open source hardware development boards that combine various styles of e-paper panels (touch, color, lighted, etc) with a microcontroller, an array of sensors, and pretty much every other feature they could think of. To top it off, they put in the effort to produce fantastic documentation, easy to use libraries, and free support software such as an online GUI builder and image converter.

We’ve reviewed a number of previous Inkplate boards, and always came away very impressed by the attention to detail from Soldered Electronics. When they asked if we’d be interested in taking a look at a prototype for their new 6 MOTION board, we were eager to see what this new variant brings to the table. Since both the software and hardware are still pre-production, we won’t call this a review, but it should give you a good idea of what to expect when the final units start shipping out in October.

Continue reading “Hands On: Inkplate 6 MOTION”

Hands On: Bus Pirate 5

If you’ve been involved with electronics and hardware hacking for awhile, there’s an excellent chance you’ve heard of the Bus Pirate. First introduced on the pages of Hackaday back in 2008 by creator Ian Lesnet, the open hardware multi-tool was designed not only as away to easily tap into a wide array of communication protocols, but to provide various functions that would be useful during hardware development or reverse engineering. The Bus Pirate could talk to your I2C and SPI devices, while also being able to measure frequencies, check voltages, program chips, and even function as a logic analyzer or oscilloscope.

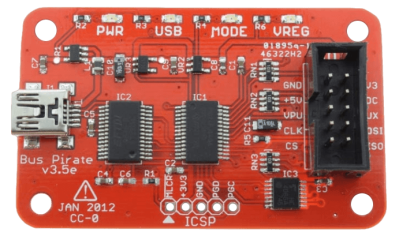
Bus Pirate 3, circa 2012

The Bus Pirate provided an incredible number of tools at a hobbyist-friendly price, and it wasn’t long before the device became so popular that it achieved a milestone which only a few hardware hacking gadgets can boast: its sales started to get undercut by cheap overseas clones. Of course, as an open hardware device, this wasn’t really a problem. If other companies wanted to crank out cheap Bus Pirates, that’s fine. It freed Ian up to research a next-generation version of the device.

But it turns out that was easier said than done. It’s around this point that the Bus Pirate enters what might be considered its Duke Nukem Forever phase. It took 15 years to release the sequel to 1996’s Duke Nukem 3D because the state-of-the-art in video games kept changing, and the developers didn’t want to be behind the curve. Similarly, Ian and his team spent years developing and redeveloping versions of the Bus Pirate that utilized different hardware platforms, such as the STM32 and ICE40 FPGA. But each time, there would be problems sourcing components, or something newer and more interesting would be released.

But then in 2021 the Raspberry Pi Pico hit the scene, and soon after, the bare RP2040 chip. Not only were the vast I/O capabilities of the new microcontroller a perfect fit for the Bus Pirate, but the chip was cheap and widely available. Finally, after years of false starts, the Bus Pirate 5 was born.

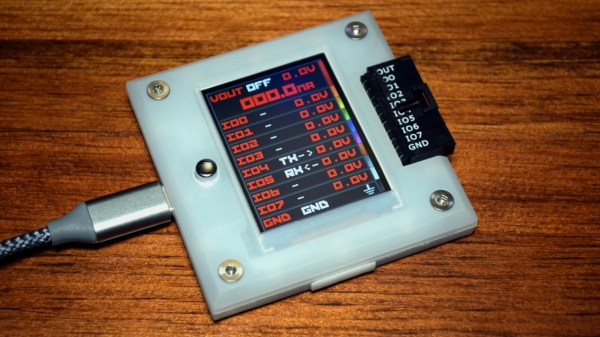
I was able to grab one of the first all-new Bus Pirates off the production line in January, and have been spending the last week or so playing around with it. While there’s definitely room for improvement on the software side of things, the hardware is extremely promising, and I’m very excited to be see how this new chapter in the Bus Pirate story plays out.

Continue reading “Hands On: Bus Pirate 5”

Hands-On: The RISC-V ESP32-C3 Will Be Your New ESP8266

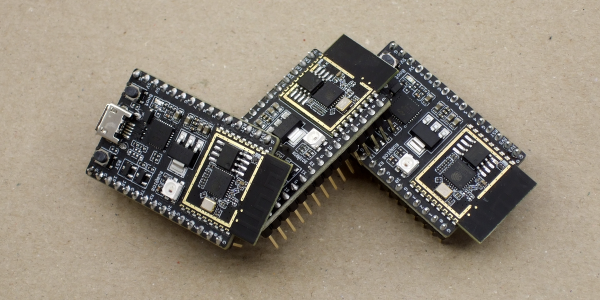
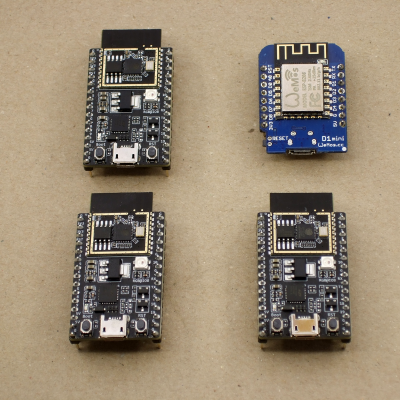
We just got our hands on some engineering pre-samples of the ESP32-C3 chip and modules, and there’s a lot to like about this chip. The question is what should you compare this to; is it more an ESP32 or an ESP8266? The new “C3” variant has a single 160 MHz RISC-V core that out-performs the ESP8266, and at the same time includes most of the peripheral set of an ESP32. While RAM often ends up scarce on an ESP8266 with around 40 kB or so, the ESP32-C3 sports 400 kB of RAM, and manages to keep it all running while burning less power. Like the ESP32, it has Bluetooth LE 5.0 in addition to WiFi.

Espressif’s website says multiple times that it’s going to be “cost-effective”, which is secret code for cheap. Rumors are that there will be eight-pin ESP-O1 modules hitting the streets priced as low as $1. We usually require more pins, but if medium-sized ESP32-C3 modules are priced near the ESP8266-12-style modules, we can’t see any reason to buy the latter; for us it will literally be an ESP8266 killer.

On the other hand, it lacks the dual cores of the ESP32, and simply doesn’t have as many GPIO pins. If you’re a die-hard ESP32 abuser, you’ll doubtless find some features missing, like the ultra-low-power coprocessor or the DACs. But it does share a lot of the ESP32 standouts: the LEDC (PWM) peripheral and the unique parallel I2S come to mind. Moreover, it shares the ESP-IDF framework with the ESP32, so despite running on an entirely different CPU architecture, a lot of code will run without change on both chips just by tweaking the build environment with a one-liner.

One of these things is not like the other

If you were confused by the chip’s name, like we were, a week or so playing with the new chip will make it all clear. The ESP32-C3 is a lot more like a reduced version of the ESP32 than it is like an improvement over the ESP8266, even though it’s probably destined to play the latter role in our projects. If you count in the new ESP32-S3 that brings in USB, the ESP32 family is bigger than just one chip. Although it does seem odd to lump the RISC-V and Tensilica CPUs together, at the end of the day it’s the peripherals more than the CPUs that differentiate microcontrollers, and on that front the C3 is firmly in the ESP32 family.

Our takeaway: the ESP32-C3 is going to replace the ESP8266 in our projects, but it won’t replace the ESP32 which simply has more of everything when we need it. The shared codebase and peripheral architecture makes it easier to switch between the two when we don’t need the full-blown ESP32. In that spirit, we welcome the newcomer to the family.

But naturally, we’ve got a lot more to say about it. Specifically, we were interested in exactly what the RISC-V core brought to the table, and ran the module through power and speed comparisons with the ESP32 and ESP8266 — and it beats them both by a small margin in our benchmarks. We’ve also become a lot closer friends with the ESP-IDF SDK that all of the ESP32 family chips use, and love how far it has come in the last year or so. It’s not as newbie-friendly as ESP-Arduino, for sure, but it’s a ton more powerful, and we’re totally happy to leave the ESP8266 SDK behind us.

Continue reading “Hands-On: The RISC-V ESP32-C3 Will Be Your New ESP8266”

Purdue Meta-AR-App Allows Instructors And Students To Build Their Own AR Learning Content

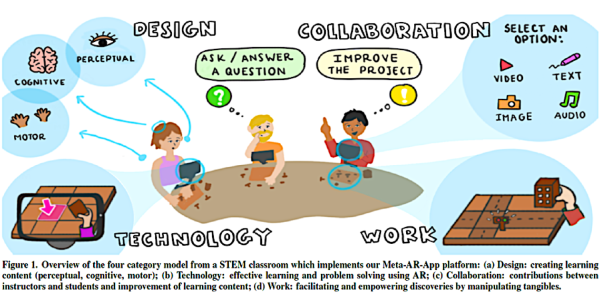
Augmented reality (AR) in the classroom has garnered a bit of interest over the years, but given the increased need for remote and virtual learning these days, it might be worth taking a closer look at what AR can offer. Purdue University’s C Design Lab thinks they’ve found a solution in their Meta-AR platform. The program allows an instructor to monitor each student’s work in real-time without being in the same classroom as the student. Not only that, but the platform allows students to collaborate in real-time with each other giving each other tips and feedback while also being able to interact with each other’s work, no matter where they may be physically located.

What we find really cool is the real-time feedback the software provides to the students. The system can sense what the students are touching and can help students in their given task, providing real-time feedback on what they are doing, how things should fit together, and what type of outcomes the students can expect given their trajectory. It also appears the system isn’t limited to AR markers but provides a very expansive toolbox for instructors and students to build on. C Design Lab is doing quite a bit of user feedback studies, continually incorporating input from students to further the platform. That’s definitely critical to ensuring the system is user-friendly.

We can easily see how something like this might scale to an industrial setting for training people how to use complex machinery, to a medical school to help prepare students to do surgery or to help develop molecular diagnostics tools. Check out the other learning tools C Design Lab is developing.

A Sneak Preview Of The Hacker Warehouse Badge

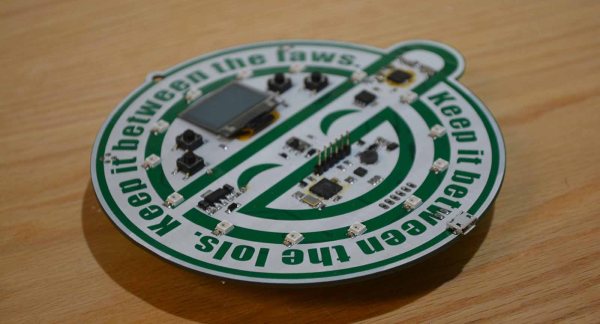
We were lucky enough to get our hands on a hand-soldered prototype of the new Hacker Warehouse badge, and boy is this one a treat. It’s fashionable, it’s blinky, and most impressively, it’s a very useful tool. This badge can replace the Google Authenticator two factor authentication app on your phone, and it’s a USB Rubber Ducky. It’s also a badge. Is this the year badges become useful? Check out the video below to find out more.

This is the time of year when hardware hackers from all across North America are busy working on the demoscene of hardware and manufacturing. This is badgelife, the celebration of manufacturing custom wearable electronics for one special weekend in Las Vegas. In just about a month from now, there will be thousands of independent badges flooding Caesar’s Palace in Vegas, complete with blinkies, custom chips, innovative manufacturing processes, and so many memes rendered in fiberglass and soldermask.

Continue reading “A Sneak Preview Of The Hacker Warehouse Badge”

Get Hands-On At Supercon: Workshop Tickets Now Available

Build something cool and pick up new skills from the workshops at the Hackaday Superconference. Last week we announced all of the talks you’ll find at Supercon, and starting today you can reserve your spot at one of the workshops.

You must have a Superconference ticket in order to purchase a workshop ticket; buy one right now if you haven’t already. You can get mechanical with Haptics and Animatronics, take your product design from schematic to PCB and enclosure, brush up your embedded development on several choices of platform, make cell towers do your bidding, or dump way too many volts into a block of wood.

Space in these workshops is limited so make sure to sign up before all the seats are taken. The base price for workshops is $10 (basically a “skin in the game” price to encourage those who register to show up). Any tickets priced above that base is meant to cover the material expense of the workshop. Here’s what we have planned:

Embedded Programming with Black Magic and the Lights On

Piotr Esden-Tempski

Sunday Afternoon

Embedded systems programming has earned a bad reputation of being difficult to master. Especially in the open-source world, most people associate it with cut and pasted code that is difficult to debug. The usual tools we have to debug embedded systems are a blinking LED and, if we are lucky, printf statements through a serial port. In this self guided workshop we will show you how easy it can be to have full insight into your microcontroller using fully open source tools that are on par with expensive proprietary closed-source solutions.

Fun with High Voltage

Will Caruana

Sunday Morning

This workshop is about making Lichtenberg figures. A Lichtenberg figure is a piece of art though the multiplication of a few thousands of volts to burn wood. We will cover the science behind this art form as well as the safety and lastly we will be getting hands on experience in being able to using high voltage transformers to make these burnings into wood and make coasters you can take home.

Designing Electronic Textures

Noah Feehan

Sunday Afternoon

Participants will learn the physics behind electrovibration, and then get to play/design for it using a new open-source board called WEFT. After the workshop, you’ll know how to deploy electrovibration in your projects, and understand the feeling of different waveforms.

End to End Product Design with Eagle and Fusion 360

Matt Berggren

Saturday Morning

In this session, we’ll take you end to end, from building a new schematic, simulating a circuit using EAGLE’s built-in SPICE simulator, laying out a PCB, generating mfg files and include some tips & tricks for milling boards and making stencils. We’ll also take you thru the link between electronics and mechanics using Fusion360. Alongside EAGLE we’ll build an enclosure and generate the mfg outputs for your mechanical design (CAM, 3D prints, etc). We’ll look at library management across electronics and mechanics and bidirectional synchronization between both of these domains. This is more than an intro, as Matt’s always good for some essential, oft-missed background and tips with EAGLE you might never have known otherwise.

AVR® MCU Effortless Design Workshop: Prototyping with Sensors and BLE

Bob Martin, Senior Staff Engineer

Sunday Morning

This hands-on training session will walk you through how to develop an embedded sensor node prototype with Bluetooth® Low Energy (BLE) connectivity. You will speed through configuration of the AVR microcontroller, sensor interface and communications interface setup by using Atmel Start, a graphical programming interface. This tool will generate libraries with simple APIs so you can spend time working on your solution instead of messing with registers or communication protocols.

Rapid Prototyping and Linux Kernel Development with the PocketBeagle® Platform

Robert Nelson

Saturday Afternoon

The newly introduced PocketBeagle® is an ultra-tiny-yet-complete Linux-enabled, community-supported, open-source USB-key-fob computer. By leveraging the Octavo SIP, the PocketBeagle offers complete BeagleBoard functionality and includes 512MB DDR3 RAM, 1-GHz ARM Cortex-A8 CPU, 2x 200-MHz PRUs, ARM Cortex-M3, 3D accelerator, power/battery management and EEPROM. The board offers lots of GPIOs, on board peripherals and various expansion capabilities via multiple headers and the Mikroelektronika click board interface. During this course you will learn about pin configuration, how to create a Linux distribution, reconfiguring io on the fly and how to leverage expansion modules. Attendees will leave with their very own PocketBeagle and a couple other surprises as well.

Cellular Connectivity for Your Next Hardware Project

Ben Strahan and Chris Gammell

Saturday Afternoon

Your project shouldn’t be constrained by the range of a WiFi signal. This workshop will show you how to connect to cellular towers via a serial link, get connected into the cloud and reliably start transmitting data. This workshop is suitable for people just getting started in the firmware ecosystem up through advanced firmware engineers. Advanced members of the workshop will have the opportunity to hack their conference badge to connect to cell towers. Sign up for this workshop to add another connection method to your hardware development toolbox.

An Introduction to Animatronics with Laser Cut Tentacle Mechanisms

Joshua Vasquez

Saturday Morning

Animatronics are way cool, but the hacker community rarely ventures farther than a few hobby servos and “dem-blinkin’ LEDs.” In this workshop, I’ll get you cozy with tentacle mechanisms that you can build with just a laser cutter and a few hand tools. There are three big takeaways from this workshop. We’ll build up a two-stage controller reusable in other projects, muscle up our vocabulary of off-the-shelf parts for cable mechanisms, and discover a few laser-cut design techniques.

Superconference workshops tend to sell out extremely quickly. Don’t wait to get your ticket.

The $2 32-Bit Arduino (with Debugging)

I have a bit of a love/hate relationship with the Arduino. But if I had two serious gripes about the original offering it was the 8-bit CPU and the lack of proper debugging support. Now there’s plenty of 32-bit support in the Arduino IDE, so that takes care of the first big issue. Taking care of having a real debugger, though, is a bit trickier. I recently set out to use one of the cheap “blue pill” STM32 ARM boards. These are available for just a few bucks from the usual Chinese sources. I picked mine up for about $6 because I wanted it in a week instead of a month. That’s still pretty inexpensive. The chip has a lot of great debugging features. Can we unlock them? You can, if you have the right approach.

The Part

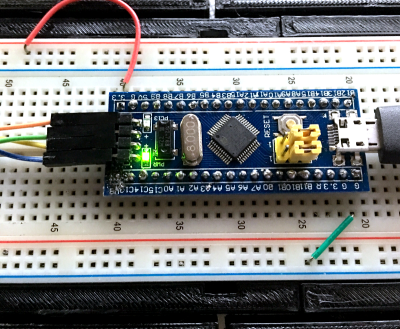
For a few bucks, you can’t complain about the hardware. The STM32F103C8T6 onboard is a Cortex-M3 processor that runs at 72 MHz. There’s 64K of flash and 20K of RAM. There’s a minimicro-USB that can act as a programming port (but not at first). There’s also many 5 V-tolerant pins, even though this a 3.3 V part.

You can find a lot more information on this wiki. The board is a clone–more or less–of a Maple Mini. In fact, that’s one way you can use these. You can use the serial or ST-Link port to program the Maple bootloader (all open source) and use it like a Maple. That is, you can program it via the USB cable.

From my point of view, though, I don’t want to try to debugging over the serial port and if I have the ST-Link port already set up, I don’t care about a bootloader. You can get hardware that acts as a USB to ST-Link device inexpensively, but I happen to have an STM32VLDISCOVER board hanging around. Most of the STM32 demo boards have an ST-Link programmer onboard that is made to use without the original target hardware. On some of the older boards, you had to cut traces, but most of the new ones just have two jumpers you remove when you want to use the programmer to drive another device.

The “blue pill” designation is just a common nickname referring to the Matrix, not the pharmaceuticals you see on TV ads. The board has four pins at one edge to accommodate the ST-Link interface. The pin ordering didn’t match up with the four pins on the STM32VLDISCOVER, so you can’t just use a straight four-pin cable. You also need to bring power over to the board since it will have to power the programmer, too. I took the power from the STM32VLDISCOVER board (which is getting its power from USB) and jumpered it to my breadboard since that was handy.

Continue reading “The $2 32-Bit Arduino (with Debugging)”