Technology moves quickly these days as consumers continue to demand more data and more pixels. We see regular updates to standards for USB and RAM continually coming down the pipeline as the quest for greater performance goes on.
HDMI 2.1 is the latest version of the popular audio-visual interface, and promises a raft of new features and greater performance than preceding versions of the standard. As it turns out, though, buying a new monitor or TV with an HDMI 2.1 logo on the box doesn’t mean you’ll get any of those new features, as discovered by TFT Central.
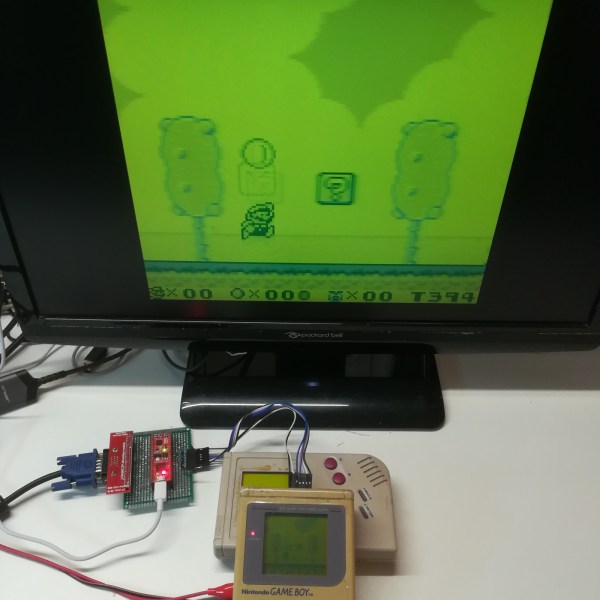
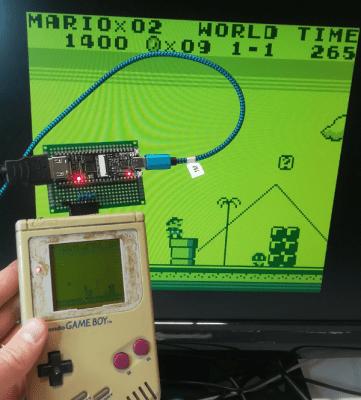
The classic Game Boy remains a firm favorite in the realm of retrocomputing. Revolutionary as it was at the time, by today’s standards its display is rather primitive, with no backlight and a usable area measuring only 47 mm x 44 mm. [Martoni] figured out a way to solve this, by developing GbVGA and GbHdmi, two projects that enable the Game Boy to connect to an external monitor. This way, you can play Super Mario Land without straining your eyes, and we can also image potential uses for those who stream their gameplay online.
Getting the image data out of the Game Boy is surprisingly straightforward, and has been done a few times before. Basically, the connection between the CPU and the LCD screen is a serial interface with a 4 MHz clock, two data lines and two sync lines. [Martoni] uses pin headers sticking out of the Game Boy’s plastic case to connect these to a small FPGA board. The board in question is a Fireant for the VGA version and a Tang Nano 4K for the HMDI model. In either case the FPGA reads out each frame from the Game Boy’s LCD interface and draws the extracted image onto the monitor, using the same four shades of green as used on the original screen.
[Martoni] states that the ultimate goal of these projects is to make a Switch-like docking station for the original Game Boy, which is definitely something we’re looking forward to. Although adding external monitors to the Game Boy is not entirely new, we like the simplicity of this implementation and the fact that anyone can improve upon it thanks to the full source code being available. Similar hacks have been performed on the newer Game Boy Pocket and Game Boy Advance as well.
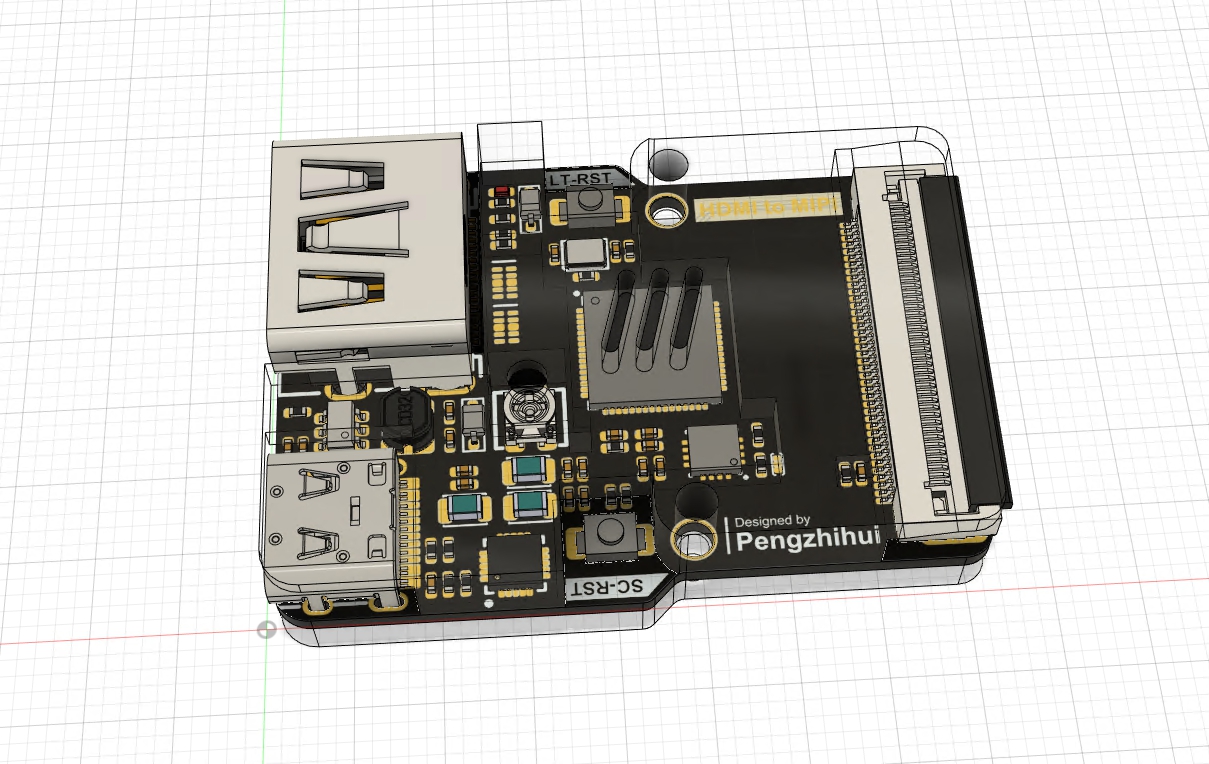
We agree with [magic-blue-smoke] that one of the only things more fun than a standard Raspberry Pi 4 is the Compute Module form factor. If they are not destined to be embedded in a system, these need a breakout board to be useful. Each can be customized with a myriad board shapes and ports, and that’s where the real fun starts. We’ve already seen projects that include custom carrier boards in everything from a 3D Printer to a NAS and one that shows we can build a single-sided board at home complete with high-speed ports.
[magic blue smoke] used this ability to customize the breakout board as an opportunity to create a hackable media player “stick” with the Raspberry Pi built-in. We love that this Raspberry Pi CM4 TV Stick eliminates all the adapters and cables usually required to connect a Pi’s fiddly micro HDMI ports to a display and has heat sinks and an IR receiver to boot. Like a consumer media player HDMI stick, all you need to add is power. Continue reading “How Do You Make A Raspberry Pi On A Stick?”→
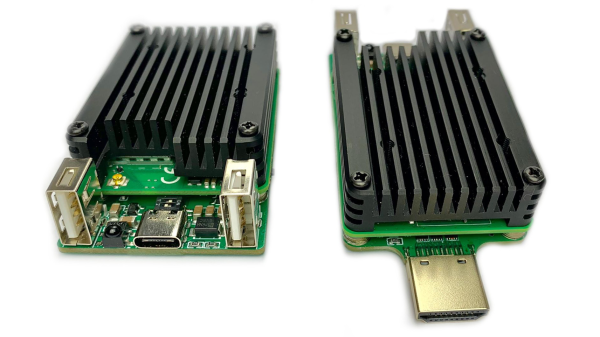
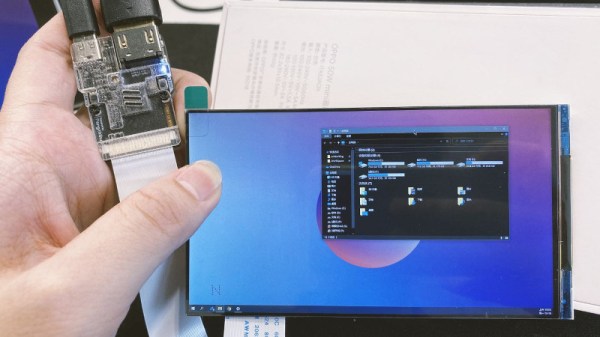
The first attempt was using Toshiba’s TC358870XBG ASIC, capable of driving screens over MIPI DSI 1.1 from an HDMI input. [peng-zhihui] designed a simple test module for the chip based on the company’s evaluation board design, with [ylj2000] providing software to help get that solution off the ground.
However, for now that solution is imperfect, so [peng-zhihui] also experimented with the Longxun LT6911 HDMI to MIPI driver. While cheap, information on the part is scarce, and the company’s own source code for using the hardware is only accessible by signing an NDA. However, [peng-zhihui] made pre-compiled firmware available for those that wish to work with the hardware.
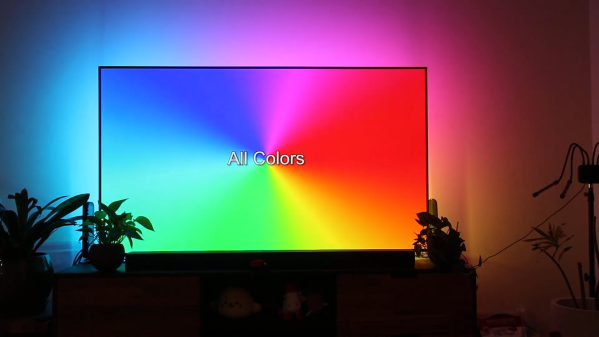
The development process was one full of roadblocks and dead ends, but [Andrew] persevered. After solving annoying problems with HDCP and HDMI splitters, he was finally able to get a Raspberry Pi to capture video going to his TV and use OpenCV to determine the colors of segments around the screen. From there, it was simple enough to send out data to a string of addressable RGB LEDs behind the TV to create the desired effect.
For all the hard work, [Andrew] was rewarded with an ambient lighting system that runs at a healthy 20fps and works with any HDMI video feed plugged into the TV. It even autoscales to work with video content shot in different aspect ratios so the ambient display always picks up the edge of the video content.
With 270 LEDs fitted, the result is an incredibly smooth and fluid ambient display we’d love to have at home. You can build one too, since [Andrew] shared all the code on Github. As an added bonus, he also gave the system an audio visualiser, and tested it out with some Streetlight Manifesto, the greatest third-wave ska band ever to roam the Earth. The Fourth Wave still eludes us, but we hold out hope.
Is it really cheating if the aimbot you’ve built plays the game worse than you do?
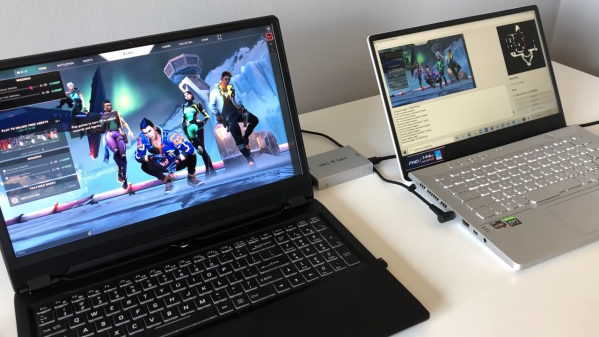
We vote no, and while we take a dim view on cheating in general, there are still some interesting hacks in this AI-powered bot for Valorant. This is a first-person shooter, team-based game that has a lot of action and a Counter-Strike vibe. As [River] points out, most cheat-bots have direct access to the memory of the computer which is playing the game, which gives it an unfair advantage over human players, who have to visually process the game field and make their moves in meatspace. To make the Valorant-bot more of a challenge, he decided to feed video of the game from one computer to another over an HDMI-to-USB capture device.
The second machine has a YOLOv5 model which was trained against two hours of gameplay, enough to identify friend from foe — most of the time. Navigation around the map was done by analyzing the game’s on-screen minimap with OpenCV and doing some rudimentary path-finding. Actually controlling the player on the game machine was particularly hacky; rather than rely on an API to send keyboard sequences, [River] used a wireless mouse dongle on the game machine and a USB transmitter on the second machine.
The results are — iffy, to say the least. The system tends to get the player stuck in corners, and doesn’t recognize enemies that pop up at close range. The former is a function of the low-res minimap, while the latter has to do with the training data set — most human players engage enemies at distance, so there’s a dearth of “bad breath range” encounters to train to. Still, we’re impressed that it’s possible to train a machine to play a complex FPS game at all, let alone this well.
It might be difficult to imagine in our modern HDMI Utopia, but there was a time when game consoles required proprietary cables to connect up to your TV. We’re not just talking about early machines like the NES either, turn of the millennium consoles like the PlayStation 2, Gamecube, and the original Xbox all had weirdo A/V ports on the back that were useless without the proper adapter.
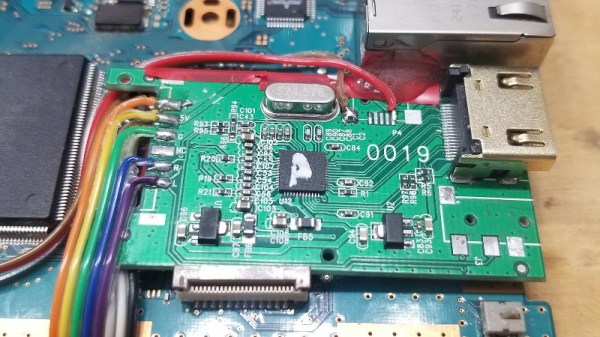
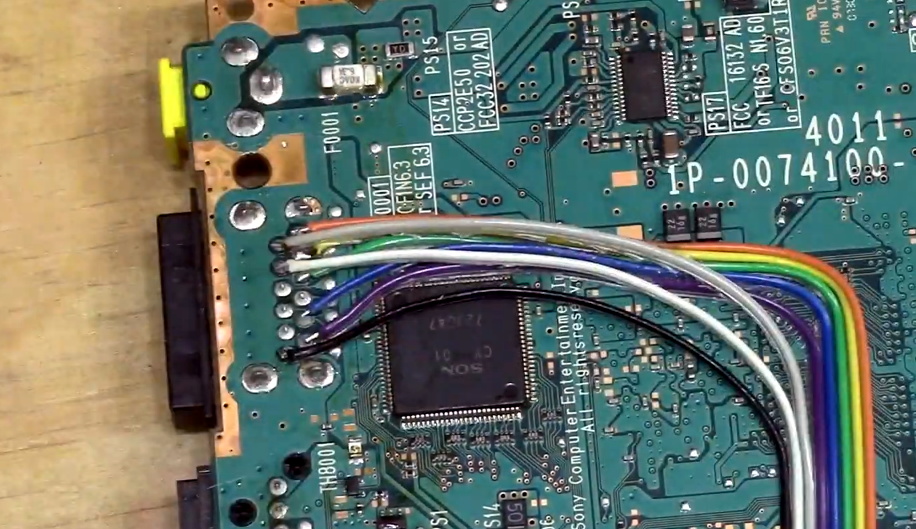
But thanks to the efforts of [Taylor Burley], you can now upgrade your Slim PS2 with integrated HDMI capability. It’s not even a terribly difficult modification, as these things go. Sure there’s a lot of soldering involved to run from the console’s A/V connector to the commercially-made HDMI dongle he’s hidden inside the case, but at least it’s straightforward work.
Tapping into the console’s A/V connector.
As [Taylor] shows in the video after the break, all you have to do is remove the proprietary connector from the HDMI adapter dongle, and wire it directly into the console’s A/V port with a bit of ribbon cable. There are only 8 pins in the connector that you need to worry about, and the spacing is generous enough that there’s no problem getting in there with your iron and some standard jumper wires. You’ve also got to pull 5 V from the board to power the adapter, but that’s easy enough thanks to the system’s nearby USB ports.
There’s a perfect spot to mount the adapter board next to the console’s Ethernet connector, and once that’s tacked down with a bit of adhesive, the only thing left to do is cut a hole in the back of the enclosure for the HDMI port and snip away a bit of the metal RF shield. Presumably the same modification could be done on the original “fat” PS2, though you’ll be on your own for finding a suitable place to mount the board.
 Getting the image data out of the Game Boy is surprisingly straightforward, and