Since the late 60s, Moore’s law has predicted with precision that the number of semiconductors that will fit on a chip about doubles every two years. While this means more and more powerful computers, every year, it also means that old computers can be built on smaller and cheaper hardware. This project from [Bjoern] shows just how small, too, as he squeezes a PET 2001 onto the STM32 Blue Pill.
While the PET 2001 was an interesting computer built by Commodore this project wasn’t meant to be a faithful recreation, but rather to test the video output of the Blue Pill, with the PET emulation a secondary goal. It outputs a composite video signal which takes up a good bit of processing power, but the PET emulation still works, although it is slightly slow and isn’t optimized perfectly. [Bjoern] also wired up a working keyboard matrix as well although missed a few wire placements and made up for it in the software.
With his own home-brew software running on the $2 board, he has something interesting to display over his composite video output. While we can’t say we’d emulate an entire PC just to get experience with composite video, we’re happy to see someone did. If you’d like to see a more faithful recreation of this quirky piece of computing history, we’ve got that covered as well.
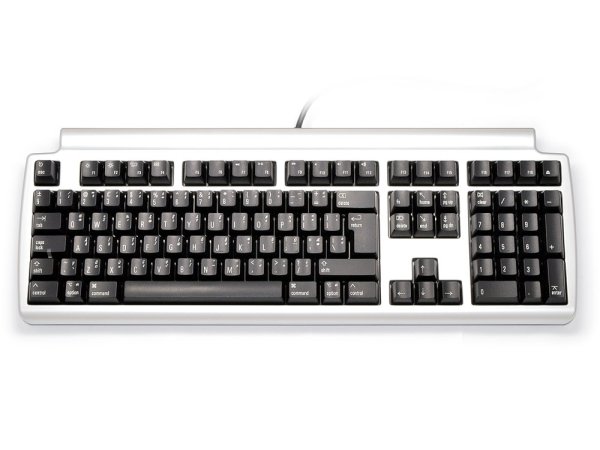
There are a lot of keyboards to choose from, and a quick trip through some of the forums will quickly show you how fanatical some people can be about very specific styles or switches. [Crdotson] doesn’t seem to be too far down the rabbit hole in that regard, but he does have a keyboard that he really likes despite one small quirk: it’s built for Mac, and some of the modifier keys aren’t laid out correctly for Windows. Since Windows has limited (and poor) options for software keymapping, he took an alternative route and built a keymapper in hardware instead.
The build uses a Raspberry Pi as a go-between from the keyboard to his computer. The Pi watches the USB bus using usbmon, which allows inspection of the packets and can see which keys have been pressed. It then passes those keypresses through to the computer. His only modification to the keyboard mapping is to swap the Alt and Super (Windows) keys for his keyboard of choice, although using this software would allow any other changes to be made as well. Latency is only on the order of a few microseconds, which is not noticeable for normal use cases.
While we have seen plenty of other builds around that can map keyboards in plenty of custom ways, if you don’t have the required hardware for a bespoke solution it’s much more likely that there’s a Raspberry Pi laying around that can do the job instead. There are a few issues with the build that [crdotson] is planning to tackle, though, such as unplugging the device while a key is being pressed, which perpetually sends that keystroke to the computer without stopping. But for now it’s a workable solution for his problem.
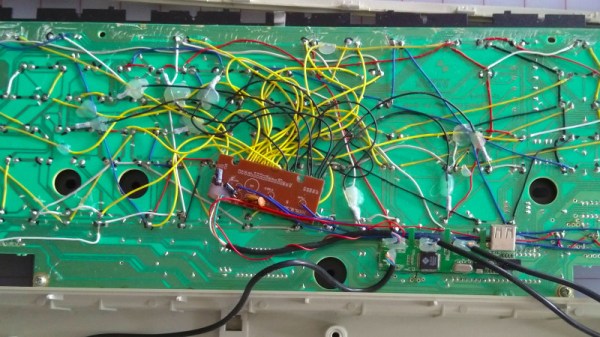
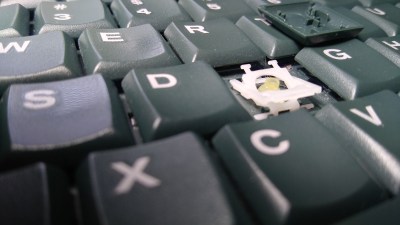
The world of custom keyboards has over the years developed its work into an art form, as mechanical key switches meet USB-HID capable microcontrollers for a plethora of designs as individual as their creators. This was however not always the case, and from the days of 8-bit home computers onwards making a custom keyboard often meant taking a surplus one from elsewhere and adapting its matrix to suit whatever controller interface was at hand. [Julian Calaby]’s USB conversion of an Apple Extended keyboard may be unusual in this day and age and was probably a late example even 15 years ago when he made it, but it remains a glorious piece of bodge-wire hardware hacking at its finest.
The task at hand with this type of conversion is to cut the matrix PCB tracks and replace them with soldered wires to create the new matrix required. This can then be wired to the controller, which in [Julian]’s case came from a cheap USB keyboard. He added a small USB hub to allow for a pair of USB sockets where Apple had put an ADB socket, making for quite a decent older keyboard with an unexpected USB interface.
Now older and wiser, he has plans to revisit his old keyboard with a modern microcontroller board, and needs to revisit the matrix again and give the peripheral new life. We still like the original though, as it captures a moment in time when keyboard matrix hacking made sense, and reminds us of our own youthful hardware follies.
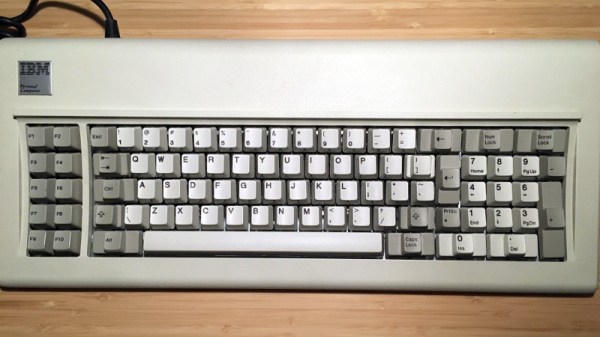
We know that the Hackaday family includes many enthusiasts for quality keyboards, and thus mention of the fabled ‘boards of yore such as the IBM Model F is sure to set a few pulses racing. Few of us are as lucky as [Brennon], who received the familial IBM PC-XT complete with its sought-after keyboard.
This Model F has a manufacture date in March 1983, and as a testament to its sturdy design was still in one piece with working electronics. It was however in an extremely grimy condition that necessitated a teardown and deep clean. Thus we are lucky enough to get a peek inside, and see just how much heavy engineering went into the construction of an IBM keyboard before the days of the feather-light membrane devices that so many of us use today. There follows a tale of deep cleaning, with a Dremel and brush, and then a liberal application of Goo Gone. The keycaps had a long bath in soapy water to remove the grime, and we’re advised to more thoroughly dry them should we ever try this as some remaining water deep inside them caused corrosion on some of the springs.
The PC-XT interface is now so ancient as to have very little readily available in the way of adapters, so at first a PS/2 adapter was used along with a USB to PS/2 converter. Finally though a dedicated PC-XT to USB converter was procured, allowing easy typing on a modern computer.
History will always have its in-between technologies — that stuff that tides us over while the Next Big and Lasting Thing is getting the kinks worked out of it. These kinds of devices often do one thing and do it pretty well. Remember zip drives? Yeah you do. Still have mine.
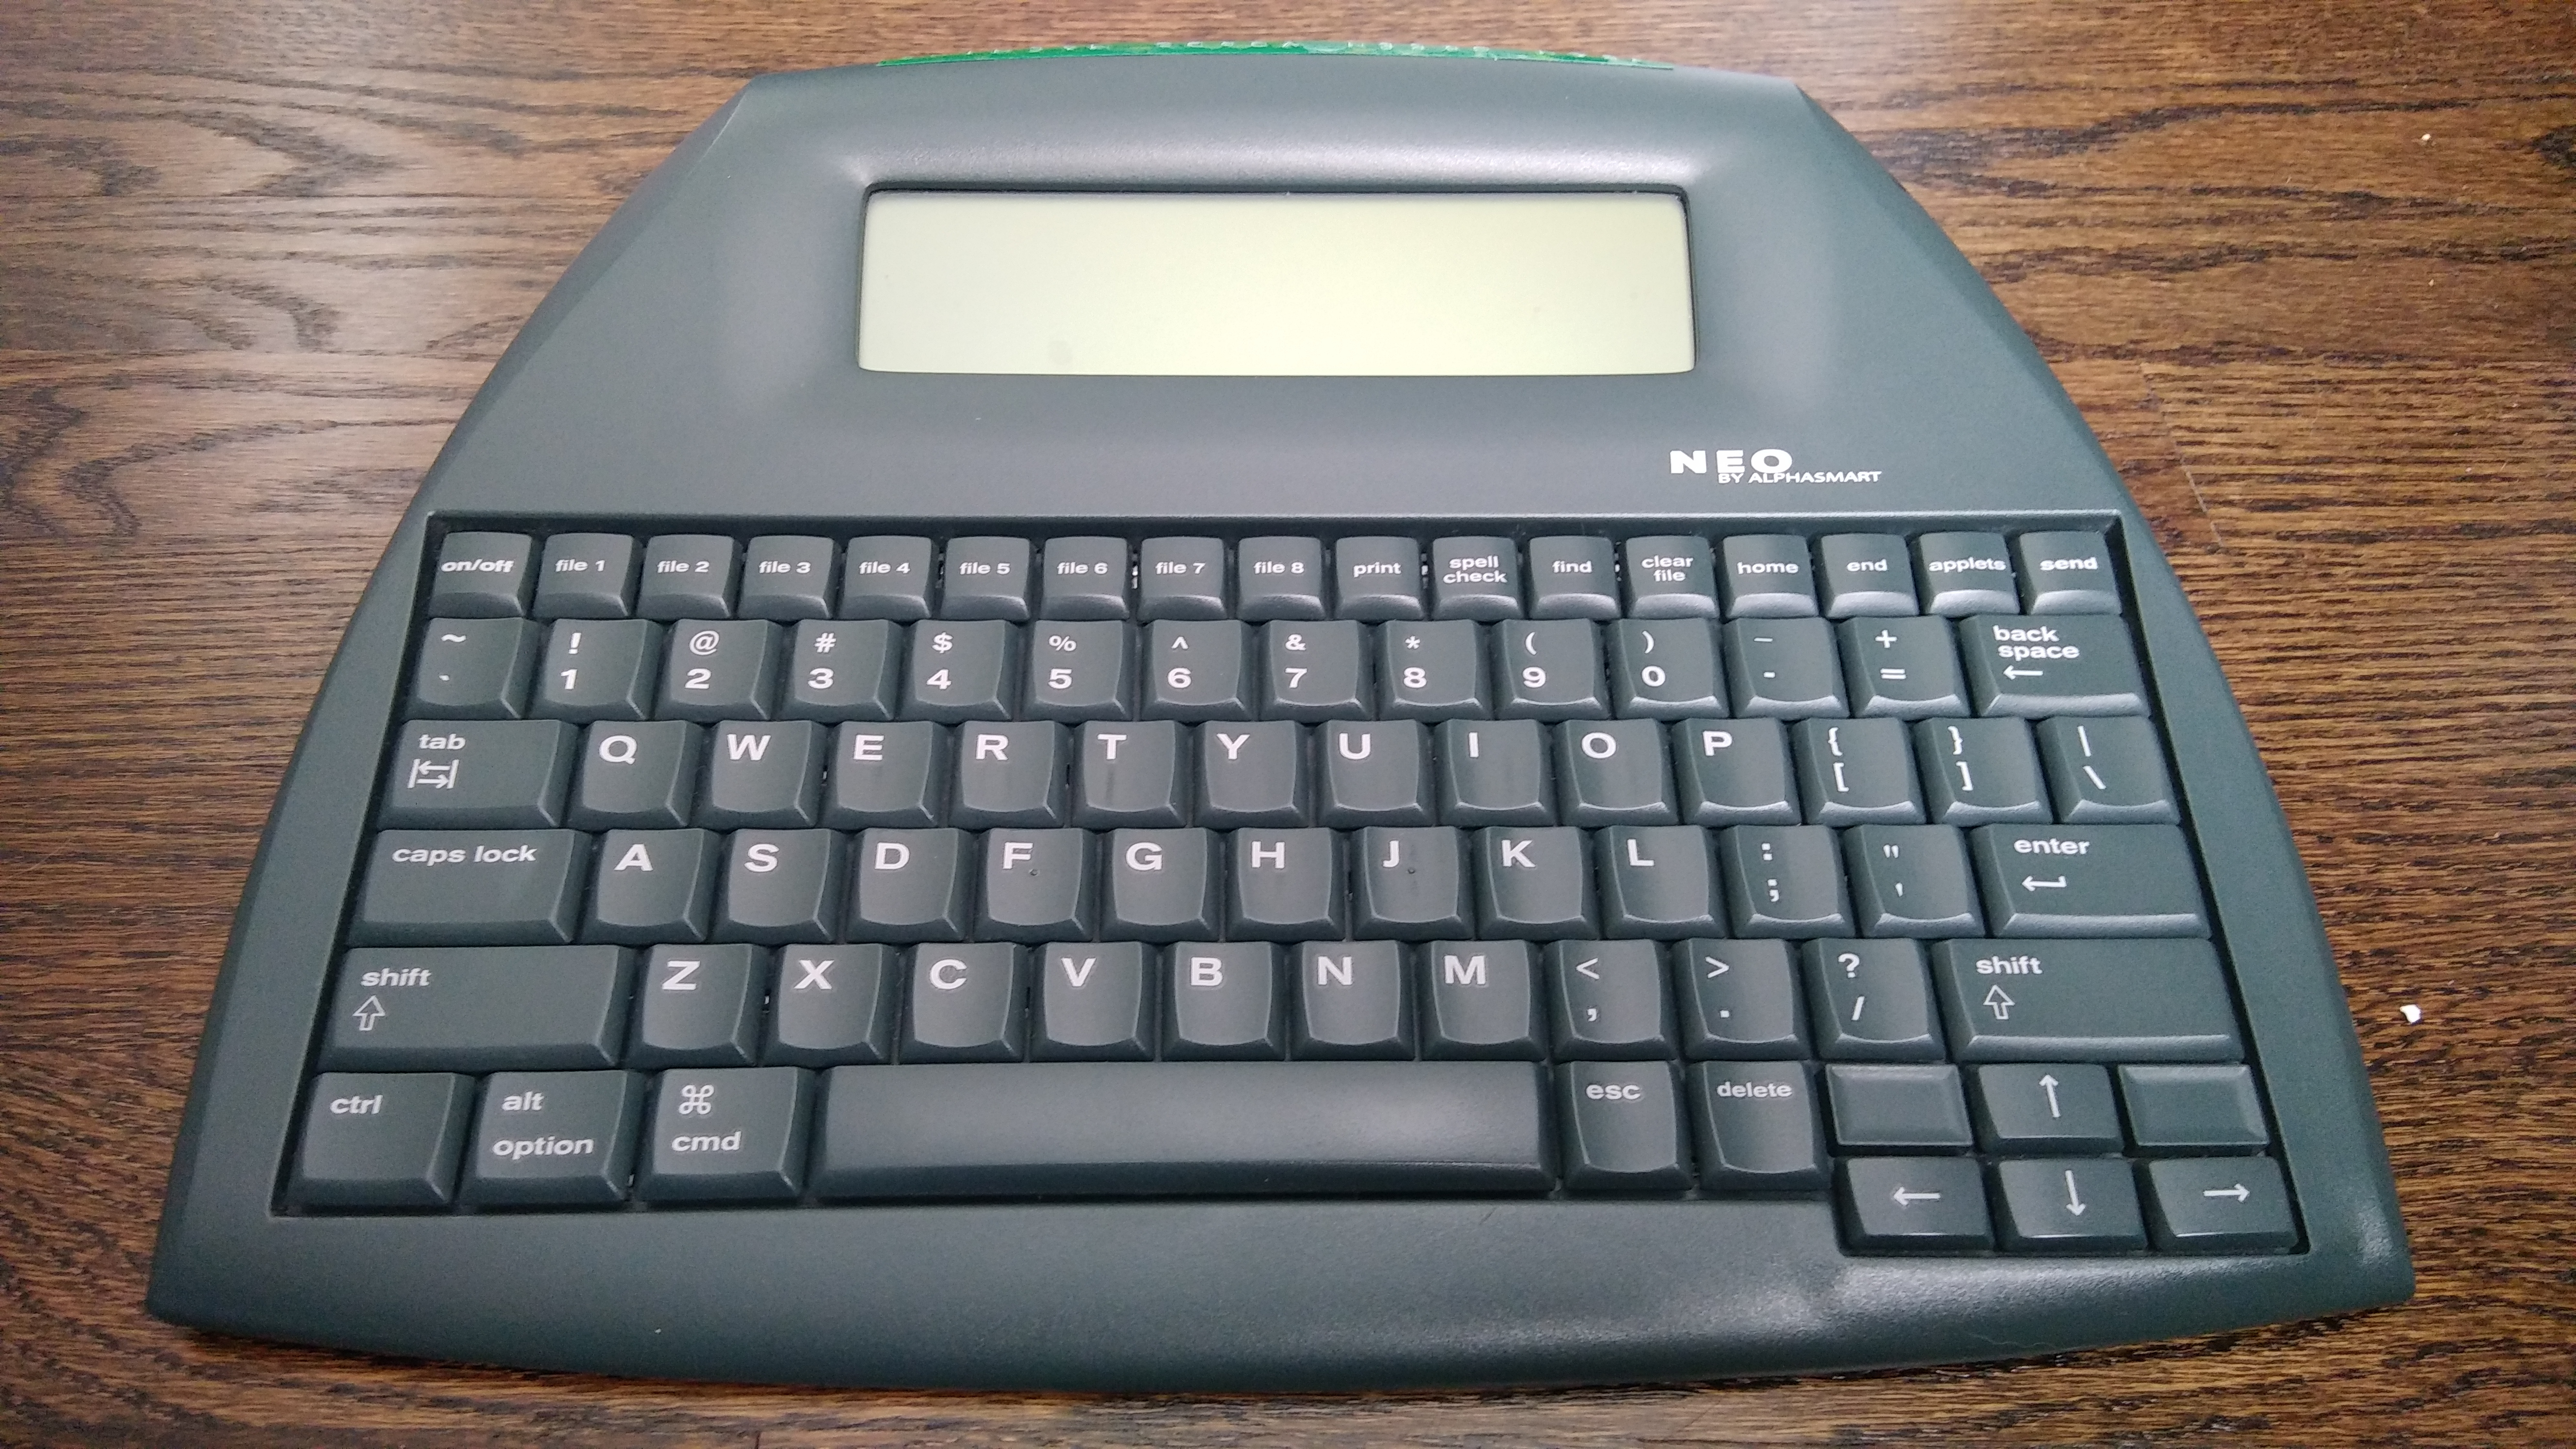
The halcyon days of the AlphaSmart NEO sit in between the time where people were chained to heavy typewriters and word processors and the dawn of on-the-go computing. Early laptops couldn’t be trusted not to die suddenly, but the NEO will run for 700 hours on three AAs.
The NEO stands for the freedom to get your thoughts down wherever, whenever, without the need for a desk, paper, ink, ribbons, power cords, and the other trappings that chain people indoors to flat surfaces. And that’s exactly what was so tantalizing to me about it. Inspiration can truly strike anywhere at any time, so why not be prepared? This thing goes from off to blinking cursor in about a second and a half. There’s even a two-button ‘on’ option so you don’t run the battery down or accidentally erase files while it’s in your bag.
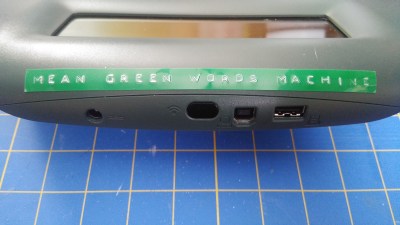
These might be the world’s greatest scissor switches.L-R: DC power, IR, USB-B, and USB-A for connecting to a printer.
I bought this funny little word processor a few years ago when I wanted to attempt NaNoWriMo — that’s National Novel Writing Month, where you write 50,000 words towards a novel, non-fiction book, or short story collection in any genre you want. It averages out to 1,667 words a day for 30 days. Some days it was easy, some days it was not. But every non-Hackaday word I typed that month was on this, my Mean Green Words Machine.
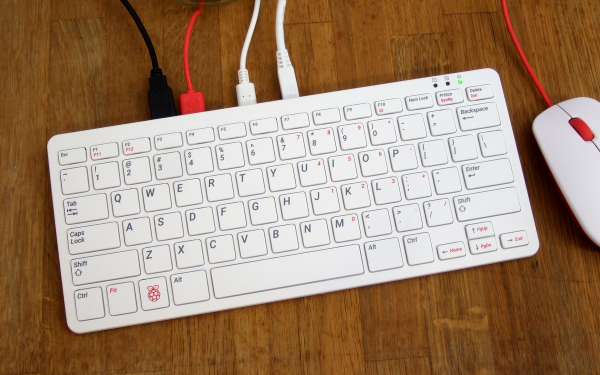
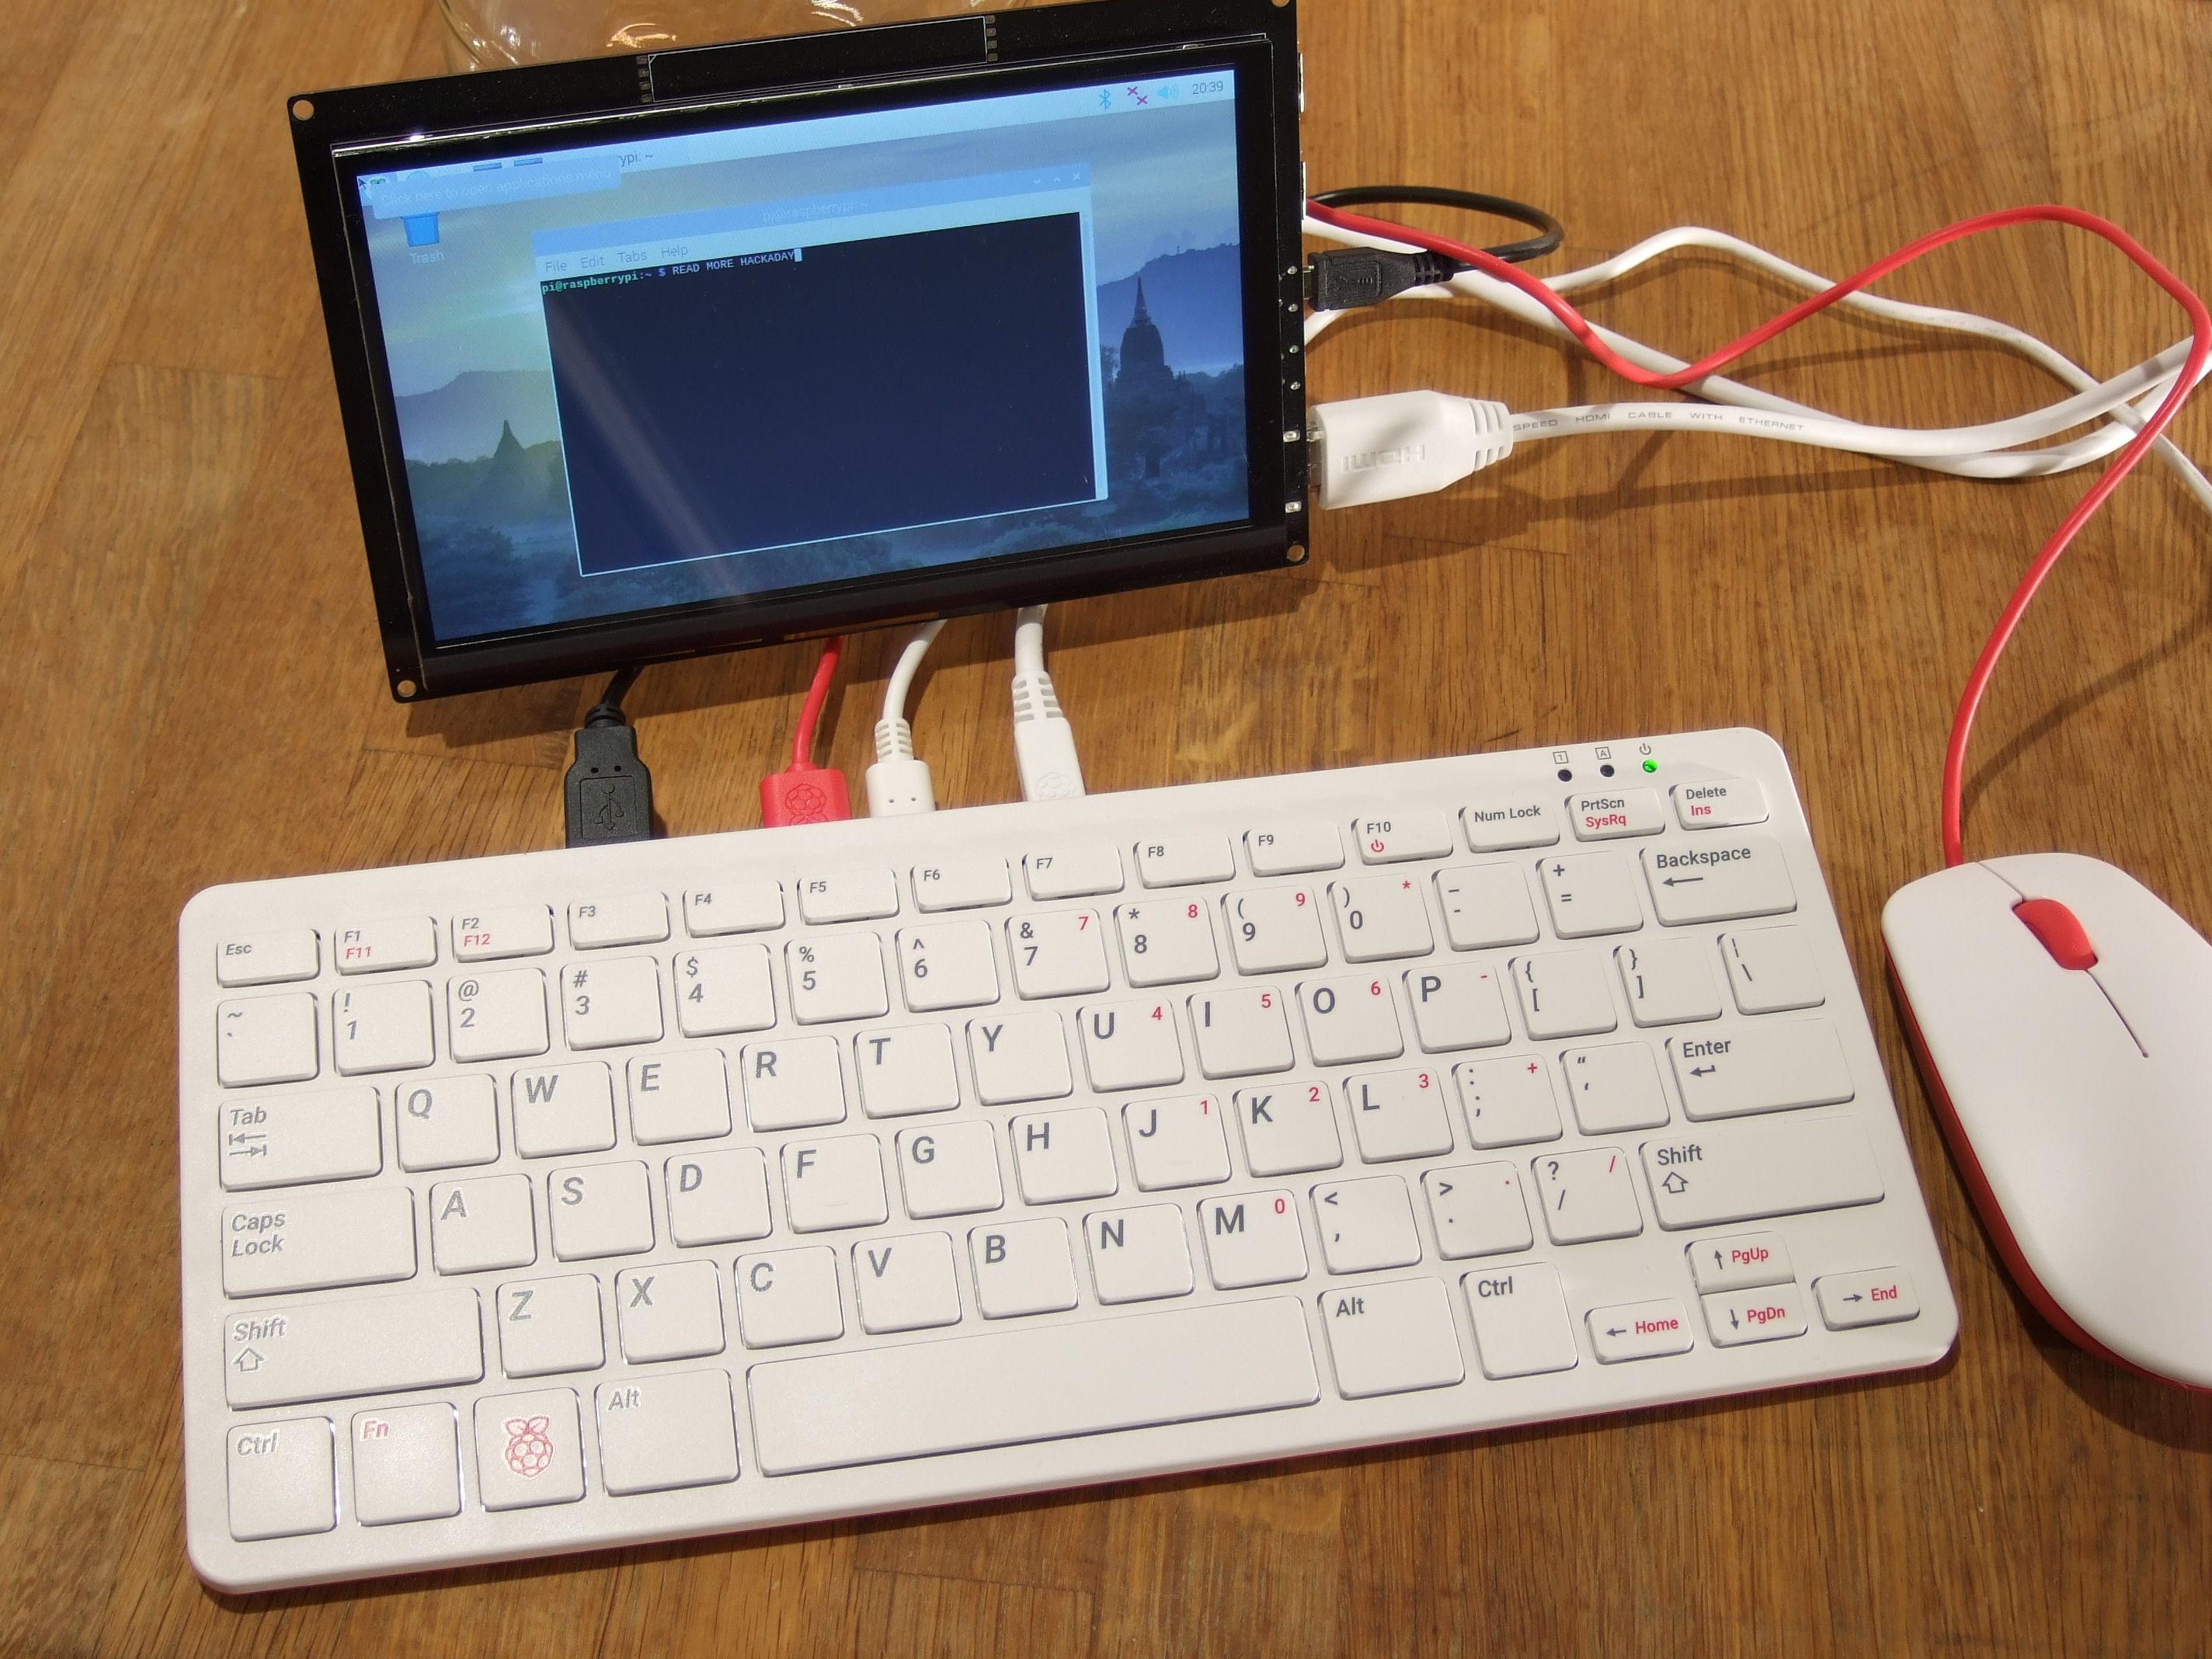
The newest Raspberry Pi 400 almost-all-in-one computer is very, very slick. Fitting in the size of a small portable keyboard, it’s got a Pi 4 processor of the 20% speedier 1.8 GHz variety, 4 GB of RAM, wireless, Ethernet, dual HDMI outputs, and even a 40-pin Raspberry Standard IDE-cable style header on the back. For $70 retail, it’s basically a steal, if it’s the kind of thing you’re looking for because it has $55 dollars worth of Raspberry Pi 4 inside.
In some sense, it’s getting dangerously close to fulfilling the Raspberry Pi Dream. (And it’s got one more trick up it’s sleeve in the form of a huge chunk of aluminum heat-sinked to the CPU that makes us think “overclocking”.)
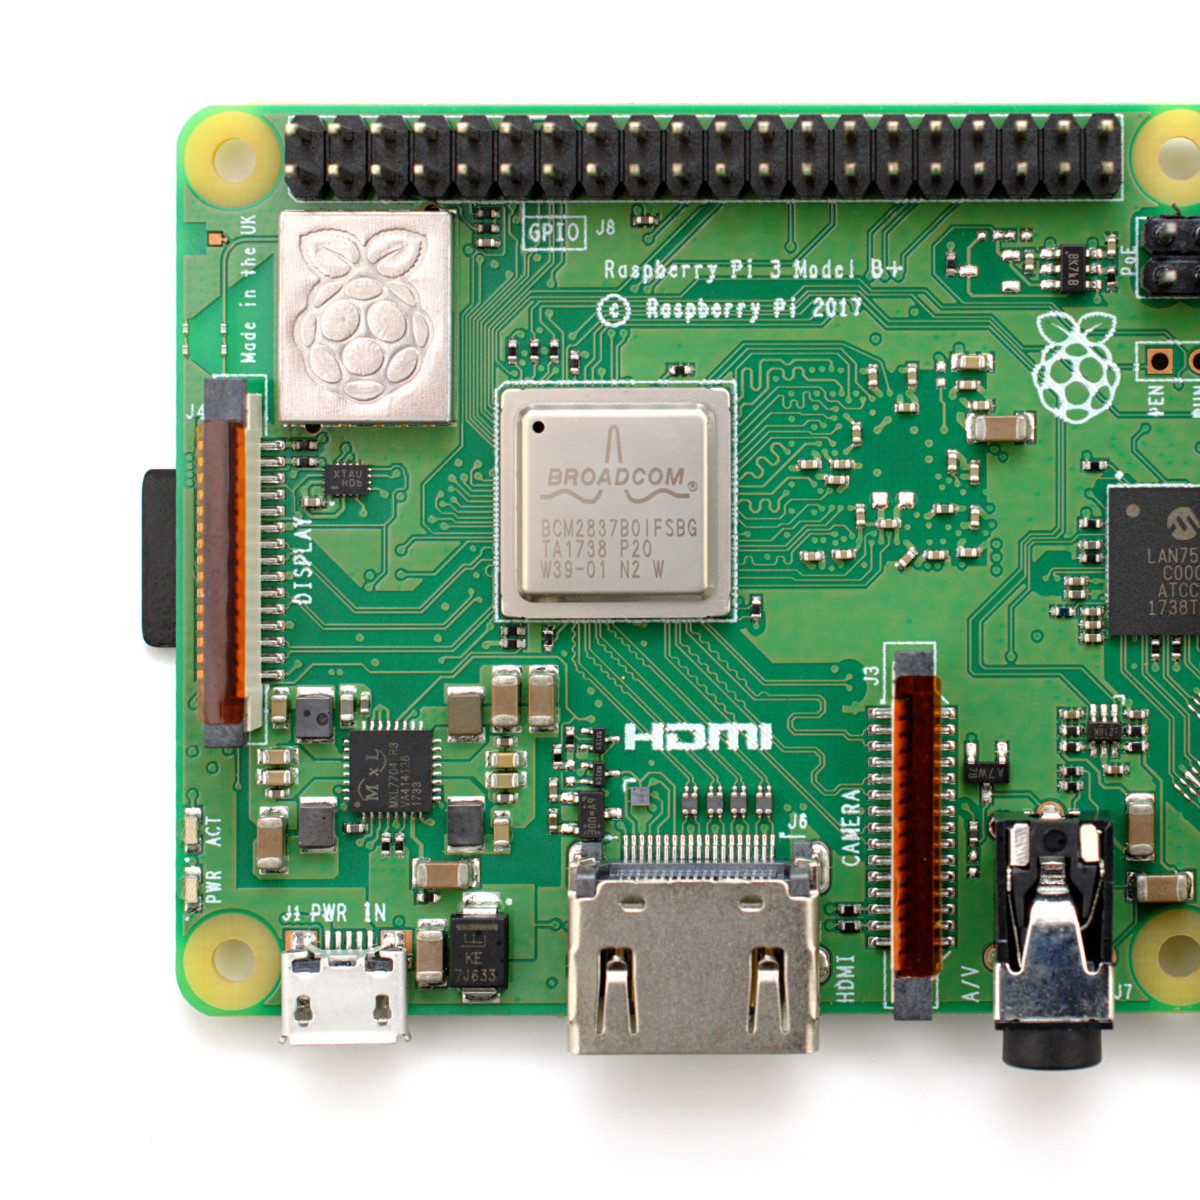
We remember the founding dream of the Raspberry Pi as if it were just about a decade ago: to build a computer cheap enough that it would be within everyone’s reach, so that every school kid could have one, bringing us into a world of global computer literacy. That’s a damn big goal, and while they succeeded on the first count early on, putting together a $35 single-board computer, the gigantic second part of that master plan is still a work in progress. As ubiquitous as the Raspberry Pi is in our circles, it’s still got a ways to go with the general population.
The Raspberry Pi Model B wasn’t, and isn’t, exactly something that you’d show to my father-in-law without him asking incredulously “That’s a computer?!”. It was a green PCB, and you had to rig up your own beefy 5 V power supply, figure out some kind of enclosure, scrounge up a keyboard and mouse, add in a monitor, and only then did you have a computer. We’ve asked the question a couple of times, can the newest Raspberry Pi 4B be used as a daily-driver desktop, and answered that in the affirmative, certainly in terms of it having adequate performance.
But powerful doesn’t necessarily mean accessible. If you want to build your own cyberdeck, put together an arcade box, screw a computer into the underside of your workbench, or stack together Pi Hats and mount the whole thing on your autonomous vehicle testbed, the Raspberry Pi is just the ticket. But that’s the computer for the Hackaday crowd, not the computer for everybody. It’s just a little bit too involved.
The Raspberry Pi 400, in contrast, is a sleek piece of design. Sure, you still need a power supply, monitor, and mouse, but it’s a lot more of a stand-alone computer than the Pi Model B. It’s made of high-quality plastic, with a decent keyboard. It’s small, it’s light, and frankly, it’s sexy. It’s the kind of thing that would pass the father-in-law test, and we’d suggest that might go a long way toward actually realizing the dream of cheaply available universal (open source) computing. In some sense, it’s the least Hackaday Raspberry Pi. But that’s not saying that you might not want one to slip into your toolbag.
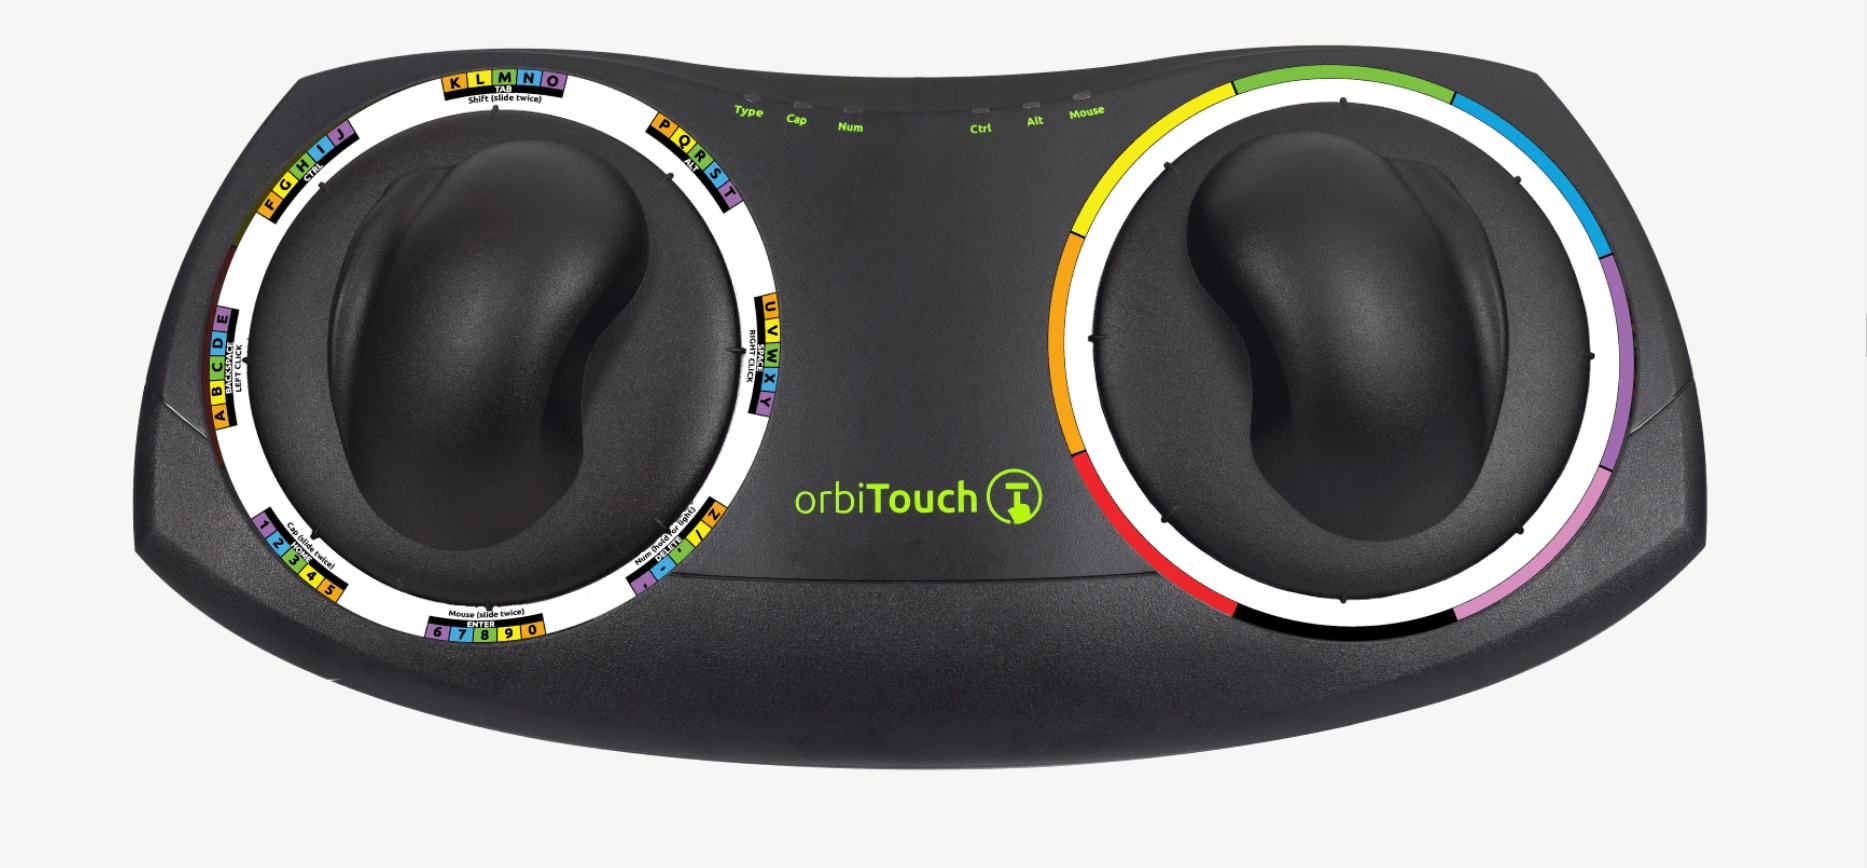
I can’t remember how exactly I came across the OrbiTouch keyboard, but it’s been on my list to clack about for a long time. Launched in 2003, the OrbiTouch is a keyboard and mouse in one. It’s designed for people who can’t keyboard regularly, or simply want a different kind of experience.
The OrbiTouch was conceived of by a PhD student who started to experience carpal tunnel while writing papers. He spent fifteen years developing the OrbiTouch and found that it could assist many people who have various upper body deficiencies. So, how does it work?
It’s Like Playing Air Hockey with Both Hands
To use this keyboard, you put both hands on the sliders and move them around. They are identical eight-way joysticks or D-pads, essentially. The grips sort of resemble a mouse and have what looks like a special resting place for your pinky.
One slider points to groups of letters, numbers, and special characters, and the other chooses a color from a special OrbiTouch rainbow. Pink includes things like parentheses and their cousins along with tilde, colon and semi-colon. Black is for the modifiers like Tab, Alt, Ctrl, Shift, and Backspace. These special characters and modifiers aren’t shown on the hieroglyphs slider, you just have to keep the guide handy until you memorize the placement of everything around the circle.
You’re gonna need a decent amount of desk space for this. Image via OrbiTouch
The alphabet is divided up into groups of five letters which are color-coded in rainbow order that starts with orange, because red is reserved for the F keys. So for instance, A is orange, B is yellow, C is green, D is blue, E is purple, then it starts back over with F at orange. If you wanted to type cab, for instance, you would start by moving the hieroglyph slider to the first alphabet group and the color slider to green.