Let’s get this out of the way first – this project isn’t meant to be a replacement for your regular smartphone. Although, at the very least, you can use it as one if you’d like to. But [Shree Kumar]’s Hackaday Prize 2018 entry, the Kite : Open Hardware Android Smartphone aims to be an Open platform for hackers and everyone else, enabling them to dig into the innards of a smartphone and use it as a base platform to build a variety of hardware.
When talking about modular smartphones, Google’s Project Ara and the Phonebloks project immediately spring to mind. Kite is similar in concept. It lets you interface hacker friendly modules and break out boards – for example, sensors or displays – to create your own customized solutions. And since the OS isn’t tied to any particular brand flavor, you can customize and tweak Android to suit specific requirements as well. There are no carrier locks or services to worry about and the bootloader is unlocked.
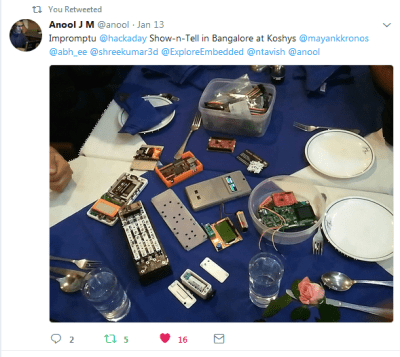
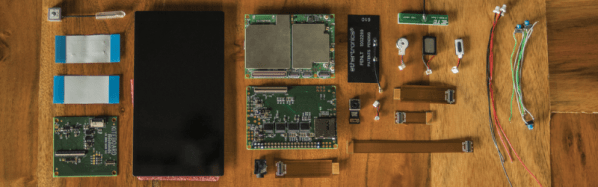
At the core of the project is the KiteBoard – populated with all the elements that are usually stuffed inside a smartphone package – Memory, LTE/3G/2G radios, micro SIM socket, GPS, WiFi, BT, FM, battery charging, accelerometer, compass, gyroscope and a micro SD slot. The first version of KiteBoard was based around the Snapdragon 410. After some subtle prodding at a gathering of hackers in Bangalore, [Shree] moved over to the light side, and decided to make the KiteBoard V2 Open Source. The new board will feature a Snapdragon 450 processor among many other upgrades. The second PCB in the Kite Project is a display board which interfaces the 5″ touchscreen LCD to the main KiteBoard. Of Hacker interest is the addition of a 1080p HDMI output on this board that lets you hook it up to external monitors easily and also allows access to the MIPI DSI display interface.
Finally, there’s the Expansion Board which provides all the exciting hacking possibilities. It has a Raspberry Pi compatible HAT connector with GPIO’s referenced to 3.3 V (the KiteBoard works at 1.8 V). But the GPIO’s can also be referenced to 5 V instead of 3.3 V if you need to make connections to an Arduino, for example. All of the other phone interfaces are accessible via the expansion board such as the speaker, mic, earpiece, power, volume up / down for hacking convenience. The Expansion board also provides access to all the usual bus interfaces such as SPI, UART, I²C and I²S.
To showcase the capabilities of the Kite project, [Shree] and his team have built a few phone and gadget variants. Build instructions and design files for 3D printing enclosures and other parts have been documented in several of his project logs. A large part of the BoM consists of off-the-shelf components, other than the three Kite board modules. If you have feature requests, the Kite team is looking to hear from you.
When it comes to smartphone design, Quantity is the name of the game. Whether you’re talking to Qualcomm for the Snapdragon’s, or other vendors for memory, radios, displays and other critical items, you need to be toeing their line on MOQ’s. Add to this the need to certify the Kite board for various standards around the world, and one realizes that building such a phone isn’t a technical challenge as much as a financial one. The only way the Kite team could manage to achieve their goal is to drum up support and pledges via a Kickstarter campaign to ensure they have the required numbers to bring this project to fruition. Check them out and show them some love. The Judges of the Hackaday Prize have already shown theirs by picking this project among the 20 from the first round that move to the final round.