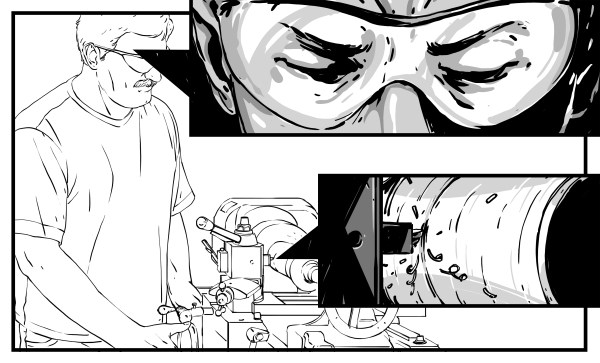
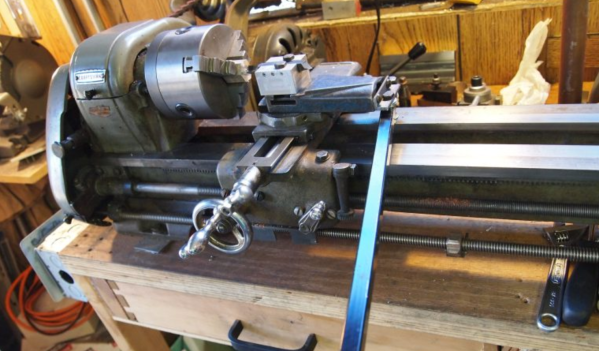
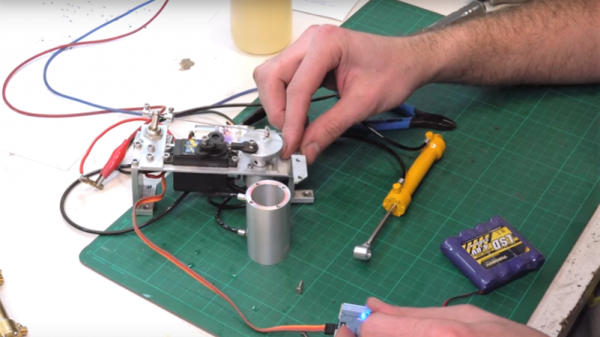
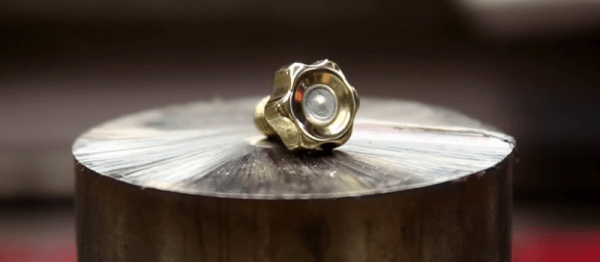
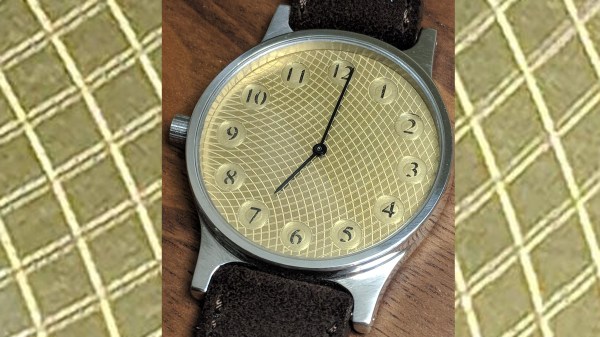
Engineering And Artistry Meet An Untimely End At Burning Man

Burning Man is so many different things to so many people, that it defies neat description. For those who attend, it always seems to be a life-changing experience, for good or for ill. The story of one man’s Burning Man exhibition is a lesson in true craftsmanship and mind-boggling engineering, as well as how some events can bring out the worst in people.

For [Malcolm Tibbets], aka [the tahoeturner], Burning Man 2017 was a new experience. Having visited last year’s desert saturnalia to see his son [Andy]’s exhibition, the studio artist decided to undertake a massive display in his medium of choice — segmented woodturning. Not content to display a bamboo Death Star, [Malcolm] went big– really big. He cut and glued 31,000 pieces of redwood into rings of various shapes and sizes and built sculptures of amazing complexity, including endless tubes that knot and loop around and back into each other. Many of the sculpture were suspended from a huge steel tripod fabricated by [Andy], forming an interactive mobile and kinetic sculpture.

Alas, Burning Man isn’t all mellowness in the desert. People tried to climb the tripod, and overnight someone destroyed some of the bigger elements of the installation. [Malcolm] made a follow-up video about the vandalism, but you’ll want to watch the build video below first to truly appreciate the scale of the piece and the loss. Here’s hoping that [Malcolm]’s next display is treated with a little more respect, like this interactive oasis from BM 2016 apparently was.

Thanks to [Keith Olson] for the tip.

Over-Engineered Mailbox Flag Machined Using Under-Engineered Mini-Lathe

[Tim Nummy] used his cheap, Chinese, bench mini-lathe to make a non-terrible mailbox flag holder (YouTube video, embedded below). Tim posts videos on his channel about garage hobby projects, many of which are built using his mini-lathe, often based on suggestions from his followers. One such suggestion was to do something about his terrible mailbox flag – we’re guessing he receives a lot of old-school fan mail.

He starts off by planning the build around 1 ¼ inch aluminum bar stock, a 688 bearing, three neodymium magnets and some screws. The rest of it is a “think and plan as you go along” project, but essentially, the new holder is in three pieces. An inner piece goes inside the mail box and holds the assembly to the mail box. The middle piece holds the two magnets which act as end-stops or limits for the flags raised and lowered positions. The final, outer piece holds the flag itself, and the bearing which allows it to rotate freely.

This part also has the third magnet embedded in it to work with the other two magnets for the limits. The use of magnets is cool, but a ball catch with two detents would have worked just as well. It’s a great simple project to follow for those who want to wet their feet on lathe work. [Tim] has also posted links to all of the tools and equipment seen in the video, so check that out if anything catches your fancy.

But workshop veterans will almost certainly cringe at several places along the video. The main one that caught our eye is obviously the shaky lathe itself. It could do with a heavier workbench, proper leveling, foundation bolts or anti-vibration mounts. And from the looks of it, the tail stock isn’t any rock steady too. Although the lathe is variable speed, the chuck rpm is set too high for aluminum, and the lack of cutting fluid makes it even more troublesome. Using oil, or even some cutting fluid, while tapping would have been wise too.

We’re not sure if it’s the shaky foundation or poor feed control, but the step cut for mounting the bearing is over-sized by a whole lot more and requires a big goop of retaining compound to glue the bearing in place. But the end result works quite well, including the magnetic catches – a complex solution for a simple problem.

We’re sure our keen-eyed readers will likely spot some more issues in [Tim]’s methods, so go at it in the comments below, but please make sure to rein in the snark and keep your feedback positive.

Continue reading “Over-Engineered Mailbox Flag Machined Using Under-Engineered Mini-Lathe”

Enresoning An IPhone 8 Ring

The iPhone 8 was just released last week, and that means some people were standing in line in front of an Apple store for hours waiting to get their hands on the latest and greatest glowing rectangle. [Patrick Adair] had a better idea: he would stand in front of an Apple store for four hours, then do something productive with his new smartphone. With the help of a waterjet, some resin, a lathe, and some very fine grades of sandpaper, he created the Apple Ring.

Setting aside the whole process of actually acquiring an iPhone 8 on launch day, the process of turning an iPhone into a ring is more or less what you would expect. First, the iPhone was cut into ring-shaped pieces on a waterjet cutter. Special care was taken to avoid the battery, and in the end [Patrick] was able to get a nice chunk ‘o phone that included the camera lens.

This ring piece was then embedded in clear resin. For this, [Patrick] used Alumilite epoxy, a pressure pot, and a toaster oven to cure the resin. Once the phone parts were firmly encased for the rest of eternity, the ring blank moved over to the lathe. The center of the ring was bored out, and the process of sanding, polishing and gluing in all the tiny parts that fell out during the process commenced. The end result actually looks pretty great, and even though it’s probably a little too bulky, it is a remarkable demonstration of the craft of turning.

You can check out [Patrick]’s video below, along with a video from the Waterjet Channel showing the deconstruction of a glowing rectangle.

Continue reading “Enresoning An IPhone 8 Ring”

Smooth And Steady Cuts With An Improvised Power Feeder

Some woodworking operations require stock to be fed at a smooth, steady rate, for which purpose a power feeder is usually employed. They’re expensive bits of gear, though, and their cost can usually be borne only by high-output production shops. But when you need one, you need one, and hacking a power feeder from a drill and a skate wheel is a viable option.

It should come as no surprise that this woodshop hack comes to us from [Matthias Wandel], who never seems to let a woodworking challenge pass him by. His first two versions of expedient power feeders were tasked with making a lot of baseboard moldings in his new house. Version three, presented in the video below, allows him to feed stock diagonally across his table saw, resulting in custom cove moldings. The completed power feeder may look simple — it’s just a brushless drill in a wooden jig driving a skate wheel — but the iterative design process [Matthias] walks us through is pretty fascinating. We also appreciate the hacks within hacks that always find their way into his videos. No lathe? No problem! Improvise with a drill and a bandsaw.

Surprised that [Matthias] didn’t use some of his famous wooden gears in this build? We’re not. A brushless motor is perfect for this application, with constant torque at low speeds. Want to learn more about BLDC motors? Get the basics with a giant demo brushless motor.

Continue reading “Smooth And Steady Cuts With An Improvised Power Feeder”

Hackaday Prize Entry: Mini DRO For A Lathe

A manual lathe has dial wheels to control the feed of the main carriage and the cross slide to help take cuts on the workpiece. These feed wheels always have some backlash and require frequent resetting of the “zero”. The usual process would be to take measurements on the workpiece with either a vernier caliper or a micrometer at intervals which requires stopping the machine, adding up to increased machine time. The addition of a digital readout not only simplifies the process, but also reduces machining time substantially. Since the DRO magnetic strips are directly attached to the cross slide, the effects of backlash are mitigated.

[Igor] has just such a manual lathe and built his own mini DRO unit from scratch a couple of years back. Most DRO’s have encoder strips and sensors attached to the cross slide with a larger display unit attached separately on a stalk, with wires running between the two. [Igor] kept things simple by building a unit that fit within the space constraints he had. His unit consists of just two sensor modules – each attached directly to the slide. The main unit houses a linear hall sensor, electronics, buttons, a small LCD and batteries. The second axis unit houses just the sensor with a cable connecting it to the main unit for data and power. At the heart of the system is a pair of NSE-5310 linear hall sensor encoder chips. These work in conjunction with multipole magnetic strips. The encoder provides a 12-bit output, and the magnetic strips have poles spaced 2 mm apart. This translates to a theoretical resolution of almost 0.5 microns, but of course, the machine mechanics limit the actual results. The encoder chips talk to an ATtiny2313 over the I2C bus. Three buttons and the power supply round-up the hardware. To run it off a single 1.5 V rechargeable battery, [Igor] used a boost converter to get 3.3 V. The 5 V needed for the LCD is obtained by a voltage doubler connected to a PWM output from the microcontroller and regulated by a Zener diode. The second sensor unit connects via a TRRS 3.5 mm socket.

He added a Bluetooth module as an after thought, but ran out of GPIO pins as well as program space and had to get creative to make it work. The plan was to transmit the data to an Android tablet which would work as a large, remote, wireless display. He never did use that feature though, being satisfied with the small LCD display. There’s several things that went wrong in the build, and if he were to replicate the project again, several changes and improvements would help. So if anyone plans on doing something similar, do check up [Igor]’s project logs first.

Reamer Regrinding Using A Toolpost Spindle

How often have you wished you could reduce the size of a drillbit? [Ben Katz] has a bunch of projects in mind that use a tight-tolerance 22mm bore–but he didn’t have a 22mm reamer handy. Rather than buy one, he thought, why not regrind a larger one to the right size?

He first ground down the shank to fit in the lathe’s drill chuck. Once it was loaded into the chuck,  he reground the edge of a 7/8″ (22.225mm) reamer, reducing its diameter down to 22mm by spinning it on his lathe in conjunction with a toolpost spindle with a grinding wheel attached. The final diameter was 21.995mm—off by 5 microns!

[Ben]’s homebuilt spindle is a cool project in itself, and we publish a lot of posts about those handy tools. Check out our pieces on a brushless DC motor used as a CNC spindle, and this 3D printer outfitted with a spindle. Also check out [Ben]’s electric tricycle build we featured a few years ago.

Continue reading “Reamer Regrinding Using A Toolpost Spindle”

Wearable Superconductors

What do you do with a discarded bit of superconducting wire? If you’re [Patrick Adair], you turn it into a ring.

Superconducting wire has been around for decades now. Typically it is a thick wire made up of strands of titanium and niobium encased in copper. Used sections of this wire show up on the open market from time to time. [Patrick] got ahold of some, and with his buddies at the waterjet channel, they cut it into slices. It was then over to the lathe to shape the ring.

Once the basic shape was created, [Patrick] placed the ring in ferric chloride solution — yes the same stuff we use to etch PC boards. The ferric chloride etched away just a bit of the copper, making the titanium niobium sections stand out. A trip through the rock tumbler put the final finish on the ring. [Patrick] left the ring in bare metal, though we would probably add an epoxy or similar coating to keep the copper from oxidizing.

[Patrick] is selling these rings on his website, though at $700 each, they’re not cheap. Time to hit up the auction sites and find some superconducting wire sections of our own!

If you’re looking to make rings out of more accessible objects, check out this ring made from colored pencils, or this one made from phone wire.