RISC-V Microcontroller Lights Up Synth With LED Level Meter

The LM3914 LED bar graph driver was an amazing chip back in the day. Along with the LM3915, its logarithmic cousin, these chips gave a modern look to projects, allowing dancing LEDs to stand in for a moving coil meter. But time wore on and the chips got harder to find and even harder to fit into modern projects, what with their giant DIP-18 footprint. What’s to be done when a project cries out for bouncing LEDs? Simple — get a RISC-V microcontroller and roll your own LED audio level meter.

In fairness, “simple” isn’t exactly what comes to mind while reading [svofski]’s write-up of this project. It’s part of a larger build, a wavetable synth called “Pétomane Ringard” which just screams out for lots of blinky LEDs. [svofski] managed to squeeze 20 small SMD LEDs onto the board along with a CH32V003 microcontroller. The LEDs are charlieplexed, using five of the RISC-V chip’s six available GPIO lines, leaving one for the ADC input. That caused a bit of trouble with programming, since one of those pins is needed to connect to the programmer. This actually bricked the chip, thankfully only temporarily since there’s a way to glitch the chip back to life, but only after pulling it out of the circuit. [svofski] recommends adding a five-second delay loop to the initialization routine to allow time to recover if the microcontroller gets into an unprogrammable state. Good tip.

As for results, we think the level meter looks fantastic. [svofski] went for automated assembly of the 0402 LEDs, so the strip is straight and evenly spaced. The meter seems to be quite responsive, and the peak hold feature is a nice touch. It’s nice to know there’s a reasonable substitute for the LM391x chips, especially now that all the hard work has been done.
Continue reading “RISC-V Microcontroller Lights Up Synth With LED Level Meter”

Cracking A GBA Game With NSA Tools

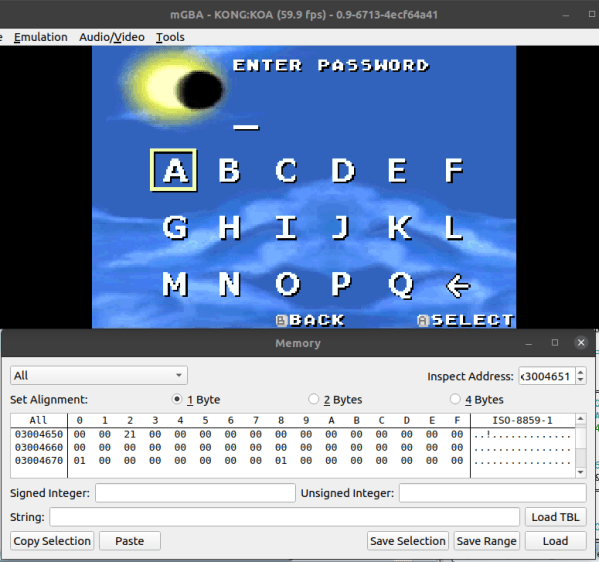
[Wrongbaud] is a huge fan of Japanese kaiju-style movies, including Godzilla and King Kong. In honor of the release of a new movie, he has decided to tackle a few projects to see how both of these monsters can hold their own against other legendary monsters. In this project, he is using Ghidra, named after another legendary kaiju, against the password system of the Game Boy Advance game Kong: King of Atlantis.

Since this project is a how-to, [wrongbaud] shows how to search Ghidra for existing scripts that might already have the functionality needed for GBA analysis and emulation. When not, he also illustrates how to write scripts to automate code analysis, and then moves on to cracking the level password system on the game.

The key to finding the passwords on this game was looking for values in the code that were seven characters long, and after some searching [wrongbaud] is finally able to zero in on the code responsible for handling passwords. Once found a brute force method was automated to find viable passwords, and from there the game was officially pwned. For anyone interested in security, reverse engineering, or just the way that binaries work, it’s quite the detailed breakdown. Of course, it’s not the only example we have seen that uses this software tool to extract passwords.

Gyroscope Level Is Digital

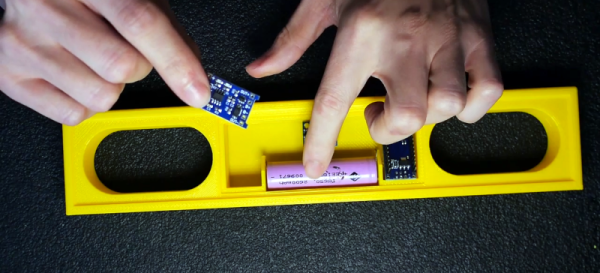
A spirit level, you know the kind of level with a little bubble in a tube of fluid, is a basic construction tool. [DesignBuildDestroy] took an Arduino, a gyroscope chip, and an OLED, and made a 3D printed level with no bubble, but it does have a nice digital display.

It is funny when you realize that at one time a gyroscope was a high tech item reserved for missiles and aircraft. Now you can grab a six-axis sensor for pennies. Even, better, the code used in the project can offload the Arduino for a lot of processing.

Continue reading “Gyroscope Level Is Digital”

Manual Mesh Bed Levelling For 3D Printers

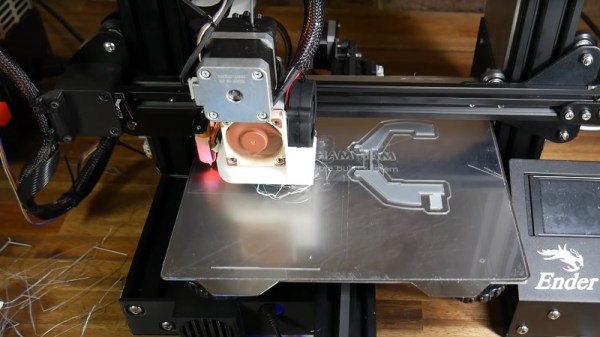
In 3D printing, we often talk about leveling the print bed, although that’s not an accurate term. A bed that is level in our terms presents a flat surface that is parallel to the path of the print head, but within reason we care little about that. Instead we care more about it being parallel to the path of the head than it being perfectly flat. If we had a perfectly flat bed — say a sheet of glass — you’d think it might be pretty easy, but for some other materials it could be convex or concave or even have ripples all over the place. [Teaching Tech] shows you how to manually “level” the bed using a mesh but without using an automatic sensor. You can see the technique in the video below.

When you use adjustments to level the bed, you are tramming it, but only the very pedantic use that term for fine adjustment. But no amount of adjusting bed springs will get rid of bulges and ripples. A common solution is to use a sensor to measure the distance to the bed and form a mesh correction. Then, as the printer head moves in the XY plane, the software will adjust the Z-axis to rise over bumps and go down if there is a concave portion of the bed. What [Teaching Tech] is doing, however, is a manual mapping. You won’t need to add a sensor to your printer to take advantage of the method. 

Continue reading “Manual Mesh Bed Levelling For 3D Printers”

Next Level Spirit Level Is On The Level

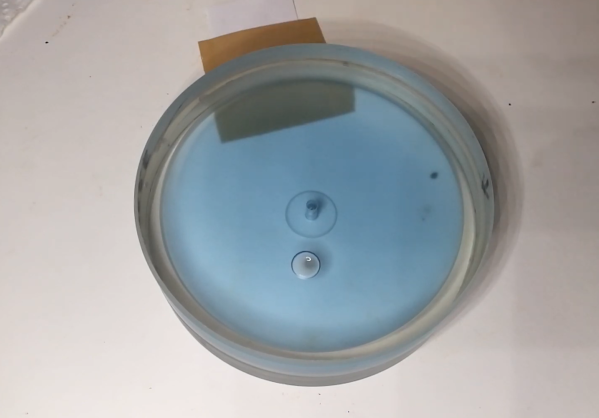
Miss your shot and scratch on the eight ball? It’s natural to blame the table for not being level so you can save face, but in all likelihood, you’re probably right. [Huygens Optics]’s father never misses a billiards shot on his home table, until one day he did. [Huygens Optics] rushed to his aid and built an extremely precise spirit level for the table so it will never happen again.

First and foremost, he had to decide how sensitive the spirit level should be. Obviously, the table should be as level as possible, though other factors like the condition of the felt will come into play as well. In doing some calculations, he found that every degree of leveling error in the table translates to several millimeters of ball unevenness and deviation, so he wanted the level to have .01 degrees of accuracy. How he manages this feat of grinding and polishing in a hobbyist workshop is all captured in the fascinating video after the break.

The level is made from two disks cut from leftover 15mm borosilicate glass. Between the disks is a 4mm cavity for the liquid (ethyl alcohol) and the air bubble to move around. To avoid introducing error with uneven adhesive application, [Huygens Optics] tried to join the disks using optical contact bonding, wherein two surfaces stick together through the magic of intermolecular forces, like the one that keeps geckos attached to vertical things. That worked quite well until he added the liquid, which broke the bond. Instead, he used a thin, UV-curable epoxy.

Getting into optics doesn’t have to cost a lot. Instead of buying or grinding lenses for experimentation, you can laser-cut lens profiles out of acrylic.

Continue reading “Next Level Spirit Level Is On The Level”

Quick Hack Cleans Data From Sump Pump

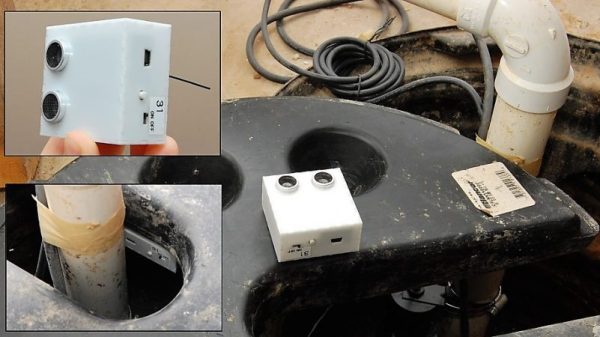
Nobody likes to monitor things as much as a hacker, even mundane things like sump pumps. And hackers love clean data too, so when [Felix]’s sump pump water level data was made useless by a new pump controller, he just knew he had to hack the controller to clean up his data.

Monitoring a sump pump might seem extreme, but as a system that often protects against catastrophic damage, the responsible homeowner strives to take care of it. [Felix] goes a bit further than the average homeowner, though, with an ultrasonic sensor to continually measure the water level in the sump and alert him to pending catastrophes. Being a belt and suspenders kind of guy, he also added a float switch to control the pump, but found that the rapid cycle time made his measurements useless. Luckily the unit used a 555 timer to control the pump’s run time after triggering, so a simple calculation of the right RC values and a little solder job let him increase the on time of the pump. The result: a dry basement and clean data.

We recently discussed the evolution of home automation if you want to know more about the systems that sensors and actuators like these can be part of. Or for a more nuts and bolts guide to networking things together, our primer on MQTT might help.

Printing Bed Off-Kilter? Blu-Tack To The Rescue!

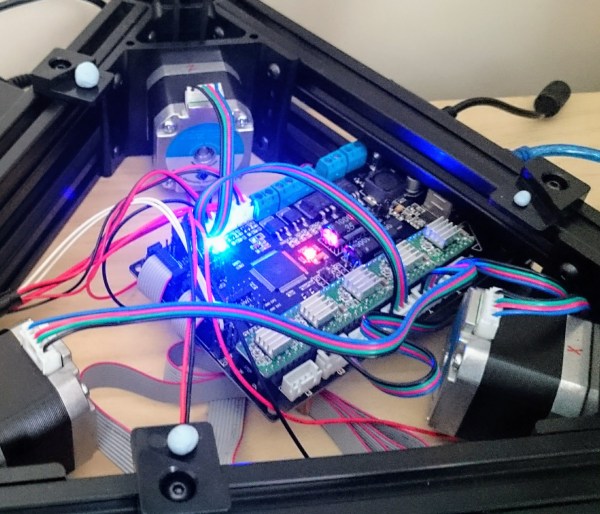
For all their applications, 3D printers can be finicky machines. From extruder problems, misaligned or missing layers, to finding an overnight print turned into a tangled mess, and that’s all assuming your printer bed is perfectly leveled. [Ricardo de Azambuja’s] new linear delta printer was frustrating him. No matter what he did, it wouldn’t retain the bed leveling calibration, so he had to improvise — Blu-Tack to the rescue.

It turns out [Azambuja]’s problem was so bad that the filament wouldn’t even attempt to adhere to the printing bed. So, he turned to Printrun Pronterface and a combination of its homing feature and the piece-of-paper method to get a rough estimate of how much the bed needed to be adjusted — and a similar estimate of how big of a gob of Blu-Tack was needed.

Pressing the bed into place, he re-ran Pronterface to make sure he was on the level. [Azambuja] notes that you would have to redo this for every print, but it was good enough to print off a trio of bed leveling gears he designed so he doesn’t have to go through this headache again for some time.

Continue reading “Printing Bed Off-Kilter? Blu-Tack To The Rescue!”