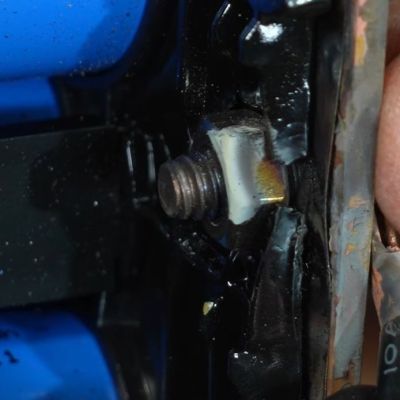
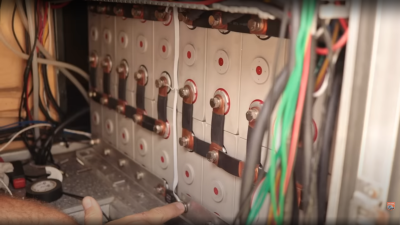
When you think of EVs from the 90s, GM’s EV1 may come to mind, but [bleeptrack] found a more obscure CityEL three wheeler to restore.
This Personal Electric Vehicle (PEV) is no spring chicken, but a new set of LiFePO4 batteries should give its 48 V electrical system a new lease on life. [bleeptrack] shows us through the cockpit of this jet fighter-esque EV and its simple control systems, including a forward and reverse selector and the appreciable kilometers on the odometer.
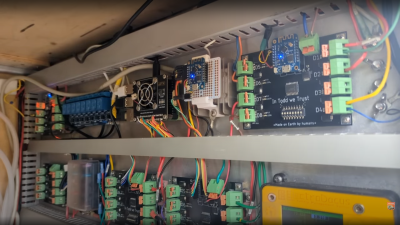
Modernizing touches for this vehicle include a smart shunt to track the vehicle charge level as an improvement over the wildly unreliable original system and a new DC to DC converter after the original unit failed. These changes really cleaned up the electronics compartment from the original rat’s nest under the seat.
Husband and wife team [Jason & Kara] hail from Canada, and in 2018, after building their own camper, sold up their remaining earthly goods and headed south. If you’re not aware of them, they documented their journey on their YouTube channel, showing many interesting skills and hacks along the way. The video we’re highlighting today shows a myriad of ways to power all the DC-consuming gadgets this they lug along with them.
Their heavily modded F-550 truck houses 12kWh of LiFePO4 batteries and a 1.5kW retractable solar array, with a hefty inverter generating the needed AC power. They weren’t too happy with the conversion losses from piles of wall warts that all drained a little power, knowing that the inverter that fed them was also not 100% efficient. For example, a typical laptop power brick gets really hot in a short time, and that heat is waste. They decided to run as much as possible direct from the battery bank, through different DC-DC converter modules in an attempt to streamline the losses a little. Obviously, these are also not 100%
efficient, but keeping the load off the inverter (and thus reducing dependency upon it, in the event of another failure) should help stem the losses a little. After all as [Jason] says, Watts saved are Watts earned, and all the little lossy loads add up to a considerable parasitic drain.
One illustration of this is their Starlink satellite internet system consumes about 60W when running from the inverter, but only 28W when running direct from DC. Over the course of 24 hours, that’s not far off 1kWh of savings, and if the sun isn’t shining, then that 12kWh battery isn’t going to stretch as far.
There are far too many hacks, tips, and illustrations of neat space and power-saving solutions everywhere, to write here. Those interested in self-build campers or hacking a commercial unit may pick up a trick or two.
There’s a good chance that if you build something which includes the ability to top up a lithium-ion battery, it’s going to involve the incredibly common TP4056 charger IC. Now, there’s certainly nothing wrong with that. It’s a decent enough chip, and there are countless pre-made modules out there that make it extremely easy to implement. But if the chip shortage has taught us anything, it’s that alternatives are always good.
So we’d suggest bookmarking this opensource hardware Li-Ion battery charger design from [Shahar Sery]. The circuit uses the BQ24060 from Texas Instruments, which other than the support for LiFePO4 batteries, doesn’t seem to offer anything too new or exciting compared to the standard TP4056. But that’s not the point — this design is simply offered as a potential alternative to the TP4056, not necessarily an upgrade.
[Shahar] has implemented the design as a 33 mm X 10 mm two-layer PCB, with everything but the input and output connectors mounted to the topside. That would make this board ideal for attaching to your latest project with a dab of hot glue or double-sided tape, as there are no components on the bottom to get pulled off when you inevitably have to do some rework.
The board takes 5 VDC as the input, and charges a single 3.7 V cell (such as an 18650) at up to 1 Amp. Or at least, it can if you add a heatsink or fan — otherwise, the notes seem to indicate that ~0.7 A is about as high as you can go before tripping the thermal protection mode.
Like the boilerplate TP4056 we covered recently, this might seem like little more than a physical manifestation of the typical application circuit from the chip’s datasheet. But we still think there’s value in showing how the information from the datasheet translates into the real-world, especially when it’s released under an open license like this.
For the price of a mid-range Android phone, [Kenneth Finnegan] turned a 50 caliber ammo can into a 50 amp-hour portable power supply. The battery pack uses four 3.5 V LiFePO4 cells wired in series to achieve a nominal 12 V supply that stands in for a traditional lead-acid battery. The angel of second-hand purchases was smiling on this project as the cells were acquired on eBay in unused condition, complete with bus bars and mounting spacers. All it took to fit them in the case was to grind off the spacers’ dovetails on the outer edges.
There are many benefits to Lithium Iron Phosphate chemistry over traditional lead acid and [Kenneth] spells that out in his discussion of the battery management system at work here. While the newer technology has a much better discharge curve than lead-acid, there’s a frightening amount of power density there if these batteries were to have a catastrophic failure. That’s why there are Battery Management Systems and the one in use here is capable of monitoring all four cells individually which explains the small-gauge wires in the image above. It can balance all of the cells to make sure one doesn’t get more juice than the others, and can disconnect the system if trouble is a-brewin’. Continue reading “Ammo Can Battery; 50 Ah LiFePO4 Clad In Army Green”→
Over the last decade or so, battery technology has improved massively. While those lithium cells have enabled thin, powerful smartphones and quadcopters, [patrick] thought it would be a good idea to do something a little simpler. He built a USB power bank with an 18650 cell. While it would be easier to simply buy a USB power bank, that’s not really the point, is it?
This project is the follow-up to one of [patrick]’s earlier projects, a battery backup for the Raspberry Pi. This earlier project used an 14500 cell and an MSP430 microcontroller to shut the Pi down gracefully when the battery was nearing depletion.
While the original project worked well with the low power consumption Pi Model A and Pi Zero, it struggled with UPS duties on the higher power Pi 3. [patrick] upgraded the cell and changed the electronics to provide enough current to keep a high-power Pi on even at 100% CPU load.
The end result is a USB power bank that’s able to keep a Raspberry Pi alive for a few hours and stays relatively cool.
Knocking a microcontroller into sleep mode and waking it up on demand or in intervals is common practice in many low power applications, enabling devices to stay in operation for years on a single coin cell battery. Since there are tons of applications where you might want to do similar things with a Raspberry Pi, [Patrick Van Oosterwijck] created the LiFePO4wered/Pi. The module that snaps on to eight GPIO pins of a Pi, extending it by a long life LiFePO4 battery, a charging regulator, and a proper power management. Obviously, it also makes a great UPS.
[Patrick] realized this project by expanding his already available and equally useful LiFePO4wered/USB charging regulator module by a low power MSP430G2131 microcontroller and a load switch. A daemon on the Raspberry Pi speaks to the module over I2C, allowing you to schedule a wake-up timer, let your Pi autoboot after a power outage or just read out the current battery voltage through a command line tool. Once the Pi is safely shut down, the microcontroller will also go to sleep, resulting in a standby current of 8 uA for the whole system. Together with the 500 mAh LiFePo4 cell, that’s theoretically low enough to send your Pi-ncess into a seven-year-long sleep.
LiFePO4wered/Pi is not only good for sleeping, though. [Patrick’s] runtime tests show, that the 500 mAh cell will power a Raspberry Pi Zero and a WiFi dongle for about two hours. Because the Raspberry Pi and many USB peripherals won’t complain when only 3.2 V are present on the VBUS, [Patrick] was able to squeeze out even more runtime by dismissing the boost converter from the design and driving the Pi directly from the battery voltage. If that worries you, you can either read a detailed explanation on why that works so well or just have a look at the more compliant 5 V version.
Eventually, [Patrick] used his module to create a Raspberry Pi time-lapse camera. A little script lets the Pi take a picture on boot up, set a wake-up timer and go back to sleep again. Safely enclosed in a waterproof electric box and deployed into the wild, the camera took 120 pictures on a single charge.
We’re sure the module will find it’s way into many cool projects and we’re counting the hours until we can get one in [Patrick’s] tindie store. Until then, enjoy the time-lapse video:
You can go to any dollar store, gas station, big box store, or your favorite Internet retailer and get a USB power bank. It’s a lithium battery mashed into a plastic enclosure with a USB port, probably poorly engineered, but it does serve as a great power supply for the Raspberry Pi. For the Raspberry Pi Zero contest we’re running over on hackaday.io, [Patrick] built a lithium phosphate battery pack that’s much better engineered and has some features a simple USB power bank will never have.
[Patrick]’s Raspberry Pi UPS isn’t just a battery and charge controller attached to the power rails; this board has a microcontroller that has full control over when the Pi wakes up, when the Pi goes to sleep, and can put the Pi into a clean shutdown, even in headless mode. SD cards around the world rejoiced.
The electronics for this project are just a low-power MSP430 microcontroller and a boost regulator. The battery pack/power manager attaches to the Pi through the first few GPIO pins on the Pi’s 40-pin header. That’s enough to tap into the 3.3 and 5V supplies, along with the serial console so power events can be scripted on the Pi.
So far, [Patrick] has made a few time-lapse movies with his lithium battery backup, a Pi Model A+, and a Raspberry Pi camera. He managed to take 99 pictures over the course of about 24 hours, powered only by a single lithium-ion cell. You can check that video out below.