Yak Shaving: Hacker Mode Vs Maker Mode

When I start up a new project, one that’s going to be worth writing up later on, I find it’s useful to get myself into the right mindset. I’m not a big planner like some people are — sometimes I like to let the project find its own way. But there’s also the real risk of getting lost in the details unless I rein myself in a little bit. I’m not alone in this tendency, of course. In the geek world, this is known as “yak shaving“.

The phrase comes obliquely from a Ren and Stimpy episode, and refers to common phenomenon where to get one thing done you have to first solve another problem. The second problem, of course, involves solving a third, and so on. So through this (potentially long) chain of dependencies, what looks like shaving a yak is obliquely working on cracking some actually relevant problem.
Continue reading “Yak Shaving: Hacker Mode Vs Maker Mode”

Bright Idea For A Name Tag

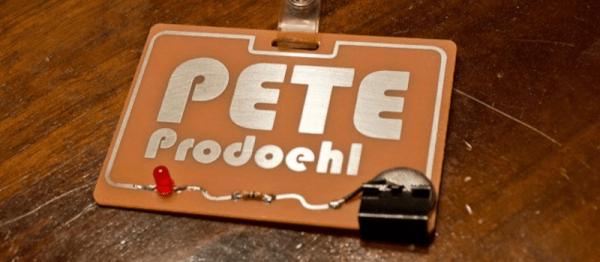
Looking for a quick DIY project to separate yourself from the crowd at your next business function or maker expo? Take a leaf out of [Pete Prodoehl’s] book and make your own name tag complete with blinking LED!

Minimalist, yet flashy (sorry!), this quick project can be completed inside a few hours with few resources, and is a great way to display your DIY handiwork. Continue reading “Bright Idea For A Name Tag”

Bistrobot: Make Me A Sandwich

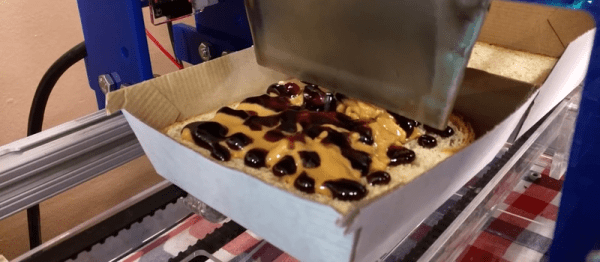
Reading this article in the San Francisco Chronicle sounds very familiar if you’ve owned a hand-built robot of any kind. “Bistrobot” is a pretty sweet sandwich-making robot. It toasts bread on the fly and applies peanut butter, jelly, honey, apple butter, and/or a few other gloopy dispensable delicacies at the behest of human customers. Watch the video below and we guarantee that you’ll want to toss a couple bucks into it, even if you don’t like toasted PB&J sandwiches.

The video makes everything look peachy, like a 3D printer on a good day. Check out the jelly nozzle zig-zagging across the half-sandwich — it’s very familiar. Indeed the whole machine seems like something we could build. But as we all know, continuous duty has a way of finding the flaws in our designs. The Chronicle article is part triumph, and part tale of woe, with the builder being called in to repair the Bistrobot for the “zillionth” time.

Continue reading “Bistrobot: Make Me A Sandwich”

Bread Online

Bread Online Is A Bread Maker For The Internet Of Things

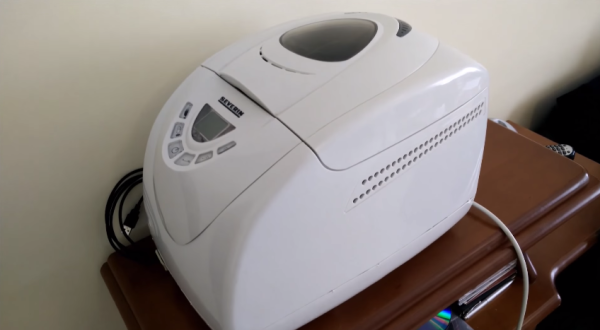
An engineering student at the University of Western Macedonia has just added another appliance to the ever-growing list of Internet enabled things. [Panagiotis] decided to modify an off-the-shelf bread maker to enable remote control via the Internet.

[Panagiotis] had to remove pretty much all of the original control circuitry for this device. The original controller was replaced with an Arduino Uno R3 and an Ethernet shield. The temperature sensor also needed to be replaced, since [Panagiotis] could not find any official documentation describing the specifications of the original. Luckily, the heating element and mixer motor were able to be re-used.

A few holes were drilled into the case to make room for the Ethernet connector as well as a USB connector. Two relays were used to allow the Arduino to switch the heating element and mixer motor on and off. The front panel of the bread maker came with a simple LCD screen and a few control buttons. Rather than let those go to waste, they were also wired into the Arduino.

The Arduino bread maker can be controlled via a web site that runs on a separate server. The website is coded with PHP and runs on Apache. It has a simple interface that allows the user to specify several settings including how much bread is being cooked as well as the desired darkness of the bread. The user can then schedule the bread maker to start. Bread Online also comes with an “offline” mode so that it can be used locally without the need for a computer or web browser. Be sure to check out the video demonstration below. Continue reading “Bread Online Is A Bread Maker For The Internet Of Things”

Makey Makey Made Smaller

When it launched in 2012, the Makey Makey was the golden child of the maker movement. It was a simple, easy to use board with holes for alligator clips and a USB socket that would present capacitive touch pads as a USB HID device. Thus, the banana piano was born.

The Makey Makey is a device specifically designed to introduce kids to electronics in a way the Arduino can’t match; even with an Arduino, most of the work is with code. If you’re introducing electronics to a class of 10-year-olds, that might be a bit too much.

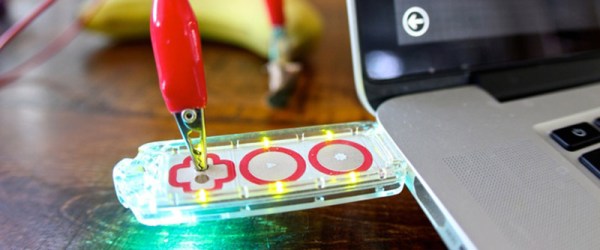
Now there’s a new Makey Makey on the block. It’s the Makey Makey Go, and it’s the same user experience as the Makey Makey classic made cheaper and much more rugged.

The Makey Makey Go features a single touch pad to clamp an alligator clip to. That’s enough to send any keypress or a mouse click over USB, where a wide variety of apps and games can make this tiny thumb drive-sized board useful. Banana pianos are out, and plant harps and Jello Flappy Bird are in.

There aren’t many details about the internals of the Makey Makey Go, but [Jay] from Makey Makey says the prototypes are based on the ATMega32u4, while the production units will use cheaper chips. Video below.

Continue reading “Makey Makey Made Smaller”

Field Trip! Hackaday Visits Adafruit Industries

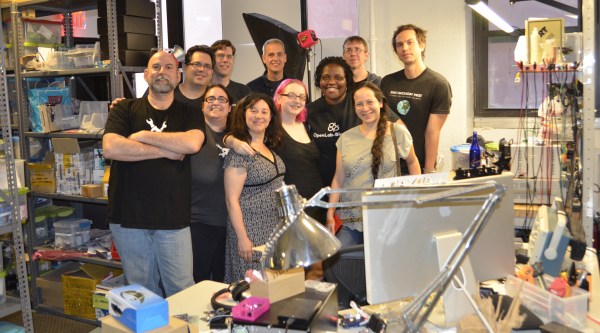
While still weary from our TechCrunch Disrupt Hackathon, The Hackaday crew had a chance we couldn’t pass up: A tour of Adafruit Industries. Adafruit isn’t open to the public, so an opportunity to see the inner workings of one of the largest companies in the hacker/maker industry was really something special.

Coming in off the hustle and bustle of lower Manhattan streets, we found ourselves in a nondescript white marble lobby. The contrast and colors made me think of a scene out of THX1138. A short elevator ride opens to a second lobby area with a large door. We weren’t alone though – a security camera stands silent witness. Any thoughts of Big Brother were quelled when the door was thrown open by none other than [Phil Torrone], welcoming us to Adafruit.

If you’ve seen any of the photos or videos of Adafruit’s offices, you know what to expect – a large, open space broken by the columns keeping the building’s 10 stories upright. It’s the perfect blank canvas upon which to build a company. Since we were there late on a Sunday afternoon, things were relatively quiet. Only a handful of the 80 Adafruit employees were at their stations. Those on hand were packing and scanning in orders, in preparation for what would be a busy Monday. It’s a bit hard to be standing in Adafruit, knowing that you’re within arm’s reach of every part, module, or device you’ve ever wanted, and not want to jump right in on a project. With 10 of us there that may have made a bit of a dent in Adafruit’s bottom line, though.

The tour started at [Phil’s] desk. Tucked in among a copy of Dune, a very respectable graphic novel collection, and the two most recent editions of The Art of Electronics was United States Export Controls, 7th Edition. Considering the amount of shipping to far-flung countries the company has to do each day, one must stay on top of little things like ITAR and other export laws.

Throughout the tour, [Phil] made it clear that he views his job as a simple one: Do everything possible to allow [Limor] to crank out designs. [Phil] keeps the business running so she can keep on engineering open source hardware. [Phil’s] touches shine through though, in the product logos, and the characters which appear in Adafriut’s Circuit Playground. If those videos strike you as kid stuff, that’s exactly what they are designed to be. During his tenure at Make, [Phil] was one of four people who ran the first Makerfaire in 2006. He still gets e-mails from people who attended it as kids and were inspired to enter the fields of engineering or computer science. Both [Phil] and [Limor] have their sights set on inspiring the next generation of hackers.

Next up on our tour was the wearables department, domain of the one and only Becky Stern. We were all struck by how incredibly neat and organized the area was. There was a well-labelled place for everything, and everything was in its place. On display was a grey hoodie with a bandolier of ninjaflex 3D printed bullets, all lit by RGB LEDs.

Click past the break for the rest of Hackaday’s Tour of Adafruit Industries!

Continue reading “Field Trip! Hackaday Visits Adafruit Industries”

TeaSteeper

Automated Tea Maker

[Pariprohus] wanted to make an interesting gift for his girlfriend. Knowing how daunting it can be to make your own tea, he decided to build a little robot to help out. His automated tea maker is quite simple, but effective.

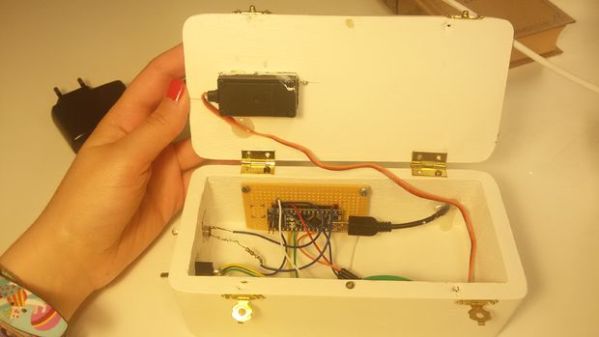
The device runs off of an Arduino Nano. The Nano is hooked up to a servo, a piezo speaker, an LED, and a switch. When the switch is turned to the off position, the servo rotates into the “folded” position. This moves the steeping arm into a position that makes the device easier to store and transport.

When the device is turned on to the “ready” position, the arm will extend outward and stay still. This gives you time to attach the tea bag to the arm and place the mug of hot water underneath. Finally the switch can be placed into “brew” mode. In this mode, the bag is lowered into the hot water and held for approximately five minutes. Each minute the bag is raised and lowered to stir the water around.

Once the cycle completes, the Nano plays a musical tune from the piezo speaker to remind you to drink your freshly made tea. All of the parameters including the music can be modified in the Nano’s source code. All of the components are housed in a small wooden box painted white. Check out the video below to see it in action. Continue reading “Automated Tea Maker”