Jazzberry Bakes The Pi Into A Mechanical Keyboard

If you hang around Hackaday long enough, pretty soon you’ll start to see some patterns emerging. As the nexus of all things awesome in the hacking world, our front page offers a unique vantage point by which you can see what’s getting folks excited this particular month, year, or decade. Right now we can tell you hackers love the Raspberry Pi, 3D printing, and perhaps above all, they can’t get enough mechanical keyboards.

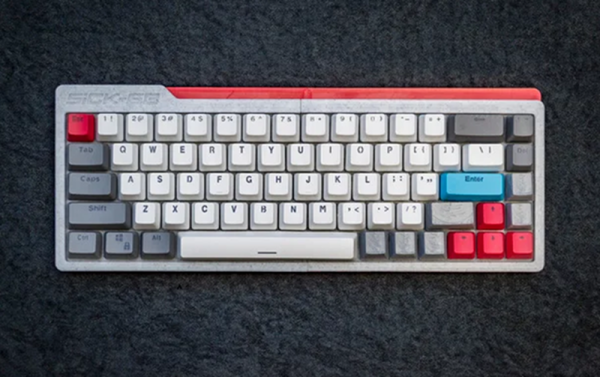
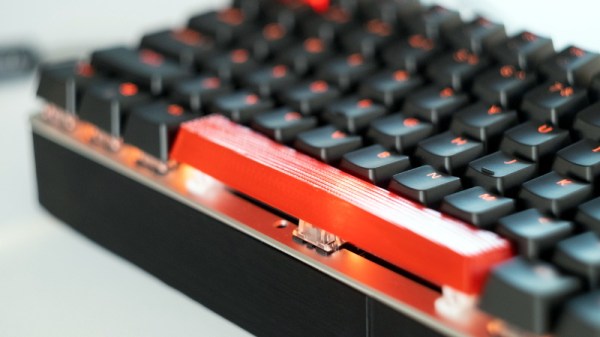
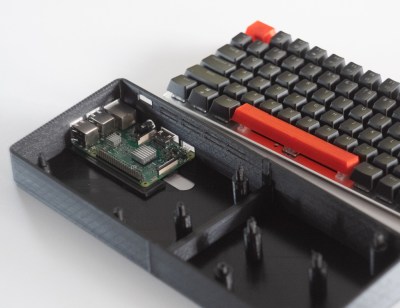
So that makes the Jazzberry by [Mattis Folkestad] something of a perfect storm in the hacker world. The project uses a 3D printed enclosure to combine a Raspberry Pi 3B+ and an Ajazz AK33 mechanical keyboard into a single unit like the home computers of old. Honestly, we’re just glad he didn’t sneak an ESP8266 in there; as the resulting combination might have been enough to crash the site.

That being said, we can’t help but notice there’s a lot of open space inside the 3D printed enclosure. Right now there’s nothing inside but the Raspberry Pi, which only takes up a fraction of the internal volume. Adding a battery and hard drive would be the logical next steps, but it could also be outfitted with a suite of radios and various other hacking and security research accoutrements. We’ve seen an influx of such builds over the last few months, and the Jazzberry seems like it could make a very slick entry into this burgeoning category of mobile pentesting devices.

The STL files are designed specifically for the combination of hardware that [Mattis] used, but it shouldn’t be too difficult to modify them for your own purposes. Even if you stick with the same AK33 keyboard, an upgrade to the impressively powerful Raspberry Pi 4 would be more than worth the time fiddling with the STLs in your CAD tool of choice. If you really want to go all in, add a display and you’re well on the way to that cyberdeck you’ve always wanted.

Tearing Apart Pulse Transformer Switches

If you like mechanical keyboards, you like switches. Historically, switches were weird, with strange capacitive rubber dome switches in Topre boards, buckling springs in the IBM Model M, and beamsprings in earlier IBM keyboards. This teardown of an HP signal generator has the weirdest keyboard switches ever. They’re being called pulse transformer switches, but they are the strangest, weirdest, and most complicated keyboard switch we’ve ever seen

Mechanically, these keys are mounted on a 1×5 plastic frame with a plunger that presses down on a (brass?) photoetched plate. Mechanically, this is effectively a metal dome keyboard that simply presses a springy bit of metal against a contact on a printed circuit board. That’s the mechanical explanation, the electrical theory of operation is much, much weirder.

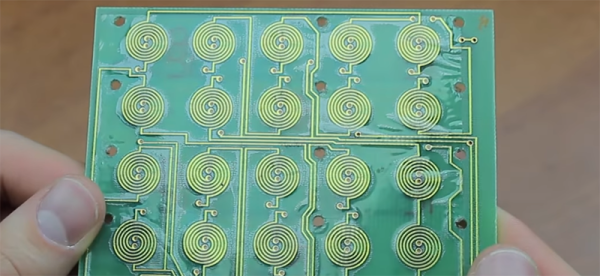
Electrically, this keyboard consists of a printed circuit board with two coils underneath each key. The circuit is wired up so two keys are ‘read’ at the same time with a pulse from a multiplexer. This pulse induces a current in the ‘sense’ coil of two individual keys which is sent to a comparator. If both keys are not pressed, the comparator sees a positive and a negative voltage which cancels out, meaning no keys are pressed. If one key is pressed, the metal dome shorts out the transformer underneath the keyboard, meaning only one voltage is seen by the comparator, and that key is registered as being pressed.

This is some crazy keyboard circuitry, and I do not say that lightly. There are ‘acoustic’ keyboards out there which consist of a row of keys striking a metal bar with an acoustic transducer on each end. By measuring the time it takes for the sound of a keypress to reach either end of the metal bar, a keypress can be registered. This is weird and expensive to build, and it’s still simpler than a pulse transformer switch. Check out the video below.

Continue reading “Tearing Apart Pulse Transformer Switches”

A Customizable Open Source Mechanical Numpad

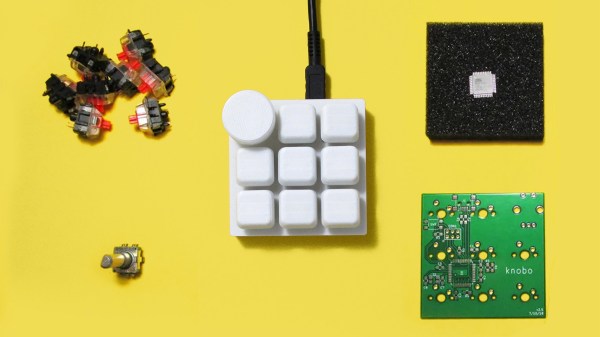
Mechanical keyboards with reduced key counts are all the rage these days, but while those streamlined input devices might look cool on your desk, there are times when the traditional number pad or navigation keys are quite handy. Rather than just going without, [Mattia Dal Ben] decided to put together his own mechanical auxiliary input device for when the main board just isn’t cutting it.

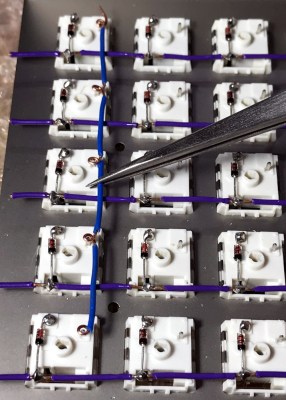
[Mattia] is calling his creation the YamPAD, which stands for Yet Another Mechanical numPAD. One of the major goals for the project is to produce a design that’s easy for others to replicate and customize. His PCB has a socket designed to fit an Arduino Pro Micro, which combined with the QMK firmware, offers a wide array of configuration options. All that’s left is to add in the Cherry MX switches and some 1N4148 diodes.

But if you want to take things a little further, [Mattia] has that covered as well. The PCB design has provisions for RGB LED back-lighting should you find yourself in need of crunching some numbers in the dark. There’s even a spot for a 0.91″ OLED display if you really want to take things to the next level.

As of right now, the YamPAD is just a bare PCB, but [Mattia] is planning to design a 3D printed enclosure for it soon. The sketches he’s done so far depict a printed case which we think bears more than a passing resemblance to a Wii Fit Balance Board, but of course being a fully open source project, you’ll be free to design your own case based on the PCB’s dimensions. It would be interesting to see what other kind of customization the community might come up with once the design is finalized.

If you like the idea of the YamPAD, you might also want to check out the kbord we covered back in 2017. If you want to see the full keyboard done in this DIY open hardware style, there are already some choice entries into the field.

Need A Small Keyboard? Build Your Own!

If you want keyboards, we can get you keyboards. If you want a small keyboard, you might be out of luck. Unless you’re hacking Blackberry keyboards or futzing around with tiny tact switches, there’s no good solution to small, thin, customization keyboards. There’s one option though: silicone keyboards. No one’s done it yet, so I figured I might as well.

Unfortunately, there is no readily available information on the design, construction, or manufacture of custom silicone keypads. There is a little documentation out there, but every factory that does this seems to have copy and pasted the information from each other. Asking a company in China about how to do it is a game of Chinese Whispers. Despite this, I managed to build a custom silicone keypad, and now I’m sharing this information on how to do it with you.

Continue reading “Need A Small Keyboard? Build Your Own!”

A Keyboard For Your Thumb

Here’s an interesting problem that no one has cracked. There are no small keyboards that are completely configurable. Yes, you have some Blackberry keyboards connected to an Arduino, but you’re stuck with the key layout. You could get one of those Xbox controller chat pads, but again, you’re stuck with the keyboard layout they gave you. No, the right solution to building small and cheap keyboards is to make your own, and [David Boucher] has the best one yet.

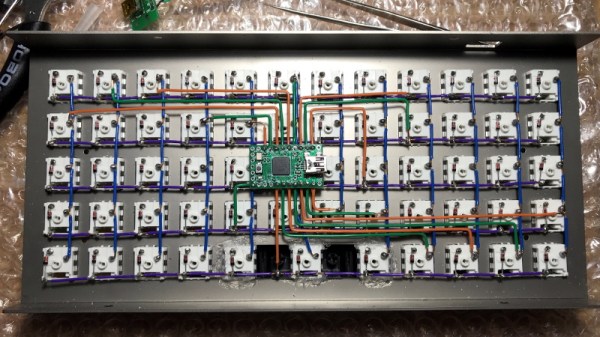
The Thumb Keyboard uses standard through-hole 4mm tact switches on a 10×4 grid, wired up in a row/column matrix. Yes, this is a mechanical keyboard, which is important: no one wants those terrible rubber dome keyswitches, and you need only look at the RGB gaming keyboard market for evidence of that. These tact switches fit into a standard perfboard, allowing anyone to build this at home with a soldering iron. After wiring up the keyboard and connecting it to an Arduino, [David] had a working keyboard.

There’s a lot going on with this build, not the least of which is the custom, 3D printed bezel for those tiny, tiny tact switches. This is a much simpler solution than building an entirely new PCB, which we’ve seen before. Since this is a 3D printed bezel, it’s easy to put labels or whatnot above the keys, or potentially print buttons. It’s great work, and one of the best small keyboards we could imagine.

Bonanza Of Keyswitch Datasheets Fills Our Decks With Clack

Mechanical keyboards use switches of a few different types. But even those types include myriad variations. How’s a hacker to know just exactly what equipment is out there?

For example, if you grab a fellow cube-farmer’s mechanical keyboard (possibly because they clacked on their Cherry Blue’s just one too many times) and angrily rip off a few keycaps to show you’re serious, what do you see? In most cases you expect to see the familiar color and stem shape of a Cherry MX switch or one of its various clones. But you may find a square box around it like a Kailh Box switch. Or the entire stem is a box (with no +) like a Matias switch. Or sometimes it looks like a little pig snout, making it a Kailh Choc.

There is a fairly wide variety of companies which make key switches suitable for use in a keyboard. Many hew to the electrical and mechanical standards implicitly created by the dominant Cherry GmbH’s common switches but not all. So if you’re designing a PCB for such a keyboard and want to use odd switches, you need to check out the Keyboardio keyswitch_documentation repo!

The keyswitch_documentation repo is an absolute treasure trove of hard to find keyswitch datasheets. Finding official information on Cherry MX switches isn’t too hard (keyswitch_documentation has 22 data sheets for MX series switches, and four for ML). But those Kailh Choc’s? Good luck (here it is in keyswitch_documentation). Did you know Tai-Hao made Matias-esque switches as well as weird rubber keycaps? Well they do, and here’s the datasheet.

We’re keeping this one handy until the next time we need data sheets for weird switches. Make sure to send a note if you find something interesting in here that’s worth noting!

Better Mechanical Keyboards Through 3D Printing

You’re not cool unless you have a mechanical keyboard. No, you won’t be able to tell if your coworkers don’t like it, because you won’t be able to hear their complaining over the sound of your clack-clack-clacking. You can even go all-in with switch modifications, o-rings, and new springs, or you could use your 3D printer to modify the touch of your wonderful Cherry MX switches. That’s what a few researchers did, and the results are promising.

The ‘problem’ this research is attempting to solve is bottoming out on Cherry MX keyswitches. If you’re bottoming out, you’re doing it wrong, but nevertheless, you can get a publication out of solving repetitive strain injury. This was done by modeling the bottom housing of a Cherry MX switch by printing most of it in nylon on a Stratasys Objet 350 polyjet printer, with a tiny bit of of the housing printed with a polymer with a hardness of Shore 40. No, Shore A, Shore B, or Shore 00 was not specified, but hey, it’s just a conference paper.

The experimental test for this keyswitch was dropping a 150 gram weight from 125 mm onto the keyswitch, with a force sensitive resistor underneath the switch, connected to an Arduino. Data was logged, filtered, and fitted in Excel to create a plot of the force on dampened, rigid, and commercial switch housings. Results from ANOVA were p > 0.05 (p=0.12).

Despite the lack of significant results, there is something here. The Objet is one of the few printers that can do multimaterial printing with the resolution needed to replicate an injection molded part. There is a trend to the data, and printing squishy parts into a keyswitch should improve typing feel. There will be more work on this, but in the meantime we’re hopeful some other experimenters will pick up this train of research.