For one-off projects or prototypes it’s not uncommon for us to make do with whatever workspace we have on hand. Using a deck railing as an impromptu sawhorse, for example, is one that might be familiar to anyone who owns a circular saw, but [Daniel] has a slightly different situation. He had been setting up metal workpieces on random chunks of brick in order to use his plasma cutter, but just like the home handyman who gets tired of nicking their deck with a saw, he decided to come up with a more permanent solution and built a custom plasma cutting table.
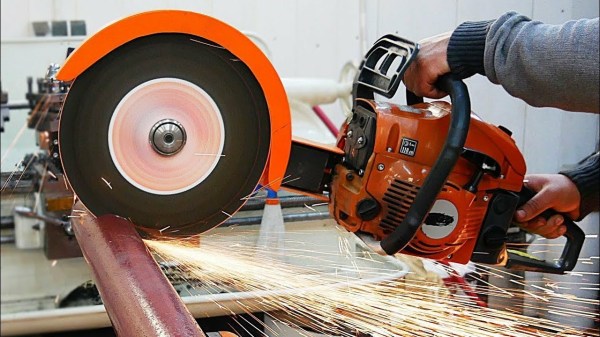
Plasma cutting has a tendency to throw up a lot of sparks, so most commercial offerings for plasma cutting tables include a water bath to catch all of the debris from the cutting process. [Daniel] builds his table over a metal tub to hold some water for this purpose. The table itself is built out of aluminum and designed to be built without welding even though most people with plasma cutters probably have welders as well. The frame is designed to be exceptionally strong and includes curved slats which add to the strength of the table. The table is also designed to be portable, so the curved slats stay in place when the table is moved.
While this might seem like an average metal table at first glance, the table is actually being designed with a homemade CNC machine in mind which [Daniel] is working on. The CNC plasma cutter needs a sturdy, flat surface and can’t be set up on bricks in the driveway, so this table suits both [Daniel]’s immediate needs to not shower himself in sparks every time he cuts something and also his future CNC machine’s need for a sturdy, flat workspace. We look forward to seeing that build being completed but in the meantime take a look at this motorized plasma cutter which has the beginnings of a CNC machine if in one direction only.
Continue reading “Keep The Sparks Away With A Plasma Cutting Table”