Active Suspension R/C Car Really Rocks

When you’re a kid, remote control cars are totally awesome. Even if you can’t go anywhere by yourself, it’s much easier to imagine a nice getaway from the daily grind of elementary school if you have some wheels. And yeah, R/C cars are still awesome once you’re an adult, but actual car-driving experience will probably make you yearn for more realism.

What could be more realistic and fun than an active suspension? Plenty of adults will never get the chance to hit the switches in real car, but after a year of hard work, [snoopybg] is ready to go front and back, side to side, and even drift in this super scale ’63 Oldsmobile Dynamic 88 wagon. We think you’ll agree that [snoopybg] didn’t miss a detail — this thing makes engine noises, and there are LEDs in the dual exhaust pipes to simulate flames.

An Arduino reads data from a triple-axis accelerometer in real time, and adjusts a servo on each wheel accordingly, also in real time, to mimic a real car throwing its weight around on a real suspension system. If that weren’t cool enough, most of the car is printed, including the tires. [snoopybg] started with a drift car chassis, but even that has been hacked and drilled out as needed.

There are a ton of nice pictures on [snoopybg]’s site if you want to see what’s under the hood. We don’t see the code anywhere, but [snoopybg] seems quite open to publishing more details if there is interest out there. Strap yourself in and hold on tight, because we’re gonna take this baby for a spin after the break.

If this is all seems a bit much for you, but you’ve got that R/C itch again, there’s a lot to be said for upgrading the electronics in a stock R/C car.

Continue reading “Active Suspension R/C Car Really Rocks”

Balance Box Game Requires A Steady Hand

In the distant past, engineers used exotic devices to measure orientation, such as large mechanical gyros and mercury tilt switches. These are all still useful methods, but for many applications MEMS motions devices have become the gold standard. When [g199] set out to build their Balance Box game, it was no exception.

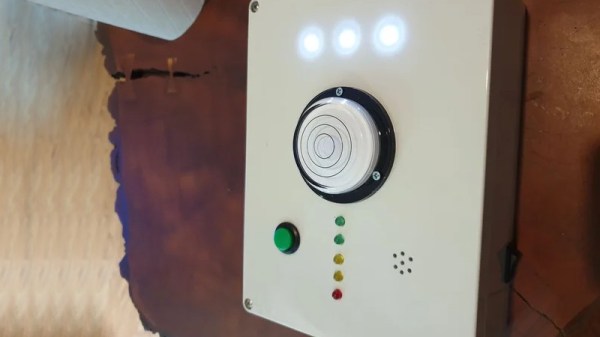
The game consists of a plastic box, upon which a spirit level is fitted, along with a series of LEDs. The aim of the game is to keep the box level while carrying it to a set goal. Inside, an Arduino Uno monitors the output of a MPU 6050, a combined accelerometer and gyroscope chip. If the Arduino detects the box is tilting, it warns the user with the LEDs. Tilt it too far, and a life is lost. When all three lives are gone, the game is over.

It’s a cheap and simple build that would have been inordinately more expensive only 10 to 20 years ago. It goes to show the applications enabled by ubiquitous cheap electronics like MEMS sensors. The technology has other fun applications, too – for example the Stecchino game, or this giant balance board joystick. We’re certainly lucky to have such powerful technology at our fingertips!

Arduino, Accelerometer, And TensorFlow Make You A Real-World Street Fighter

A question: if you’re controlling the classic video game Street Fighter with gestures, aren’t you just, you know, street fighting?

That’s a question [Charlie Gerard] is going to have to tackle should her AI gesture-recognition controller experiments take off. [Charlie] put together the game controller to learn more about the dark arts of machine learning in a fun and engaging way.

The controller consists of a battery-powered Arduino MKR1000 with WiFi and an MPU6050 accelerometer. Held in the hand, the controller streams accelerometer data to an external PC, capturing the characteristics of the motion. [Charlie] trained three different moves – a punch, an uppercut, and the dreaded Hadouken – and captured hundreds of examples of each. The raw data was massaged, converted to Tensors, and used to train a model for the three moves. Initial tests seem to work well. [Charlie] also made an online version that captures motion from your smartphone. The demo is explained in the video below; sadly, we couldn’t get more than three Hadoukens in before crashing it.

With most machine learning project seeming to concentrate on telling cats from dogs, this is a refreshing change. We’re seeing lots of offbeat machine learning projects these days, from cryptocurrency wallet attacks to a semi-creepy workout-monitoring gym camera.

Continue reading “Arduino, Accelerometer, And TensorFlow Make You A Real-World Street Fighter”

Millenium Falcon HID: Get Unity To Talk To Teensy

Here’s one that proves a hardware project can go beyond blinking LEDs and dumping massive chunks of data onto a serial console. Those practices are fine for some, but [dimtass] has found a more elegant hack for a more civilized age. His 3D Millennium Falcon model gets orientation data from his IMU as an an HID device.

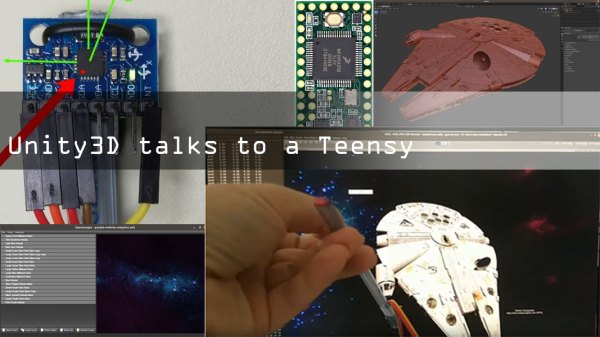
The hardware involved is an MPU6050 6-axis sensor that is interfaced with a Teensy 3.2 board. [dimtass] documents his approach to calibrating the IMU going a bit further by using a Python script to generate offsets. We’ve advocated using Jupyter notebooks in the past and this is a good example of Jupyter plotting the data and visualizing the effect of the offsets in a second pass.

When in action, the Teensy reads IMU data and sends it over a USB RAW HID interface. For the uninitiated, HID transfers are more reliable than USB CDC transfers (virtual serial port) because they use smaller data chunks per event/transaction and usually don’t require special driversOn the computer side, [dimtass] has written a small application that gets the IMU values over the RAW HID and then provides it to the visualization application.

A 3D Millennium Falcon model is rendered in Unity, the popular open source game development engine. Even though Unity has an API, this particular approach is more OS specific using a shared-memory technique. The HID application writes to a file (/tmp/hid-shared-buffer) which is then read by Unity to make orientation changes to the rendered model.

[dimtass] provides lots of details on the tools used to bring his project to life and it can be a great starting point for more projects that need interfacing sensors with a visualization system. We have seen ways to turn a person’s head into a joystick and if you need a deeper dive into Unity, look no further.

Continue reading “Millenium Falcon HID: Get Unity To Talk To Teensy”

Gyro Controlled RGB Blinky Ball Will Light Up Your Life

[James Bruton], from the XRobots YouTube channel is known for his multipart robot and cosplay builds. Occasionally, though, he creates a one-off build. Recently, he created a video showing how to build a LED ball that changes color depending on its movement.

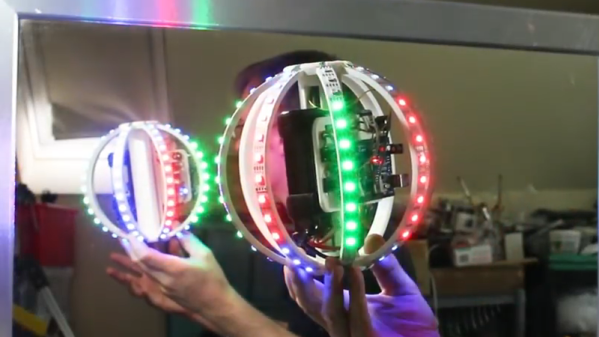
The project is built around a series of 3D printed “arms” around a hollow core, each loaded with a strip of APA102 RGB LEDs. An Arduino Mega reads orientation data from an MPU6050 and changes the color of the LEDs based on that input. Two buttons attached to the Mega modify the way that the LEDs change color. The Mega, MPU6050, battery and power circuitry are mounted in the middle of the ball. The DotStar strips are stuck to the outside of the curved arms and the wiring goes from one end of the DotStar strip, up through the middle column of the ball to the top of the next arm. This means more complicated wiring but allows for easier programming of the LEDs.

Unlike [James’] other projects, this one is a quickie, but it works as a great introduction to programming DotStar LEDs with an Arduino, as well as using an accelerometer and gyro chip. The code and the CAD is up on Github if you want to create your own. [James] has had a few of his projects on the site before; check out his Open Dog project, but there’s also another blinky ball project as well.

Continue reading “Gyro Controlled RGB Blinky Ball Will Light Up Your Life”

Building An Electric Scooter That’s Street Legal, Even In Germany

Sometimes a successful project isn’t only about making sure all the electrons are in the right place at the right time, or building something that won’t collapse under its own weight. A lot of projects involve a fair amount of social engineering to be counted as a success, especially those that might result in arrest and incarceration if built as originally planned. Such projects are often referred to as “the fun ones.”

For the past few months, we’ve been following [Bitluni]’s DIY electric scooter build, which had been following the usual trajectory for these things – take a stock unpowered scooter, replace the rear wheel with a 250 W hub motor, add an ESC, battery, and throttle, and away you go. Things took a very interesting turn, however, when his street testing ran afoul of German law, which limits small electric vehicles to a yawn-inducing 6 kph. Unwilling to bore himself to death thus, [Bitluni] found a workaround: vehicles that are only assisted by an electric motor have a much more reasonable speed limit of 25 kph. So he added an Arduino with a gyro and accelerometer module and wrote a program to only power the wheel after the rider has kicked the scooter along a few times – no throttle needed. The motor stops after a bit, needing another push or two to kick it back on. A brake lever kills the motor, as does laying the scooter on its side. It’s quite a clever design, and while it might not keep the Polizei at bay, you can’t say he didn’t try.

[Bitluni] has quite a range of builds, from software-defined television to bad 3D-scanners to precision wine glass whacking. You should check out his stuff. Continue reading “Building An Electric Scooter That’s Street Legal, Even In Germany”

Junk Bin Self Balancing Bot With ESP8266

As we all know, sometimes the projects we plan simply never materialize. You have an idea, maybe even buy some of the parts you need, and then…nothing. Maybe you changed your mind, or maybe the idea was never that good to begin with. In any event, time marches on, the parts pile up, and the ideas come and go. Such is the life of the hacker.

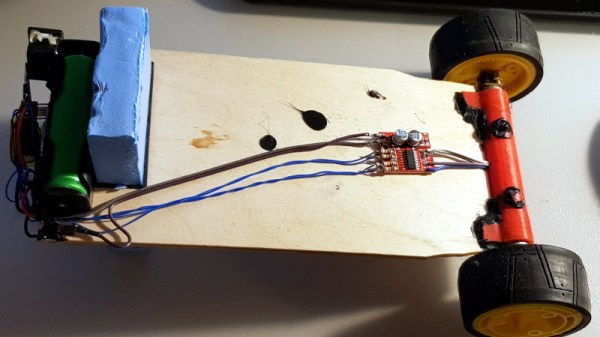
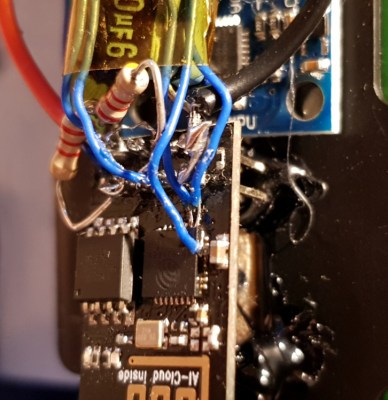
[Andrius Mikonis] writes in to tell us how his graveyard of abandoned projects ended up providing exactly what he needed to embark on a project he’s been fascinated with for years: the two-wheel self balancing robot. He started with a motor and wheel set that was originally intended to be part of a rover, added an accelerometer, and tied the whole thing together with an ESP-01 he had lying around. The final result certainly looks the part, and goes to show that projects don’t always need to be 1000 hour labors of love to accomplish their goals.

The construction of this little bot is simple in the extreme. A piece of plywood makes up the primary structure, with the wheels glued to the bottom and the electronics taking up residence in the top. It’s powered by two lithium battery cells that were salvaged out of an old laptop, with a DC-DC buck converter to provide a stable 3.3 VDC for the ESP-01 and MPU6050 accelerometer. To control the motors themselves, [Andrius] is using a cheap L293 controller that he found on eBay.

For interactive control, [Andrius] is making use of the ESP’s Wi-Fi to provide a web-based interface. This lets you control the bot from essentially any device that has a browser, rather than having to use a dedicated hardware transmitter.

Self-balancing robots of various levels of complexity are a relatively common project in the hacker world. There’s just something magical about the way they scoot around, seeming to defy gravity.