Reforming 3D Prints With Salt And Heat

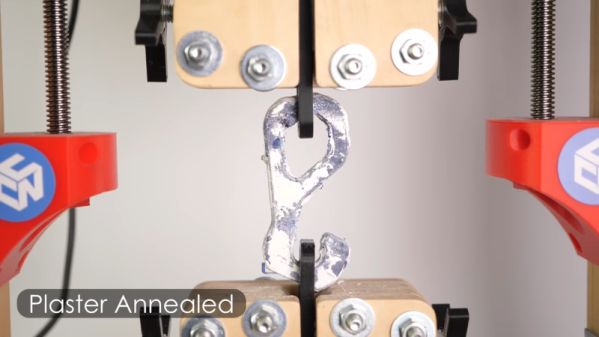
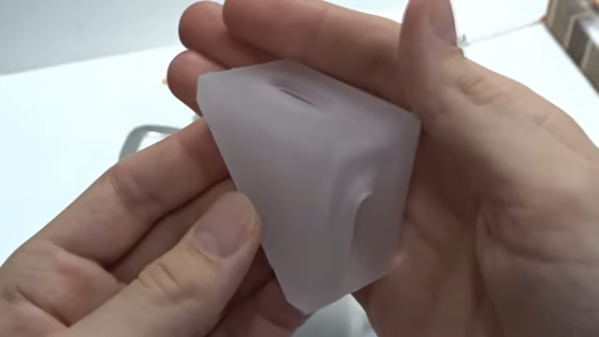
The biggest problem with fused deposition 3D prints is that while the layers should stick together, they aren’t the same as a solid piece of plastic you would get from, say, injection molding. You can anneal plastic using moderate heat, but it is likely to cause the part to deform or change size. [Free Spirit 1] has a solution for this. Using a powdered salt, the part is packed on the inside and out and put in an oven. The results in the video below look really impressive.

In addition to making the part look solid and — we assume — adding strength, the resulting prints are also water- and gas-tight which was the purpose of the effort. That alone would make the technique worthwhile.

The only thing we noticed is that the part has to have access to hold the salt. Anything not supported would be subject to deformation. However, the ground-up salt is so fine that it should be relatively easy to fill in most parts and, of course, print with 100% infill to avoid hollow internal areas.

[Free spirit 1] used a coffee grinder to get the salt powder, but apparently you can buy “flour salt.” We wondered if other powders might work well, too. Apparently, sand didn’t work out, perhaps because the salt dissolves out in water, so whatever you use, it should probably dissolve in something that won’t attack your plastic.

Annealing isn’t a new idea, and we’d love to see some objective tests on this new method.

Continue reading “Reforming 3D Prints With Salt And Heat”

Mil-Spec Looks Without Defense Department Budget

While hackers and makers have a tendency to focus on functionality above all else, that doesn’t mean there isn’t room for some visual flair. A device that works well and looks good will always be more impressive than the bare bones approach, but the extra time and money it usually takes to polish up the visual component of a build means it’s often overlooked. Which is exactly what [Jay Doscher] wanted to address with his Mil-Plastic project.

On the surface, the Mil-Plastic is yet another entry in the rapidly growing and often ill-defined world of cyberdecks: custom computing devices that forgo the standard laptop and desktop dichotomy and instead explore the road not taken by mainstream consumer electronics. To that end, it’s a solid build more than worthy of praise. But more than that, it’s also a lesson on how 3D printing and some clever design can create a truly impressive visual for little more than the cost of a spool of PLA.

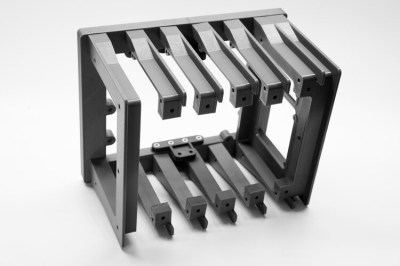
The modular design allows parts to be printed in parallel.

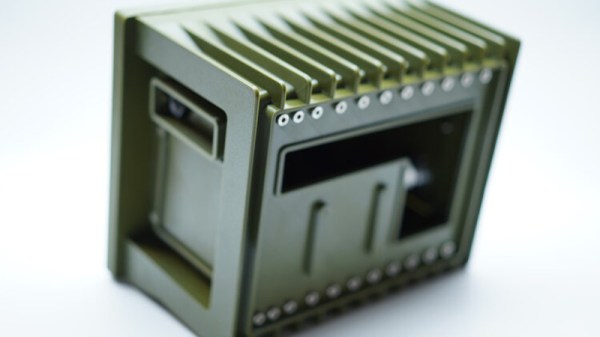
The Mil-Plastic, as the name implies, looks like it was pulled from a Humvee or an Abrams tank. While the gorgeous olive green PETG filament that [Jay] has stumbled upon certainly helps, his eye for detail and design chops aren’t to be underestimated. He’s given the case a rugged and armored look that simply screams “Your Tax Dollars At Work”, complete with faux cooling fins running along the back and a generous application of low-profile stainless steel fasteners. We’ve taken a close look at the decadence of military engineering in the past, and the Mil-Plastic could hang with the best of them.

Most importantly, [Jay] has given us all the tools and information we need to recreate the look on our own terms. You don’t have to be in the market for yet another Raspberry Pi gadget to appreciate the Mil-Plastic; the design can serve as the backbone for whatever you happen to be building. The printed case not only looks impressive, but can easily be modified and expanded as needed.

[Jay] kicked off a minor revolution late last year with his Raspberry Pi Recovery Kit, and has continued to produce well-documented designs that illustrate the incredible power of desktop 3D printing. If you can look through his portfolio and not get inspired, you may want to speak with a doctor.

Printed It: Print-in-Place PCB Gripper

The goal of Printed It is to showcase creations that truly embrace the possibilities offered by desktop 3D printing. The most obvious examples are designs that can be printed quickly and cheaply enough that they’re a valid alternative to commercially available products. But as previous entries into the series have shown, there are also technical considerations. Is it simply a duplicate of something that could be produced via traditional means, or does the design really benefit from the unique nature of 3D printing?

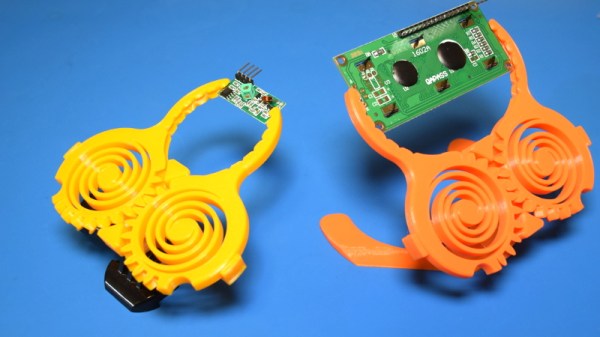
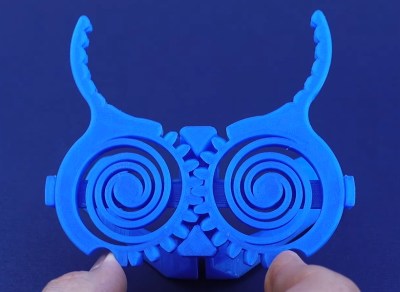
A perfect example is the Print-in-Place PCB Holder/Gripper created by SunShine. This design is able to hold onto PCBs (or really, whatever you wish) without any additional components. Just pull it off the bed, and put it to work. While having to add a rubber band or generic spring would hardly be an inconvenience, there’s always something to be said for a design that’s truly 100% printable.

The secret is the dual flat spiral springs integrated into the device’s jaws. While most of the common thermoplastics used in desktop 3D printing are relatively stiff, the springs have been designed in such a way that they can be printed in standard PLA. The backside of the jaws have teeth that mesh together, so the energy of the springs is combined to provide a clamping force. Serrations have been added to the jaws to catch the edge of the PCB and help stabilize it.

Visually, it’s certainly striking. The design largely eschews right angles, giving it an almost biological appearance. Many have compared it to the head of a mantis, or perhaps some piece of alien technology.

There’s no question that the design leverages the strengths of 3D printing either; there’s no other way to produce its intricate interlocking components, especially without the use of any sort of fasteners. In short, this design is an ideal candidate for Printed It. But there’s still one question to answer: does it actually work?

Continue reading “Printed It: Print-in-Place PCB Gripper”

Printed It: Collet Drill Stop

You’d think that being quarantined in your home would be perfect for hackers and makers like us, as we all have a project or two that’s been sitting on the back burner because we didn’t have the time to tackle it. Unfortunately, some are finding that the problem now is actually getting the parts and tools needed to do the job. When there’s a bouncer and a line outside the Home Depot like it’s a nightclub on Saturday night, even the simplest of things can be difficult to source when making in the time of COVID.

Which is exactly the situation I found myself in recently when I needed to drill a bunch of holes to the same depth. The piece was too big to put in the drill press, and while I contemplated just wrapping the bit in some tape to serve as a makeshift stop, I wasn’t convinced it would be accurate or repeatable enough. It occurred to me that a set of drill stop collars would be easy enough to design and 3D print, but before I fired up OpenSCAD, I decided to see what was already available online.

Which is how I found the “Collet Drill Stop” from Adam Harrison. Rather than the traditional ring and setscrew arrangement, his design uses a printable collet that will clamp down on the bit at an arbitrary position without tools. So not only could I avoid a trip to the store by printing this design out, it looked like it would potentially be an upgrade over what I would have bought.

Of course, it’s wise not to take anything for granted when dealing with 3D printing. The only way I could be sure that Adam’s design would work for me was to commit it to plastic and try it out.

Continue reading “Printed It: Collet Drill Stop”

3D-Printed Tools Turn Bench Vise Into Expedient Press Brake

Chances are pretty good that most of us have used a bench vise to do things far beyond its intended use. That’s understandable, as the vise may be the most powerful hand tool in many shops, capable of exerting tons of pressure with the twist of your wrist. Not taking advantage of that power wouldn’t make any sense, would it?

Still, the clamping power of the vise could sometimes use a little finesse, which is the thinking behind these 3D-printed press brake tools.  [Brauns CNC] came up with these tools, which consist of a punch and a die with mating profiles. Mounted to the jaws of the vise with magnetic flanges, the punch is driven into the die using the vise, forming neat bends in the metal. [Braun] goes into useful detail on punch geometry and managing springback of the workpiece, and handling workpieces wider than the vise jaws. The tools are printed in standard PLA or PETG and are plenty strong, although he does mention using his steel-reinforced 3D-printing method for gooseneck punches and other tools that might need reinforcement. We’d imagine carbon-fiber reinforced filament would add to the strength as well.

To be sure, no matter what tooling you throw at it, a bench vise is a poor substitute for a real press brake. Such machine tools are capable of working sheet metal and other stock into intricate shapes with as few setups as possible, and bring a level of power and precision that can’t be matched by an improvised setup. But the ability to make small bends in lighter materials with homemade tooling and elbow grease is a powerful tool in itself.

Continue reading “3D-Printed Tools Turn Bench Vise Into Expedient Press Brake”

Annealing 3D Prints: A Scientific Approach

We’ve all been taught the scientific method: Form a hypothesis, do some experiments, gather some data, and prove or disprove the hypothesis. But we don’t always do it. We will tweak our 3D prints a little bit and think we see an improvement (or not) and draw some conclusions without a lot of data. Not [Josef Prusa], though. His team printed 856 different parts from four different materials to generate data about how parts behaved when annealed. There’s a video to watch, below.

Annealing is the process of heating a part to cause its structure to reorganize. Of course, heated plastic has an annoying habit of deforming. However, it can also make the parts firmer and with less inner tension. Printed parts tend to have an amorphous molecular structure. That is to say, they have no organization at all. The temperature where the plastic becomes soft and able to reorganize is the glass transition temperature.

Continue reading “Annealing 3D Prints: A Scientific Approach”

Wipe Your Nozzle To Avoid Stringing

[Design Prototype Test] likes his Ender 3 printer. There was only one problem. When printing PETG — which is notorious for stringing — the hot end would pick up material and eventually ruin the print. The answer was to mount a cheap Harbor Freight brush somewhere and make the head pass over it after each layer. You can see the video of the design, below.

It sounds as though it worked well and after explaining the concept, he dives into the details of how he designed the fixture and how he mounted it. There’s a lot of good information in there about his particular toolchain and workflow.

Continue reading “Wipe Your Nozzle To Avoid Stringing”