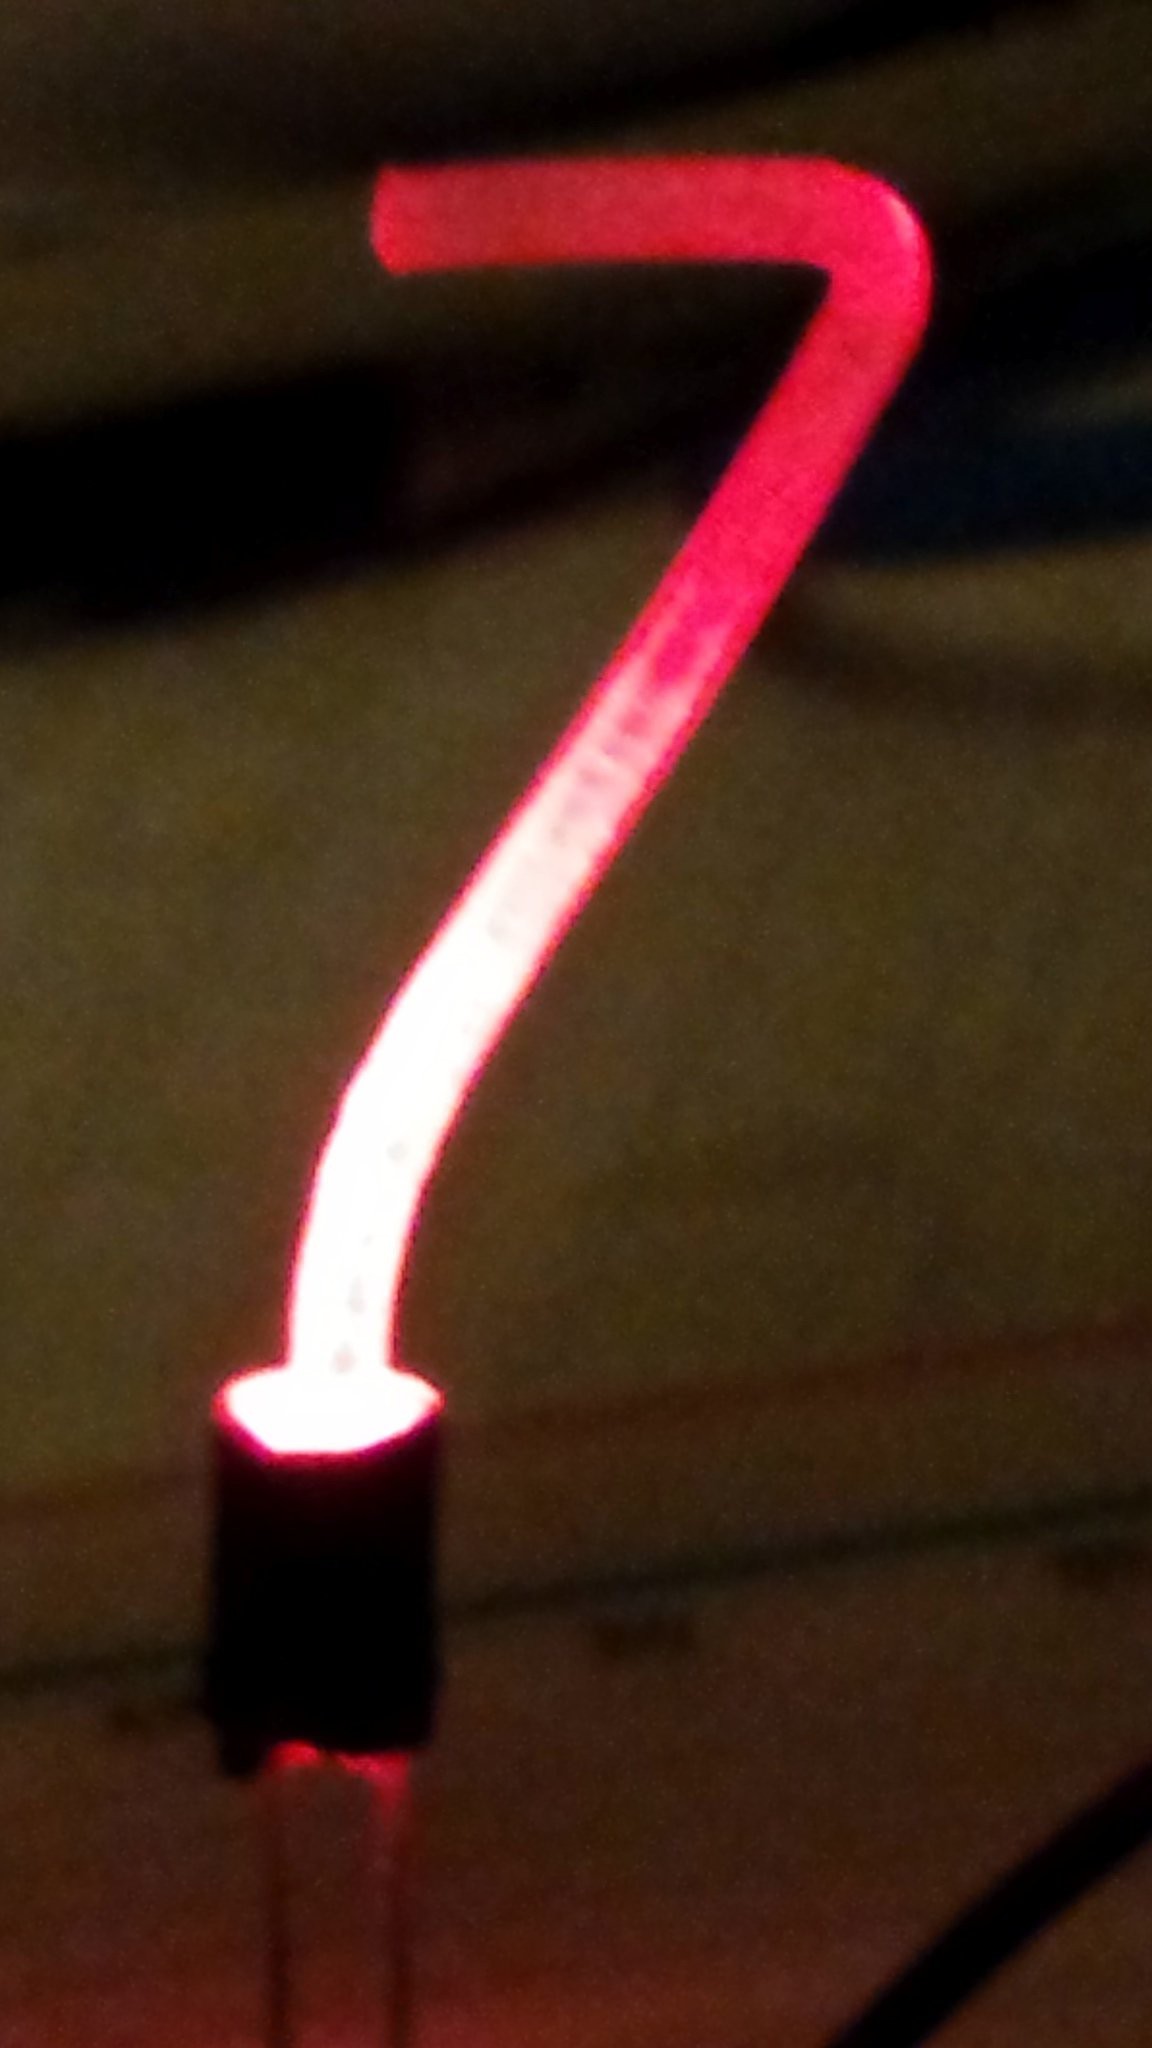
Courtesy of [david.reid]

Bent PETG Fills A Nixie Gap

Have you ever thought that Nixie tubes are cool but too hard to control with modern electronics? And that they’re just too expensive? [david.reid] apparently thought so and decided to create his own version of a Nixie tube, and it doesn’t get much cheaper than this.

PETG Nixie Tube

While working on a 3D printed locomotive with his son, [david.reid] used clear PETG (Polyethylene Terephthalate Glycol) 3D printer filament to move light from LEDs to various parts of the locomotive. He found this was a success, but roughed up the outside of the filament to see what would happen. Lo and behold, a warm glow appeared on the surface of the tube! Like any good hacker, his next thought was of Nixie tubes, as you have seen in many clocks.

His basic idea is that with a little heat you can bend the filament into any shape that you like ([david.reid] uses custom molds). You then use some sandpaper to roughen up the outside wherever you’d like light to show, and add an LED at the bottom to light it up!

[david.reid] isn’t the first person to modernize Nixie Tubes. Over the years, we’ve seen them combined with Wi-Fi boards, individual LED segments, or even laser cutters & WS2812s!

Now’s a great time to get started on a project for the Hackaday Prize! If you’re looking for somewhere to start, we’d love to at least see your own take on a clock!

3D-Printed Parts Torture-Tested In Nitro Engine — Briefly

Additive manufacturing has come a long way in a short time, and the parts you can turn out with some high-end 3D-printers rival machined metal in terms of durability. But consumer-grade technology generally lags the good stuff, so there’s no way you can 3D-print internal combustion engine parts on a run of the mill printer yet, right?

As it turns out, you can at least 3D-print connecting rods, if both the engine and your expectations are scaled appropriately. [JohnnyQ90] loves his miniature nitro engines, which we’ve seen him use to power both a rotary tool and a hand drill before. So taking apart a perfectly good engine and replacing the aluminum connecting rod with a PETG print was a little surprising. The design process was dead easy with such a simple part, and the print seemed like a reasonable facsimile of the original when laid side-by-side. But there were obvious differences, like the press-fit bronze bearings and oil ports in the crank and wrist ends of the original part, not to mention the even thickness along the plastic part instead of the relief along the shaft in the prototype.

Nonetheless, the rod was fitted into an engine with a clear plastic cover that lets us observe the spinning bits right up to the inevitable moment of failure, which you can see in the video below. To us it looks like failing to neck down the shaft of the rod was probably not a great idea, but the main failure mode was the bearings, or lack thereof. Still, we were surprised how long the part lasted, and we can’t help but wonder how a composite connecting rod would perform.

Still in the mood to see how plastic performs in two-stroke engines? Break out the JB Weld.

Continue reading “3D-Printed Parts Torture-Tested In Nitro Engine — Briefly”

Repairs You Can Print: Racing The Clock For A Dishwasher Fix

No matter how mad your 3D printing skills may be, there comes a time when it makes more sense to order a replacement part than print it. For [billchurch], that time was the five-hour window he had to order an OEM part online and have it delivered within two days. The race was on — would he be able to model and print a replacement latch for his dishwasher’s detergent dispenser, or would suffer the ignominy of having to plunk down $30 for a tiny but complicated part?

As you can probably guess, [bill] managed to beat the clock. But getting there wasn’t easy, at least judging by the full write-up on his blog. The culprit responsible for the detergent problem was a small plastic lever whose pivot had worn out. Using a caliper for accurate measurements, [bill] was able to create a model in Fusion 360 in just about two hours. There was no time to fuss with fillets and chamfers; this was a rush job, after all. Still, even adding in the 20 minutes print time in PETG, there was plenty of time to spare. The new part was a tight fit but it seemed to work well on the bench, and a test load of dishes proved a success. Will it last? Maybe not. But when you can print one again in 20 minutes, does it really matter?

Have you got an epic repair that was made possible by 3D printing? We want to know about it. And if you enter it into our Repairs You Can Print Contest, you can actually win some cool prizes to boot. We’ve got multiple categories and not that many entries yet, so your chances are good.

Transparent 3D Printing?

Transparent plastic is nothing new. However, 3D prints are usually opaque or–at best–translucent. [Thomas Sanladerer] wanted to print something really transparent. He noticed that Colorfabb had an article about printing transparent pieces with their HT filament. [Thomas] wanted to try doing the same thing with standard (and cheaper) PETG, which is chemically similar to the HT. Did he succeed? Watch the video below and find out.

You can get lots of clear plastic filament, but the process of printing layers makes the transparency turn cloudy, apparently mostly due to the small gaps between the layers. The idea with the HT filament is to overextrude at a high enough temperature that the layers can fuse together.

[Thomas] wanted to create some clear parts and diffusers for lamps. The diffusers print using vase mode and the lamps he creates when them look great even without clear diffusers.

His first experiments involved layer height and extrusion rates. He tried to determine what was making things better and worse and modifying his technique based on that. There were also some post-processing steps he tried.

If you want to see what the Colorfabb HT parts made by someone other than Colorfabb look like, check out the second video below from [3D Printing Professor]. The prints he is making don’t look very clear until he does some post processing. Even after the post processing, it isn’t going to fool anyone into thinking it is glass-clear. However, the parts that Colorfabb shows on their blog post about the material do look amazing. Between the overextrusion used to prevent gaps and the post processing steps, [3D Printing Professor] warns that it won’t be easy to get parts with precise dimensions using this technique.

If you have a big budget, you could try printing with actual glass. There seem to be several ways to do that.

Powerful, Professional Brushless Motor From 3D-Printed Parts

Not satisfied with the specs of off-the-shelf brushless DC motors? Looking to up the difficulty level on your next quadcopter build? Or perhaps you just define “DIY” as rigorously as possible? If any of those are true, you might want to check out this hand-wound, 3D-printed brushless DC motor.

There might be another reason behind [Christoph Laimer]’s build — moar power! The BLDC he created looks more like a ceiling fan motor than something you’d see on a quad, and clocks in at a respectable 600 watts and 80% efficiency. The motor uses 3D-printed parts for the rotor, stator, and stator mount. The rotor is printed from PETG, while the stator uses magnetic PLA to increase the flux and handle the heat better. Neodymium magnets are slipped into slots in the rotor in a Halbach arrangement to increase the magnetic field inside the rotor. Balancing the weights and strengths of the magnets and winding the stator seem like tedious jobs, but [Cristoph] provides detailed instructions that should see you through these processes. The videos below shows an impressive test of the motor. Even limited to 8,000 rpm from its theoretical 15k max, it’s a bit scary.

Looking for a more educational that practical BLDC build? Try one cobbled from PVC pipes, or even this see-through scrap-bin BLDC.

Continue reading “Powerful, Professional Brushless Motor From 3D-Printed Parts”

3D Printering: XT-CF20 Carbon Fiber Filament Review

ColorFabb’s XT-CF20 is one of the more exotic filaments for adventurous 3D printerers to get their hands on. This PETG based material features a 20% carbon fiber content, aspiring to be the material of choice for tough parts of high stiffness. It’s a fascinating material that’s certainly worth a closer look. Let’s check it out!

Continue reading “3D Printering: XT-CF20 Carbon Fiber Filament Review”

A Trove Of 3D Printer Filament Test Data

We’re not sure what a typical weekend at [Walter]’s house is like, but we can probably safely assume that any activity taking place is at minimum accompanied by the hum of a 3D printer somewhere in the background.

Those of us who 3D print have had our experiences with bad rolls of filament. Anything from filament that warps when it shouldn’t to actual wood splinters mixed in somewhere in the manufacturing process clogging up our nozzles. There are lots of workarounds, but the best one is to not buy bad filament in the first place. To this end [Walter] has spent many hours cataloging the results of the different filaments that have made it through his shop.

We really enjoyed his comparison of twleve different yellow filaments printed side by side with the same settings on the same printer. You can really see the difference high dimensional tolerance, the right colorant mix, and good virgin plastic stock makes to the quality of the final print. Also, how transparent different brands of transparent actually are as well as the weight of spools from different brands (So you can weigh your spool to see how much is left).

The part we really liked was his list every filament he’s experienced in: PLA, ABS, PETG, Flexible, Nylon, Metal, Wood, and Other. This was a massive effort, and while his review is naturally subjective, it’s still nice to have someone else’s experience to rely on when figuring out where to spend your next thirty dollars.