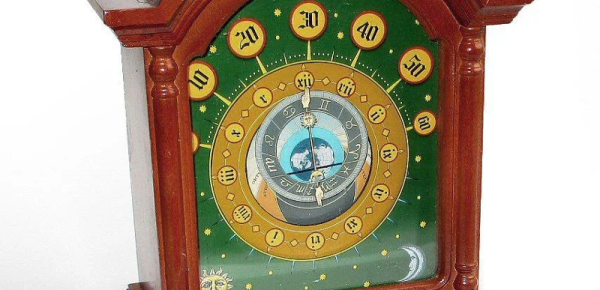
We’ll admit we are suckers for clock projects, and the more unusual, the better. We liked the look of [Peter Balch’s] astronomical clock, especially since it was handcrafted and was a relatively simple mechanism. [Peter] admits that it looks like an astronomical clock, but it isn’t the same as a complex instrument from medieval times. Instead, it uses several standard clock motors modified.
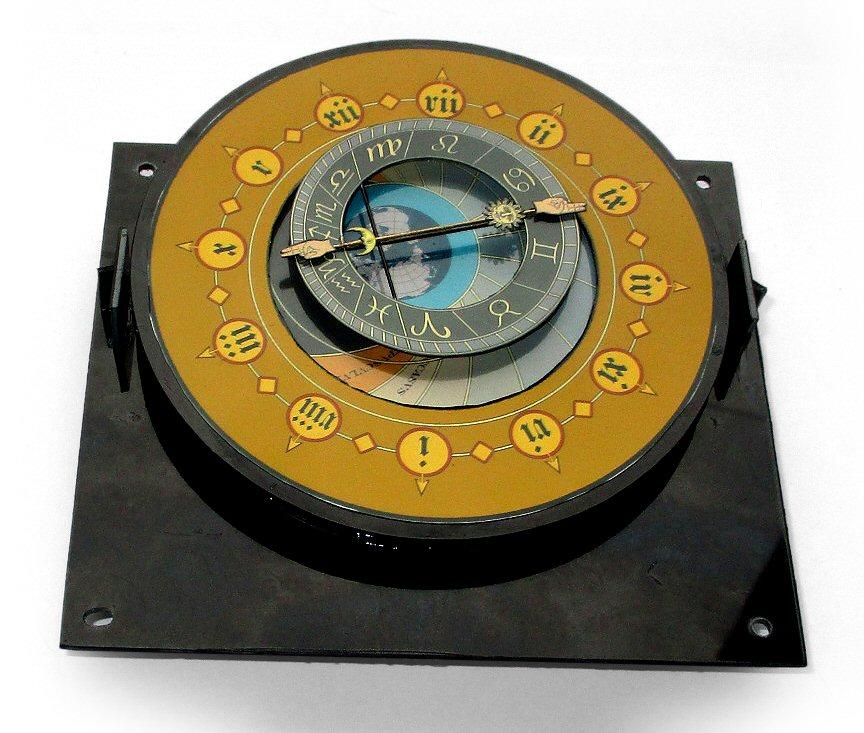
We didn’t quite follow some of the explanations for the rotation of the different elements, but the animated GIF cleared it all up. The inner and outer discs are geared at a 6:5 ratio. It takes 2 hours for the inner disc to make one rotation, meaning that every 12 hours the two discs will be back to where they began relative to one another.
Modifying the motors is fine work, requiring a good bit of disassembly and some glue. The electronics that make it tick are quite interesting. To drive the motors, a very specific pulse train is needed, but you also want to conserve battery as much as possible. A simple oscillator with a hex inverter drew more power than desired and an Arduino, even more so. A PIC12F629, though, could sleep a lot and do the job for a very low current consumption. The final clock should run a year on two AA cells.
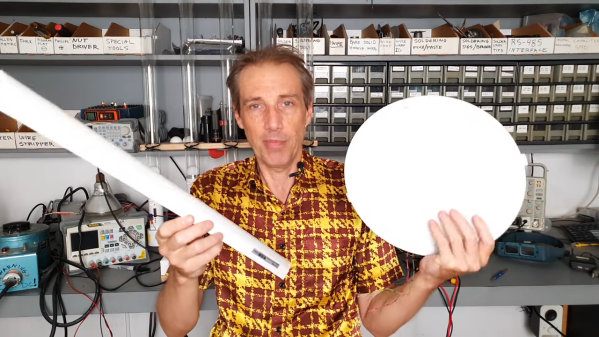
For most of us, the solution to having a non-dimmable LED light bulb but needing a dimmable one is a simple as a drive to the store to get the right kind of bulb. But that seems downright boring, not to mention wasteful, so when [Leo Fernekes] was faced with this problem, he looked for a way to make a non-dimmable bulb dimmable.
To be fair, there was a financial aspect to this hack, too. [Leo] had a bunch of cheap non-dimmable light fixtures he wanted to put to use. He started with a teardown and reverse-engineering of a light strip, which contains little more than LEDs and a small buck converter. His analysis of the circuit led him to a solution for dimming the light: inserting a MOSFET as a shunt around the LEDs. That and the addition of a diode to isolate the LEDs from the current regulator would allow for simple PWM-control of the lights via a microcontroller.
As is typical with these things, there were complications. [Leo] found that a timing problem resulted in flickering LEDs; the fix came from adding a sync circuit that cleverly leveraged a flip-flop inside the PIC16 microcontroller he chose for the circuit. His prototype incorporates these modifications, plus an interface that supports the DALI protocol for architectural lighting control. As always, [Leo] is quick to point out that mixing line voltage into your projects is not without risks, which he takes pains to mitigate. And as is also typical for his projects, [Leo] gives just the right amount of detail to understand the theory behind his design.
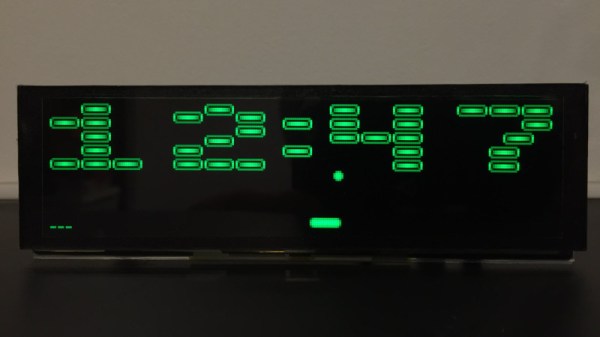
A clock can be a simple device that keeps you aware of the current time, but it can also be so much more. It can express an aesthetic ideal from yesteryear, or be a throwback to a popular cultural touchstone. It can even be both, in the case of the brilliant Arkaclock from [Victor Serrano].
The build started when [Victor] wished to create an old-school arcade-style game. Aiming to work with limited hardware, just like the pioneers, he settled on using the PIC18F86K22, with less than 4KB of RAM and just 64KB of program space to play with. Hooked up to a 256 x 64 OLED screen with a pleasant green glow, he set about recreating Arkanoid in assembly language.
With this done, [Victor] noted that the retro-looking display was rather pleasant. At this point, the device was repurposed into a clock, with the program generating an Arkanoid level in the shape of the current time. The AI would then play the game, destroying the bricks each minute before the level changed.
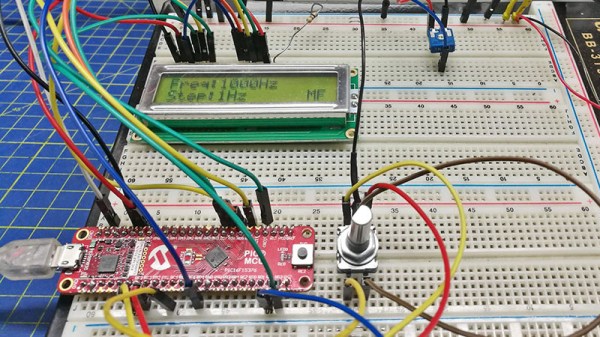
When we use a microcontroller to flip a few GPIOs or talk SPI to a peripheral chip, we are often overlooking that it will usually contain an array of built-in peripherals that were once the preserve of extra hardware. Analogue ports, timers, UARTs, and clock generators, to name just a few. [Giovanni Bernardo] has been experimenting with one of these, the internal frequency synthesiser on many PIC microcontrollers, and he’s produced a handy square wave generator for which he’s placed code on GitHub and produced a write-up (Italian language, Google translate link).
The board used is a PIC16F375 Curiosity Nano, and code takes input from a rotary encoder to set the frequency, with a button to select different step sizes and an alphanumeric LCD display to show the current settings. Frequencies from 1 Hz to 15 MHz are possible, with a clever switch between two of the PICs internal clocks to be used as the reference frequency. Stability depends upon whatever source the PIC uses for its own clock, and while we suspect that will be enough for most users it’s not inconceivable that the PIC could be clocked from a GPS-disciplined source or similar were there a requirement for it.
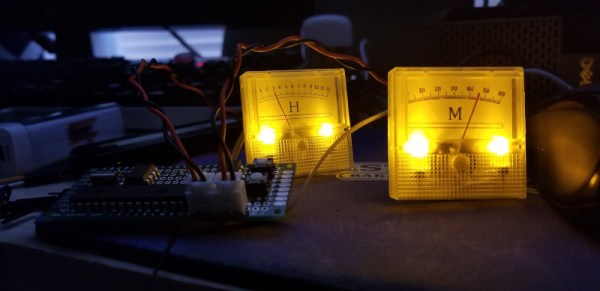
The microcontroller at the heart of the build is a PIC16F886. An 8-bit micro from the Microchip brand, it features no Arduino bootloader or USB interface, being flashed via a dedicated programmer. This is combined with a DS1302 real-time clock to keep accurate time, and a MCP4922 DAC which is responsible for generating the output to drive the dials. The dials themselves are sourced from eBay, being simple voltmeters. They’re given a new backing to display hours and minutes instead of volts, and backlit with LEDs for style.
In this day and age, we’re more used to seeing high-end micros used with integrated DACs and USB programming, but it’s nice to see the parts of yesteryear being used, too. It’s not the first clock we’ve seen from [sjm4306], either. Video after the break.
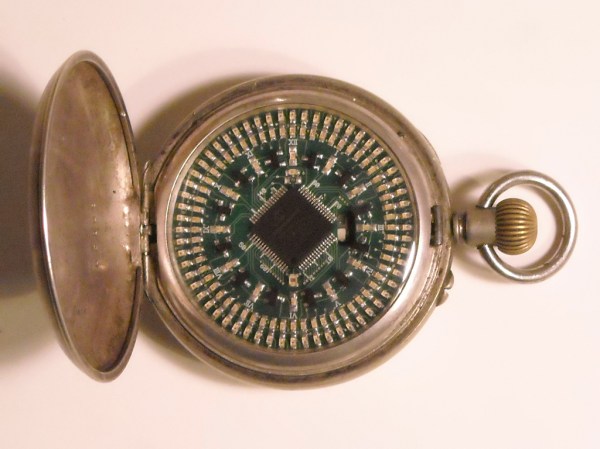
Here at Hackaday we have a bit of a preoccupation with timepieces. Maybe it’s the deeply personal connection to an object you wear on your body, or the need for ultimate reliability. Perhaps it’s just a fascination with the notion of time itself. Whatever the case, we don’t seem to be alone as there is a constant stream of time-related projects coming through our virtual doors. For this article we’ve unearthed the LED Pocketwatch 1.0 by [Dr. Pauline Pounds] from way back in 2009 (ironically via a post about a wristwatch from last year!). Fortunately for us the Internet Archive has saved this heirloom nouveau from the internet dustbin so we can appreciate the craftsmanship involved in [Dr. Pounds]’ work.
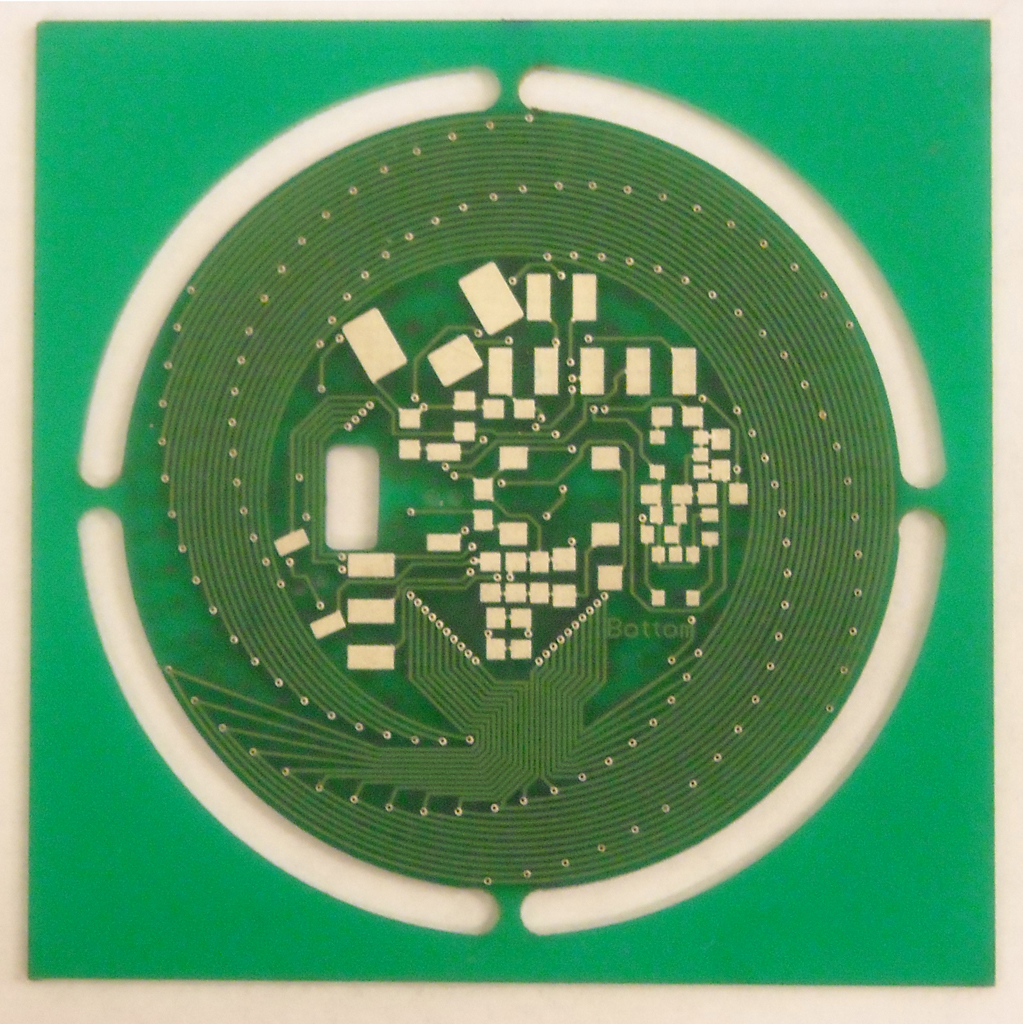
Check out the wonderful, spiral routing!
My how far we’ve come; a decade after this project was posted a hacker might choose to 3d print a case for a new wearable, but in 2009 that would have been an entire project by itself! [Dr. Pounds] chose to use the casing from an antique Elgin pocket watch. Even through the mists of a grainy demo video we can imagine how soft the well-worn casing must be from heavy use. This particular unit was chosen because it was a hefty 50mm in diameter, leaving plenty of room inside for a 44mm double sided PCBA with 133 0603 LEDs (60 seconds, 60 minutes, 12 hours), a PIC 16F946, an ERM, and a 110mAh LiPo. But what really sets the LED Pocketwatch 1.0 apart is the user interface.
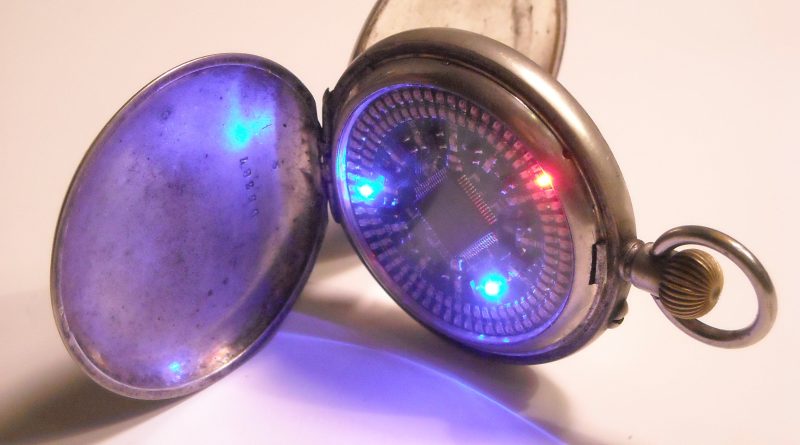
The ERM is attached directly to the rear of the case in order to best conduct vibration to the outside world. For maximum authenticity it blips on the second, to give a sense that the digital watch is mechanically ticking like the original. The original pocket watch was designed with a closing lid which is released when the stem is pressed. [Dr. Pounds] integrated a button and encoder with the end of the stem (on the PCBA) so the device can be aware of this interaction; on lid open it wakes the device to display the time on the LEDs. The real pièce de résistance is that he also integrated a minuscule rotary encoder, so when the stem is pressed you can rotate it to set the time. It’s all quite elegantly integrated and imminently usable.
At this point we’d love to link to sources, detailed drawings, or CAD files, but unfortunately we haven’t found any. If this has you inspired check out some of the otherpocket watches we’ve posted about in the past. If you’re interested in a live demo of the LED Pocketwatch 1.0, check out the original video after the break.
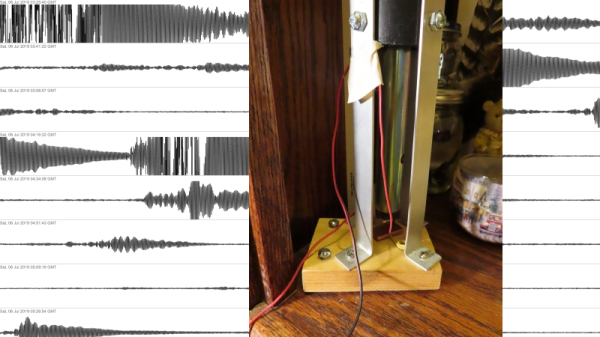
When an earthquake strikes, it’s usually hard to miss. At least that’s the case with the big ones; the dozens or hundreds of little quakes that go largely unnoticed every day are interesting too, and make sense to track. That’s usually left to the professionals, with racks of sensitive equipment and a far-flung network of seismic sensors. That doesn’t mean you can’t keep track of doings below your feet yourself, with something like this DIY seismograph.
Technically, what [Alex] built is better called a “seismic detector” since it’s not calibrated in any way. It’s just a simple sensor for detecting ground vibrations, whether they be due to passing trucks or The Big One. [Alex] lives in California, wedged between the Hayward, Calaveras, and San Andreas faults in San Jose, so there is plenty of opportunity for testing his device. The business end is a simple pendulum sensor, with a heavy metal bob hanging from a long wire inside a length of plastic pipe. Positioned close to the bob is a copper plate; the bob and the plate form an air-dielectric variable capacitor that controls the frequency of a simple 555 oscillator. The frequency is measured by a PIC microcontroller and sent to a Raspberry Pi, which displays the data on a graph. You can check in on real-time seismic activity in San Jose using the link above, or check out historical quakes, like the 7.1 magnitude Ridgecrest quake in July. [Alex]’s sensor is sensitive enough to pick up recent quakes in Peru, Fiji, and Nevada, and he even has some examples of visualizing the Earth’s core using data from the sensor. How cool is that?
 We didn’t quite follow some of the explanations for the rotation of the different elements, but the animated GIF cleared it all up. The inner and outer discs are geared at a 6:5 ratio. It takes 2 hours for the inner disc to make one rotation, meaning that every 12 hours the two discs will be back to where they began relative to one another.