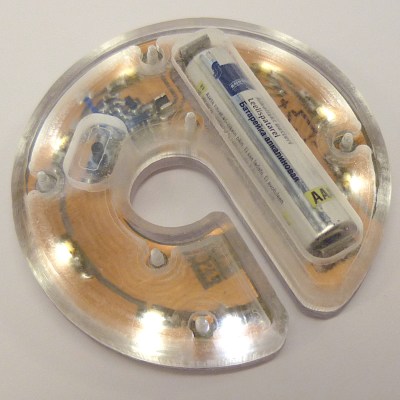
USB Power Isolator Keeps Smoke In

Anyone who’s done an electronics project knows the most important part of any good design is making sure to keep the magic smoke inside of all of the components. There are a lot of ways to make sure the smoke stays in there, but one of the most important is making sure that the power supply is isolated. If you’re using a USB port on a computer as your power source, though, it can be a little more complicated to isolate it from the computer.

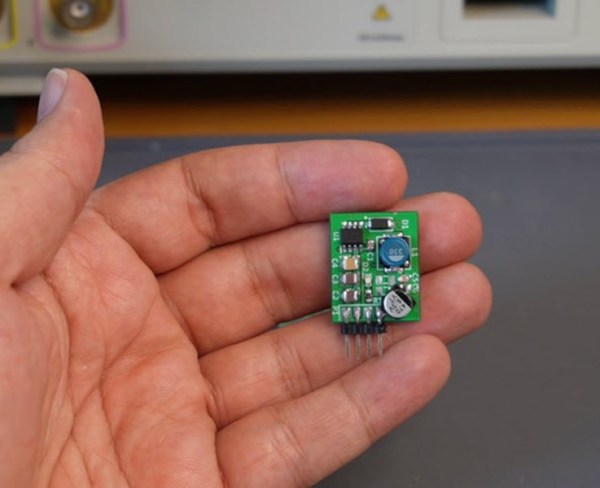
The power supply is based around a small transformer with a set of diodes to act as a rectifier. Of course, while a transformer is great at isolating power supplies, it isn’t much good at DC. That’s what the ATtiny microcontroller is for. It handles the high-speed switching of the MOSFETs, which drive the transformer and handle some power regulation. There are two different power supplies created as part of this project as well — the first generates +5V much like a normal USB plug would have, and the other creates both +5V and -5V. It will be important not to mix these two up, or that tricky blue smoke may escape.

The project page goes into extensive details on the operation of the device, so if electrical theory is of interest, this will definitely be worth a read. Isolating a valuable computer from a prototype circuit is certainly important, but if you’re looking for a way to isolate a complete USB connection, look at this build which includes isolation for a USB to FTDI adapter.

The LCD being replaced in an old laptop

Hackaday Prize 2022: Repairing A Vintage Laptop With Modern Components

Laptop computers may be ubiquitous today, but there was a time when they were the exclusive preserve of rich businesspeople. Back in the early ’90s, the significant added cost of portability was something that few were willing to pay. As a result, not many laptops from those days survive; for those that do, keeping them running can be quite a challenge due to their compact construction and use of non-standard components.

[Adalbert] ran into these problems when he got his hands on a Toshiba T3200SXC from 1991. As the first laptop ever to feature a color TFT display, it’s very much worth preserving as an historical artifact. Sadly, the original display was no longer working: it only displayed a very faint image and went completely blank soon after. Leaky capacitors then destroyed the power supply board, leaving the laptop completely dead. [Adalbert] then began to ponder his options, which ranged from trying to repair the original components to ripping everything out and turning this into a modern-computer-in-an-old-case project.

In the end he went for an option in between, which we as preservationists can only applaud: he replaced the display with a modern one of the correct size and resolution and built a new custom power supply, keeping the rest of the computer intact as far as possible. [Adalbert] describes the overall process in the video embedded below and goes into lots of detail on his hackaday.io page.

Connecting a modern LCD screen was not as difficult as it might seem: where the old display had an RGB TTL interface with three bits per color, the new one had a very similar system with six bits per color. [Adalbert] made an adapter PCB that simply connected the three bits from the laptop to the highest three bits on the screen. A set of 3D-printed brackets ensured a secure fit of the new screen in the classic case.

The internal power supply module of a laptopFor the power supply [Adalbert] took a similar approach. He designed a PCB with several DC/DC converters that fit easily inside the computer’s case, leaving enough space to add a battery. This made the old Toshiba more portable than it ever was — believe it or not, the original T3200SXC could only be used with a mains connection.

Once the laptop was restored to working order, [Adalbert] added a few finishing touches: a sound card and speakers made it suitable as a gaming platform, and a network card gave it rudimentary online capabilities. The end result is a T3200SXC that looks and feels exactly the way it did when it was new, but with a few added features. That’s a really satisfying result: many classic laptop projects add modern computing hardware, or even completely replace the original contents. You might also want to check out [Adalbert]’s unusual 3D printer based PCB manufacturing technique that he used for the new power supply.

Continue reading “Hackaday Prize 2022: Repairing A Vintage Laptop With Modern Components”

Dual Power Supply In A Pinch

Recently I needed a dual voltage power supply to test a newly-arrived PCB, but my usual beast of a lab power supply was temporarily at a client’s site. I had a FNIRSI programmable power supply which would have been perfect, but alas, I had only one. While digging around in my junk box I found several USB-C power-delivery “trigger” boards which I bought for an upcoming project. These seemed almost too small for the task at hand, but after a little research I realized they would work quite well.

The ones I had used the Injoinic IP2721 USB-C power delivery chip, commonly used in many of these boards. Mine had been sold pre-configured for certain output voltages, but they were easy to re-jumper to the voltages I needed, +5 VDC  and +20 VDC. The most challenging aspect was physically using them — they are the size of a fingernail. This version had through-hole output pads on 0.1″ centers, so I decided to solder them to the base of a standard MTA pin header. A few crimps later and I was up and running, along with the requisite pair of USB-C cables and power adapters.

For just a few dollars each, these trigger boards are useful to have in your toolbox, both for individual projects and for use in a pinch. We reviewed these modules a couple of years ago, and check out the far more flexible PD Micro that we covered last year.

Junk I Bought: My PSU Just Won’t Do

I have an Acer monitor that I’ve owned for around 15 years, and thanks to my having paid extra at the time for the model sporting a DVI socket for HDMI compatibility it still finds a place as one of my desktop monitors. It has a power brick that supplies it with 1 2V at 4.5 A, and over the years this has developed an annoying whine. Something’s loose in the magnetics, and I really should replace it. So off to AliExpress I went, and dropped in an order for a 12 V, 5 A power brick.

It’s No Heavyweight

A PSU brick, marked as 12V 5A
So far so good…

These units are pretty standard, a box about 130 mm by 60 mm with an IEC socket at one end and a trailing cable at the other for the low voltage. I’ve had enough of them pass through my hands over the years to know what to expect, so I was dismayed to find when I received my PSU that it was suspiciously light. 86 g compared to the around 250 g I’d expect, so I began to smell a rat. Time for a teardown, and a descent into the world of small switch-mode mains power supplies.

Normally it should be easier to break into Fort Knox than to crack open a mains power supply, because for safety they are ultrasonic welded together. The few times I’ve done it have required some Dremel time and a bit of swearing, so when this case turned out to open fairly easily by levering with a screwdriver it was evident this wasn’t a high-quality item. Sure enough my suspicions were confirmed, for there inside was a much smaller board. It’s clear this isn’t a 5 A power supply, so just what have I received? Continue reading “Junk I Bought: My PSU Just Won’t Do”

Laptop USB-C Charging Hack Lets You Leave The Brick At Home

At their best, laptops are a compromise design. Manufacturers go to great lengths to make the slimmest, lightest, whatever-est laptops possible, and the engineering that goes into doing so is truly amazing. But then they throw in the charger, which ends up being a huge brick with wire attached to it, and call it a day.

Does it have to be that way? Probably, but that doesn’t mean we can’t try to slim down the overall footprint of laptops at least a little. That’s what [Joe Gaz] did when he hacked his laptop to allow for USB-C charging. Tired of the charger anchoring down his HP X360, [Joe] realized that he could harvest the PCB from a USB-C charger adapter dongle and embed it inside his laptop. We’ve seen similar modifications made to Thinkpads in the past, and it’s good to see the process isn’t that far removed with other brands.

After popping open the laptop, which is always an adventure in reverse mechanical engineering, he found that removing the OEM charger jack left just enough room for the USB-C charger. Mounting the board required a 3D printed bracket, while enlarging the original hole in the side of the laptop case took some cringe-inducing work with a file. It looked like it was going to be pretty sloppy at first, but he ended up doing a pretty neat job in the end. The whole modification process is in the video below.

The end result is pretty slick — [Joe] can now carry a much more compact USB wall-wart-style charger, or eschew the charger altogether and rely on public USB charging stations. Either way, it sure beats lugging a brick around. If you’re interested in laptop hacking, or even if you just want to harvest the goodies from a defunct machine, check out this guide to laptop anatomy by our own [Arsenijs Picugins].

Continue reading “Laptop USB-C Charging Hack Lets You Leave The Brick At Home”

A Simple Linear Power Supply, Done Well

When reaching for a power supply design it’s normal here in 2022 to reach for a switching design. They’re lightweight, very efficient, and often available off-the-shelf at reasonable prices. Their benefits are such that it’s become surprisingly rare to see a traditional linear power supply with a mains-frequency transformer and rectifier circuit, so [ElectroBoy]’s dual voltage PSU board for audio amplifiers is worth a second look.

This type of linear power supply has an extremely simple circuit consisting of a transformer, bridge rectifier, and capacitors. The transformer isolates and steps down the AC voltage, the rectifier turns it into a rough DC, and the capacitors filter the DC to remove as much AC ripple as possible. In an audio power supply the capacitors have the dual role of filtering and providing an impulse reservoir for the supply in the event of a peak in demand imposed by the music being played. Careful selection is vital, with in this case a toroidal mains transformer and good quality capacitors being chosen.

The choice between a linear power supply such as this one and a switching design for high quality audio is by no means clear-cut, and may be something we’ll consider in our Know Audio series. The desirable properties are low noise and that impulse reservoir we mentioned, and it’s probably fair to say that while both types of power supply can satisfy them. With the extra expense of a toroidal transformer a linear supply is unlikely to be the cheaper of the two, but we suspect the balance tips in its favour due to a good linear supply being the easier to design.

Hacked DSP5005 unit showing amp-hours screen

Another DPS5005 Alternative Firmware

These cheap Chinese-built programmable power supplies are nothing new, we’ve been using them for years. They’re not particularly good power supplies, since current feedback is in software, but for some tasks they’re a great fit and you can’t argue with the price. Alternative firmware projects have also been a thing for a while too, but none we’ve seen have been quite as capable and polished as this latest DPS firmware project by [Profi-max.] We’ve not come across the source code yet, but at least the binary image is freely downloadable.Battery charge screen on hacked DPS5005

The firmware has some interesting features, such as programmable pre-sets intended for battery charging applications. In fact, there is a dedicated battery charge mode screen. We want to warn, however, that charging lithium ion batteries with this might not be at all wise, not in the least because of a lack of protection hardware in place. It would be very easy to destroy the unit or overheat a battery this way! However, if you must do this, there are a few features to help you out, such as a handy ‘counters’ screen showing approximate charge delivered.

Remote programmability is, as usual, via the easily hacked in serial port, with firmware support for Bluetooth serial modules if wired USB serial doesn’t suit. For those who like to mount things differently, the screen can be rotated by holding a key on power-up, or if you hook up a MPU6050 accelerometer/gyro module it will even do it automatically!

To update a stock DPS unit, the only requirements are access to an ST-Link compatible programmer dongle, to target the STM32 SWD programming interface, and the STM32CubeProgrammer utility. Open source alternatives to that are also available, stlink comes to mind as a good option. Once you have the module PCB popped out of its plastic casing, only three wires need tacking onto a handy set of pads to complete the connection to the programmer dongle. Pretty simple stuff.

If you’re looking for a similar project, with source immediately available, then checkout the OpenDPS project we covered a few years ago, and if you’re thinking of going crazy, building a DIY open source electronics lab, we got you covered.

Continue reading “Another DPS5005 Alternative Firmware”