Machine Learning With Microcontrollers Hack Chat

Join us on Wednesday, September 11 at noon Pacific for the Machine Learning with Microcontrollers Hack Chat with Limor “Ladyada” Fried and Phillip Torrone from Adafruit!

We’ve gotten to the point where a $35 Raspberry Pi can be a reasonable alternative to a traditional desktop or laptop, and microcontrollers in the Arduino ecosystem are getting powerful enough to handle some remarkably demanding computational jobs. But there’s still one area where microcontrollers seem to be lagging a bit: machine learning. Sure, there are purpose-built edge-computing SBCs, but wouldn’t it be great to be able to run AI models on versatile and ubiquitous MCUs that you can pick up for a couple of bucks?

We’re moving in that direction, and our friends at Adafruit Industries want to stop by the Hack Chat and tell us all about what they’re working on. In addition to Ladyada and PT, we’ll be joined by Meghna NatrajDaniel Situnayake, and Pete Warden, all from the Google TensorFlow team. If you’ve got any interest in edge computing on small form-factor computers, you won’t want to miss this chat. Join us, ask your questions about TensorFlow Lite and TensorFlow Lite for Microcontrollers, and see what’s possible in machine learning way out on the edge.

join-hack-chatOur Hack Chats are live community events in the Hackaday.io Hack Chat group messaging. This week we’ll be sitting down on Wednesday, September 11 at 12:00 PM Pacific time. If time zones have got you down, we have a handy time zone converter.

Click that speech bubble to the right, and you’ll be taken directly to the Hack Chat group on Hackaday.io. You don’t have to wait until Wednesday; join whenever you want and you can see what the community is talking about.

Cheese Grater Now Grates Cheese

If you’ve been using Apple products since before they were cool, you might remember the Power Mac G5. This was a time before Apple was using Intel processors, so compatibility issues were high and Apple’s number of users was pretty low. They were still popular in some areas but didn’t have the wide appeal they have now. The high quality of the drilled aluminum design lived on into the Intel era and gained more popularity, but the case was still colloquially known as the “Cheese Grater”. Despite not originally being able to grate cheese though, this Power Mac actually does grate cheese.

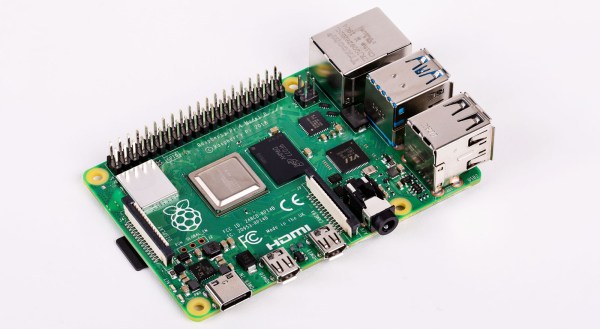
Ungrated cheese is placed in the CD drive slot where it passes through a series of 3D printed gears which grate the cheese into small chunks. The cheese grating drive is automatically started when it detects cheese via a Raspberry Pi. The Pi 4 also functions as a working desktop computer within the old G5 case, complete with custom-built I/O ports for HDMI that integrate with the case to make it look like original hardware.

Funnily enough, the Pi 4 has more computing power and memory than Apple’s flagship Mac at the time, and consumes about 100 times less power. It’s a functional build that elaborates on an in-joke in the hardware community, which we can all appreciate. Perhaps the next build should be something that uses the blue smoke for a productive purpose. Meanwhile, regular readers will remember that this isn’t the first Apple related cheese grating episode we’ve shown you.

Continue reading “Cheese Grater Now Grates Cheese”

3D-Printed Film Scanner Brings Family Memories Back To Life

There is a treasure trove of history locked away in closets and attics, where old shoeboxes hold reels of movie film shot by amateur cinematographers. They captured children’s first steps, family vacations, and parties where [Uncle Bill] was getting up to his usual antics. Little of what was captured on thousands of miles of 8-mm and Super 8 film is consequential, but giving a family the means to see long lost loved ones again can be a powerful thing indeed.

That was the goal of [Anton Gutscher]’s automated 8-mm film scanner. Yes, commercial services exist that will digitize movies, slides, and snapshots, but where’s the challenge in that? And a challenge is what it ended up being. Aside from designing and printing something like 27 custom parts, [Anton] also had a custom PCB fabricated for the control electronics. Film handling is done with a stepper motor that moves one frame into the scanner at a time for scanning and cropping. An LCD display allows the archivist to move the cropping window around manually, and individual images are strung together with ffmpeg running on the embedded Raspberry Pi. There’s a brief clip of film from a 1976 trip to Singapore in the video below; we find the quality of the digitized film remarkably good.

Hats off to [Anton] for stepping up as the family historian with this build. We’ve seen ad hoc 8-mm digitizers before, but few this polished looking. We’ve also featured other archival attempts before, like this high-speed slide scanner.

Continue reading “3D-Printed Film Scanner Brings Family Memories Back To Life”

Spot Adulterated Olive Oil With This Spectrophotometer

Olive oil at its finest quality is a product that brings alive the Mediterranean cuisine of which it is a staple. Unfortunately for many of us not fortunate enough to possess our own olive grove, commercial olive oils are frequently adulterated, diluted with cheaper oils such as canola. As consumers we have no way of knowing this, other than the taste being a bit less pronounced. Food standards agencies use spectrophotometers to check the purity of oils, and [Daniel James Evans] has created such a device using a Raspberry Pi.

A spectrophotometer shines white light through a sample to be tested, splits the light up into a spectrum with a prism or diffraction grating, and measures the light level at each point in the spectrum to gain a spectral profile of the sample. Different samples can then be compared by overlaying their profiles and looking at any differences. This build shines the light from an LED through a sample of oil, splits the result with a diffraction grating, and captures the spectrum with a Raspberry Pi camera. Commercial instruments are usually calibrated by co-incidentally sampling a pure sample of the same solvent the test subject is dissolved in, in this case the calibration is done against a sample of pure olive oil. The software requires the user to identify the spectrum in the resulting photograph, before generating a curve.

From a basis of having worked with and maintained spectrophotometers in the distant past we would have expected to see an incandescent bulb rather than an LED for a flatter response, but since this is an oil identifier rather than a finely calibrated laboratory instrument this is probably less of an issue.

Over the years we’ve had quite a few spectrophotometer projects here, this Hackaday Prize entry from 2016 is just one of many.

How To Play Doom – And More – On An NES

Doom was a breakthrough game for its time, and became so popular that now it’s essentially the “Banana For Scale” of hardware hacking. Doom has been ported to countless devices, most of which have enough processing ability to run the game natively. Recently, this lineup of Doom-compatible devices expanded to include the NES even though the system definitely doesn’t have enough capability to run it without special help. And if you want your own Doom NES cartridge, this video will show you how to build it.

We featured the original build from [TheRasteri] a while back which goes into details about how it’s possible to run such a resource-intensive game on a comparatively weak system. You just have to enter the cheat code “RASPI”. After all the heavy lifting is done, it’s time to put it into a realistic-looking cartridge.

To get everything to fit in the donor cartridge, first the ICs in the cartridge were removed (except the lockout IC) and replaced with custom ROM chips. Some modifications to the original board have to be soldered together as well, since the new chips’ pinouts don’t match perfectly. Then, most of the pin headers on the Raspberry Pi and the supporting hardware have to be removed and soldered together. Then, [TheRasteri] checks to make sure that all this extra hardware doesn’t draw too much power from the NES and overheat it.

The original project was impressive on its own, but with the Doom cartridge completed this really makes it the perfect NES hack, and also opens up the door for a lot of other custom games, including things like Mario64.

Continue reading “How To Play Doom – And More – On An NES”

Pegleg: Raspberry Pi Implanted Below The Skin (Not Coming To A Store Near You)

Earlier this month, a group of biohackers installed two Rasberry Pis in their legs. While that sounds like the bleeding edge, those computers were already v2 of a project called PegLeg. I was fortunate enough to see both versions in the flesh, so to speak. The first version was scarily large — a mainboard donated by a wifi router roughly the size of an Altoids tin. It’s a reminder that the line between technology’s cutting edge and bleeding edge is moving ever onward and this one was firmly on the bleeding edge.

How does that line end up moving? Sometimes it’s just a matter of what intelligent people can accomplish in a long week. Back in May, during a three-day biohacker convention called Grindfest, someone said something along the lines of, “Wouldn’t it be cool if…” Anyone who has spent an hour in a maker space or hacker convention knows how those conversations go. Rather than ending with a laugh, things progressed at a fever pitch.

The router shed all non-vital components. USB ports: ground off. Plastic case: recycled. Battery: repurposed. Amazon’s fastest delivery brought a Qi wireless coil to power the implant from outside the body and the smallest USB stick with 64 GB on the silicon. The only recipient of PegLeg version 1.0 was [Lepht Anonym], who uses the pronoun ‘it’. [Lepht] has a well-earned reputation among biohackers who focus on technological implants who often use the term “grinder,” not to be confused with the dating app or power tool.

Continue reading “Pegleg: Raspberry Pi Implanted Below The Skin (Not Coming To A Store Near You)”

Fixing A Cheap UPS HAT For Your Raspberry Pi With A Tiny Daemon

An uninterruptible power supply (UPS) isn’t something solely to have hooked up to your desktop PC. Your Raspberry Pi SBC might also benefit from it. Yet the available options aren’t too great, or are too expensive. This leads folk including [Joachim Baumann] to modify cheerfully cheap Chinese UPS HAT boards such as the Geekworm UPS HAT to fix its myriad of issues and missing features.

Inspired by a number of other hacks on this board which fixed things like needing to push a button on the UPS to boot the Raspberry Pi, [Joachim] set out to make a similar ATtiny-based solution that would address all issues, above all the fact that this Geekworm UPS does not detect when the connected SBC has turned off and will happily run the lithium battery pack dry. Finding a blog post by Simon who had reverse-engineered the board previously was immensely helpful. Continue reading “Fixing A Cheap UPS HAT For Your Raspberry Pi With A Tiny Daemon”