2:3 Scale VT100 Is A Perfect Pairing For PDP-8/I Replica

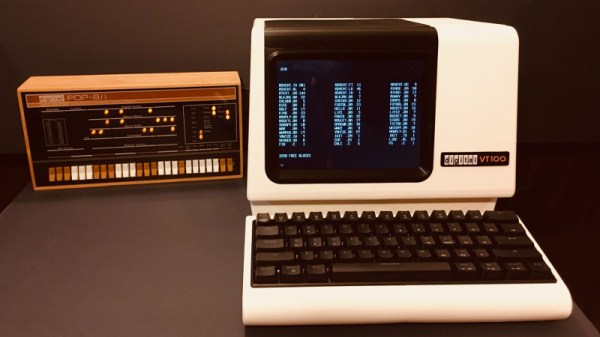
When he went shopping for a vintage serial terminal to go along with his reproduction PDP-8/I computer, [Michael Gardi] came down with a bad case of sticker shock. But rather than be discouraged, he reasoned that if his “retro” computer could stand to have modern components at its heart, so could the terminal he used to talk to it. Leaning on his considerable experience in designing 3D printed replica hardware, he’s built an absolutely gorgeous scaled down DEC VT100 terminal that any classic computer aficionado would be happy to have on their desk.

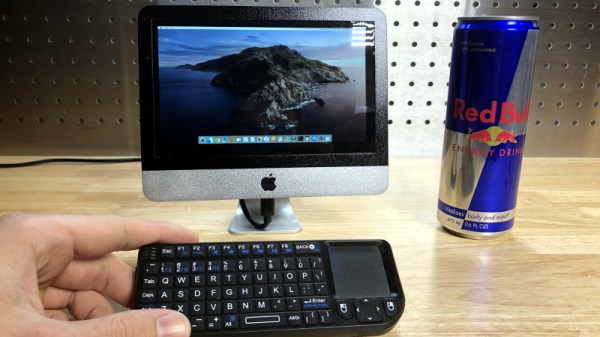
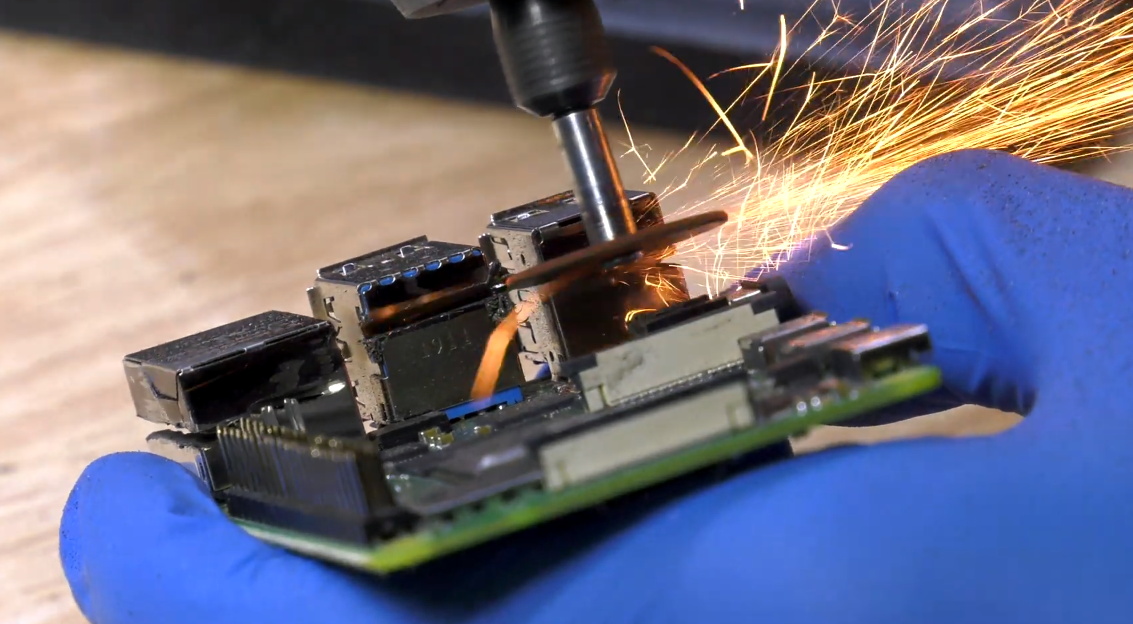
Now to be clear, [Michael] hasn’t created a true serial terminal. Since the faux PDP-8/I is running on a Raspberry Pi, all he needed to do was come up with something that could connect to its HDMI and USB ports. Put simply, he’s essentially just made a 3D printed enclosure for the Pi’s monitor and keyboard. Oh, but what a gorgeous enclosure it is.

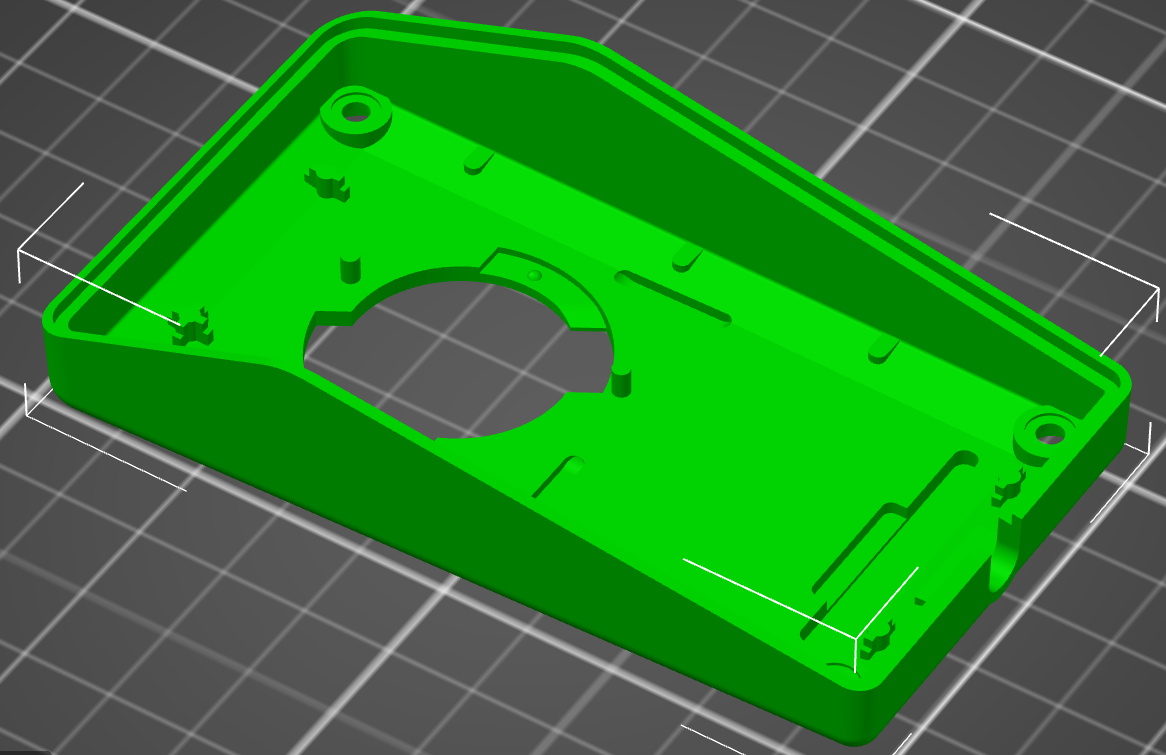
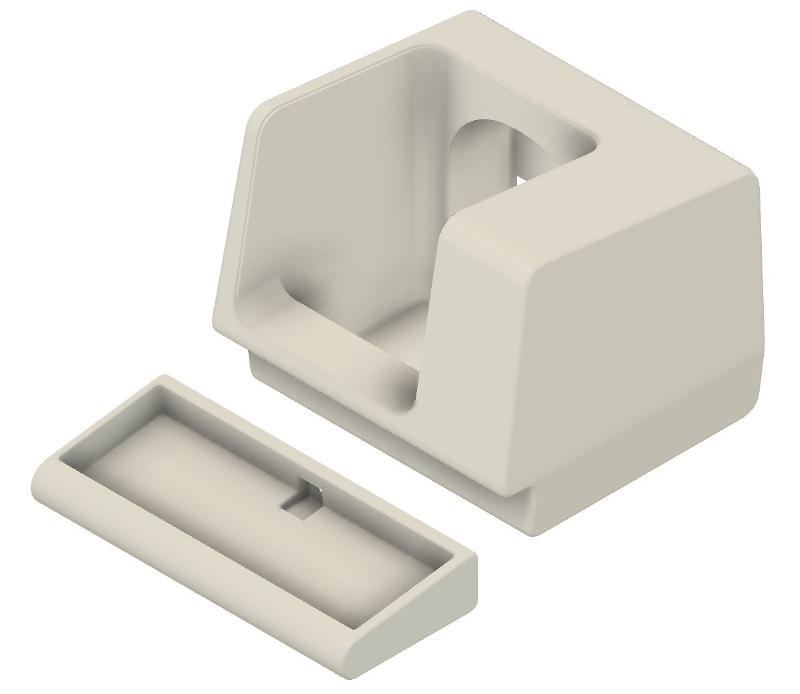
Recreating the VT100 in CAD was made more difficult by the fact that [Michael] couldn’t get his hands on the authentic hardware. But of course, that’s never stopped him before. It turns out DEC provided some very detailed dimensions for the terminal in their original documentation, and while comparing them to photographs of the actual terminal did uncover a few key differences, the overall look is spot on. Once the design was done, he reports it took two rolls of filament and more than 200 hours to print out all the parts for the enclosure.

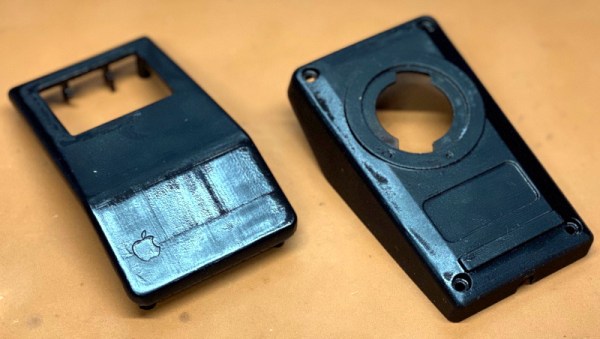
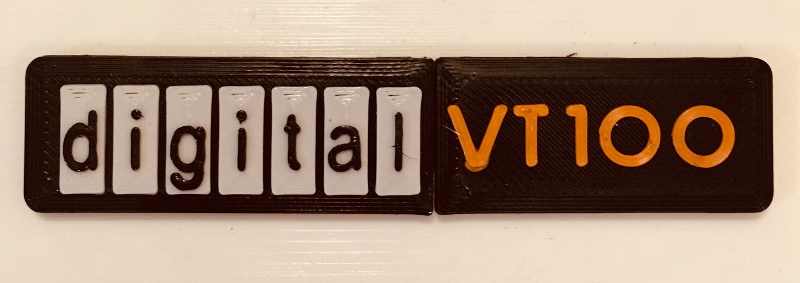
To help sell the authentic look [Michael] tracked down a 4:3 LCD of the appropriate size, and the use of an off-the-shelf portable mechanical keyboard should make text entry a pleasure. For a little fun, he even came up with a themed arcade controller for the VT100 that can be used with RetroPie. The printed logo plate is an especially nice touch, and we’re more than willing to forgive the fact that he had to print it at a larger scale than the rest of the terminal to get all the detail in with his printer’s 0.4 mm nozzle.

On a technical level, this is perhaps the most straightforward replica we’ve ever seen from [Michael]. But even on a relatively simple project like this, his signature attention to detail and craftsmanship is on full display. It’s always a good day when he’s got a new build to show off with, and we’re eager to see what he comes up with next.

Tiny Raspberry Pi Mac Nails The Apple Aesthetic

We know that some in the audience will take issue with calling a Raspberry Pi in a 3D-printed case the “World’s Smallest iMac”, but you’ve got to admit, [Michael Pick] has certainly done a good job recreating the sleek look of the real hardware. While there might not be any Cupertino wizardry under all that PLA, it does have a properly themed user interface and the general aversion to external ports and wires that you’d expect to see on an Apple desktop machine.

The clean lines of this build are made possible in large part by the LCD itself. Designed specifically for the Raspberry Pi, it offers mounting stand-offs on the rear, integrated speakers, a dedicated 5 V power connection, and a FFC in place of the traditional HDMI cable. All that allows the Pi to sit neatly on the back of the panel without the normal assortment of awkward cables and adapters going in every direction. Even if you’re not in the market for a miniature Macintosh, you may want to keep this display in mind for your future Pi hacking needs.

Well, that’s one way to do it.

Despite this clean installation, the diminutive Raspberry Pi was still a bit too thick to fit inside the 3D-printed shell [Michael] designed. So he slimmed it down in a somewhat unconventional, but admittedly expedient, way. With a rotary tool and a steady hand, he simply cut the double stacked USB ports in half. With no need for Ethernet in this build, he bisected the RJ-45 connector as well. We expect some groans in the comments about this one, but it’s hard to argue that this isn’t a hack in both the literal and figurative sense.

We really appreciate the small details on this build, from the relocated USB connectors to the vent holes that double as access to the LCDs controls. [Michael] went all out, even going so far as to print a little insert for the iconic Macintosh logo on the front of the machine. Though given the impressive work he put into his miniature “gaming PC” a couple months back, it should come as no surprise; clearly this is a man who takes his tiny computers very seriously.

Continue reading “Tiny Raspberry Pi Mac Nails The Apple Aesthetic”

Recreating Early Apple Mice For The Modern Era

At a time when practical graphical user interfaces were only just becoming a reality on desktop computers, Apple took a leap of faith and released one of the first commercially available mice back in 1983. It was criticized as being little more than a toy back then, but we all know how that particular story ends.

While the Apple G5431 isn’t that first mouse, it’s not too far removed. So much so that [Stephen Arsenault] believed it was worthy of historic preservation. Whether you want to print out a new case to replace a damaged original or try your hand at updating the classic design with modern electronics, his CAD model of this early computer peripheral is available under the Creative Commons license for anyone who wants it.

The model is exceptionally well detailed.

[Stephen] tells us that he was inspired to take on this project after he saw new manufactured cases for the G5431 popping up online, including a variant made out of translucent plastic. Realizing that a product from 1986 is old enough that Apple (probably) isn’t worried about people cloning it, he set out to produce this definitive digital version of the original case components for community use.

With these 3D models available, [Stephen] hopes that others will be inspired to try and modify the iconic design of the G5431. Perhaps by creating a Bluetooth version, or adding the ability to right-click. Considering we’ve already seen custom PCBs for mice, it’s hardly a stretch. We’d love to see somebody take him up on the offer, but even if not, the digital preservation of computer history is always welcome.

CBS Announces Functional Tricorder Replica For 2021

It’s taken 54 years, but soon, you’ll finally be able to buy a fully-functional version of the tricorder from Star Trek. Announced on the official website for the legendary sci-fi franchise, the replica will be built by The Wand Company, who’ve previously produced a number of high-quality official Star Trek props as well as replicas for Doctor Who and the Fallout game series.

Admittedly, we’re not sure what a “fully-functional tricorder” actually is, mainly because the various on-screen functions of the device were largely driven by whatever bind Kirk and Spock managed to find themselves in that week. But the announcement mentions the ability to scan radio frequencies, pull in dynamic data from environmental sensors, and record audio. The teaser video after the break doesn’t give us any more concrete information than the announcement, but it does seem to confirm that we’ll be viewing said data on the device’s iconic flip-up display.

Now as the regular Hackaday reader knows, fans have been building extremely impressive “functional” tricorders for some time now. Unlike the sleek 24th century versions seen in Star Trek: The Next Generation, the original tricorder prop was rather clunky and offers plenty of internal volume for modern goodies. Cramming a Raspberry Pi, LCD, and a bunch of sensors into an inert replica is a relatively approachable project. So it will be interesting to see how the official version stacks up to what’s already been done by intrepid hackers and makers.

The official tricorder won’t be available until summer of 2021, but you can sign up to be notified when it’s your turn to beam one up. While the $250 USD sticker price might keep the more casual Trekkers at bay, it’s actually a bit cheaper than we would have assumed given the amount of time and money we’ve seen fans put into their own builds.

Continue reading “CBS Announces Functional Tricorder Replica For 2021”

Fun-Size Tesla Might Be The World’s Smallest

We get all kinds of tips about “the world’s something-est” widget, which normally end up attracting the debunkers in droves. So normally, we shy away from making superlative claims about a project, no matter how they bill themselves. But we’re comfortable that this is the world’s smallest Tesla, at least if we have to stretch the definition of Tesla a bit.

This clown-car version of the Tesla Model S that [Austin] built is based around a Radio Flyer replica of the electric sedan. The $600 battery-powered original doesn’t deliver exactly the same neck-snapping acceleration of its full-size cousin, so he stripped off the nicely detailed plastic body and put that onto a heavily modified go-cart chassis. The tiny wheelbase left little in the way of legroom, but with the seat mounted far enough back into the wheelie-inducing zone, it was possible for [Austin] to squeeze in. He chose to pay homage to Tesla’s battery pack design and built 16 modules with fourteen 18650 cells in each, a still-substantial battery for such a small vehicle. Hydraulic brakes were also added, a wise decision since the 4800 Watt BLDC is a little snappier than the stock motor, to say the least. The video below shows the build, as well as a dangerous test ride where the speed read 72 at one point; we’re not sure if that’s MPH or km/h, but either way, it’s terrifying. The drifts were pretty sick too.

It seems [Austin] has the need for speed, and for drifting.  We’ve seen his water-cooled electric drift trike before, as well as his ridiculously overpowered crazy cart.

Continue reading “Fun-Size Tesla Might Be The World’s Smallest”

A Modern Take On The “Paperclip Computer”

Back in 1968, a book titled “How to Build a Working Digital Computer” claimed that the sufficiently dedicated reader could assemble their own functioning computer at home using easily obtainable components. Most notably, the design utilized many elements that were fashioned from bent paperclips. It’s unclear how many readers actually assembled one of these so-called “Paperclip Computers”, but today we’re happy to report that [Mike Gardi] has completed his interpretation of the 50+ year old homebrew computer.

A view behind the computer’s ALU

The purist might be disappointed to see how far [Mike] has strayed from the original, but we see his embrace of modern construction techniques as a necessary upgrade. He’s recreated the individual computer components as they were described in the book, but this time plywood and wheat bulbs have given way to 3D printed panels and LEDs. While the details may be different, the end goal is the same: a programmable digital computer on a scale that can be understood by the operator.

To say that [Mike] did a good job of documenting his build would be an understatement. He’s spent the last several months covering every aspect of the build on Hackaday.io, giving his followers a fantastic look at what goes into a project of this magnitude. He might not have bent many paperclips for his Working Digital Computer (WDC-1), but he certainly designed and fabricated plenty of impressive custom components. We wouldn’t be surprised if some of them, such as the 3D printed slide switch we covered last month, started showing up in other projects.

While the WDC-1 is his latest and certainly greatest triumph, [Mike] is no stranger to recreating early digital computers. We’ve been bringing you word of his impressive replicas for some time now, and each entry has been even more impressive than the last. With the WDC-1 setting the bar so high, we can’t wait to see what he comes up with next.

Continue reading “A Modern Take On The “Paperclip Computer””

A Replica From WarGames, But Not The One You Think

Remember the WOPR from WarGames? The fictional supercomputer that went toe-to-toe with Matthew Broderick and his acoustic coupler was like a love letter to the blinkenlight mainframes of yesteryear, and every hacker of a certain age has secretly yearned for their own scaled down model of it. Well…that’s not what this project is.

The [Unexpected Maker] is as much a WarGames fan as any of us, but he was more interested in recreating the red alphanumeric displays that ticked along as the WOPR was trying to brute force missile launch codes. These displays, complete with their thoroughly 1980s “computer” sound effects, were used to ratchet up the tension by showing how close the supercomputer was to kicking off World War III.

The display as it appeared in the film.

Of course, most us don’t have a missile silo to install his recreated display in. So when it’s not running through one of the randomized launch code decoding sequences, the display doubles as an NTP synchronized clock. With the retro fourteen segment LEDs glowing behind the smoked acrylic front panel, we think the clock itself is pretty slick even without the movie references.

Beyond the aforementioned LEDs, [Unexpected Maker] is using a ESP32 development board of his own design called the TinyPICO. An associated audio “Shield” with an integrated buzzer provides the appropriate bleeps and bloops as the display goes through the motions. Everything is held inside of an understated 3D printed enclosure that would look great on the wall or a desk.

Once you’ve got your launch code busting LED clock going in the corner, and your illuimated DEFCON display mounted on the wall, you’ll be well on the way to completing the WarGames playset we’ve been dreaming of since 1983. The only way to lose is to not play the game! (Or something like that…)

Continue reading “A Replica From WarGames, But Not The One You Think”