Using light to 3D print liquid resins is hardly a new idea. But researchers at the University of Texas at Austin want to double down on the idea. Specifically, they use a resin with different physical properties when cured using different wavelengths of light.
Natural constructions like bone and cartilage inspired the researchers. With violet light, the resin cures into a rubbery material. However, ultraviolet light produces a rigid cured material. Many of their test prints are bio-analogs, unsurprisingly.
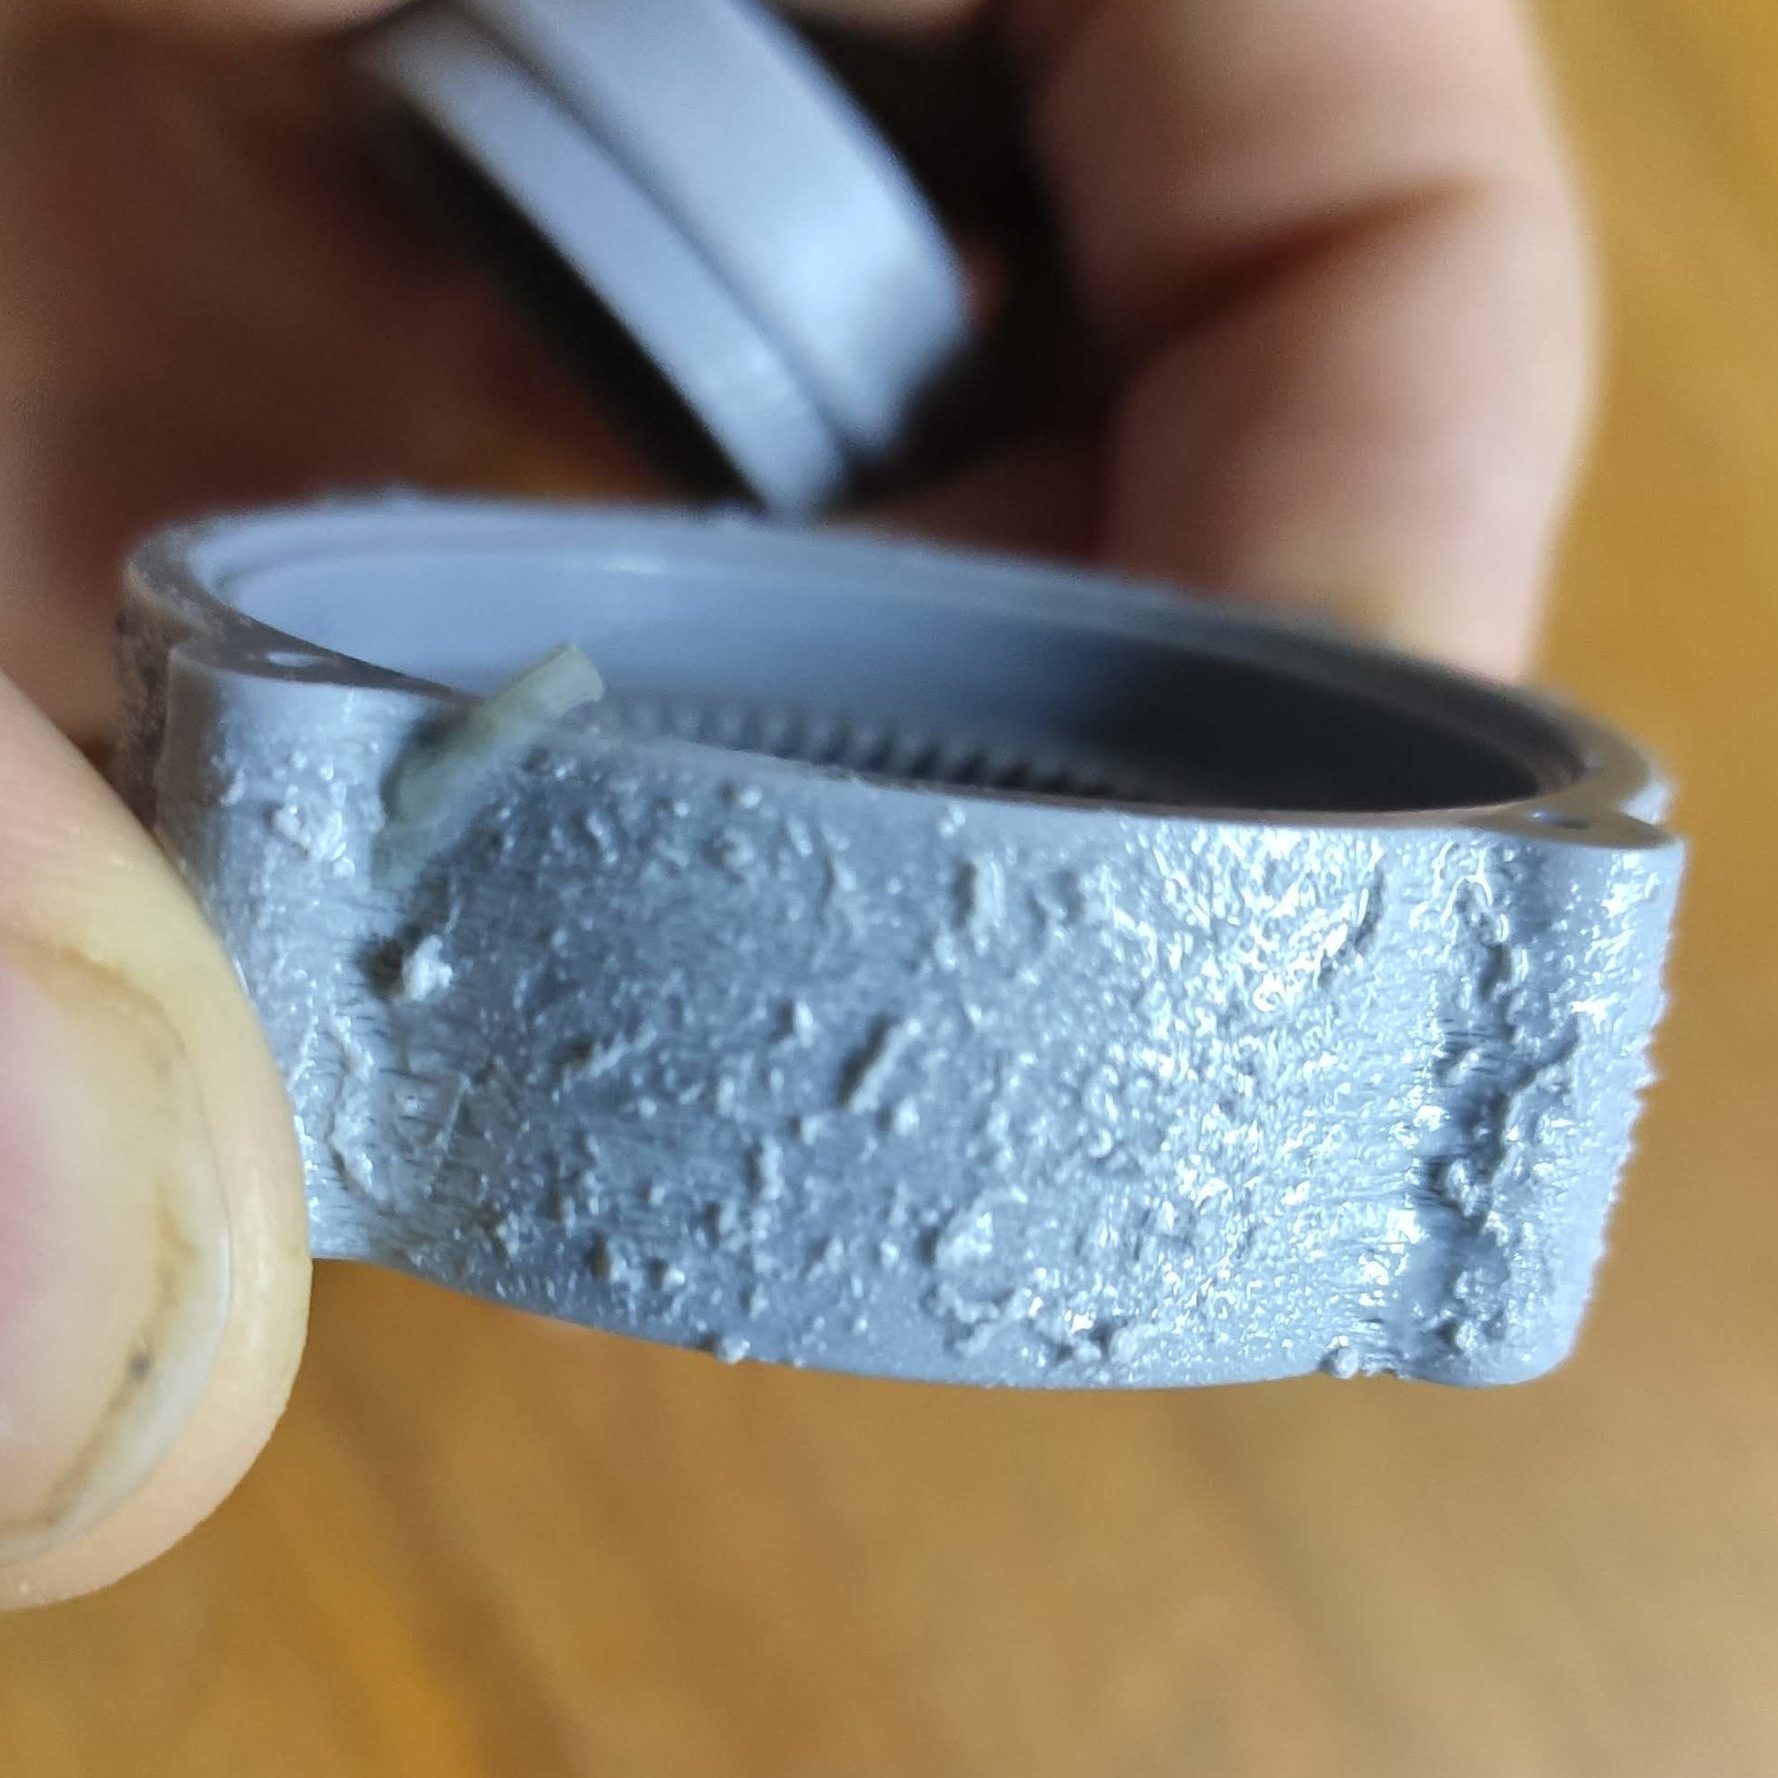
For most of us, mirrors are something we buy instead of build. However, [Unnecessary Automation] wanted to craft mirrors of his own for a custom telescope build. As it turns out, producing optically-useful mirrors is not exactly easy.
For the telescope build in question, [Unnecessary Automation] needed a concave mirror. Trying to get that sort of shape with glass can be difficult. However, there’s such a thing as a “liquid mirror” where spinning fluid forms into a parabolic-like shape. Thus came the idea to spin liquid resin during curing to try and create a mirror with the right shape.
That didn’t quite work, but it inspired a more advanced setup where a spinning bowl and dense glycerine fluid was used to craft a silicone mold with a convex shape. This could then be used to produce a resin-based mirror in a relatively stationary fashion. From there, it was just necessary to plate a shiny metal layer on to the final part to create the mirror effect. Unfortunately, the end result was too messy to use as a viable telescope mirror, but we learn a lot about what didn’t work along the way.
The video is a great journey of trial and error. Sometimes, figuring out how to do something is the fun part of a project, even if you don’t always succeed. If you’ve got ideas on how to successfully spin cast a quality mirror, drop them in the comments below. We’ve seen others explore mirror making techniques before, too.
If you had asked us yesterday “How do you 3D Print a Photo”, we would have said “well, that’s easy, do a lithophane”– but artist, hacker and man with a very relaxing voice [Wyatt Roy] has a much more impressive answer: Gaussian splats, rendered in resin.
Gaussian splats are a 3D scanning technique aimed at replicating a visual rather than geometry, like the mesh-based 3D-scanning we usually see on Hackaday. Using photogrammetry, a point cloud is generated with an associated 3D Gaussian function describing the colour at that point. Blend these together, and you can get some very impressive photorealistic 3D environments. Of course, printing a Gaussian smear of colour isn’t trivial, which is where the hacking comes in.
Do you like high-detail 3D models intended for resin printing, but wish you could more easily print them on a filament-based FDM printer? Good news, because [Jacob] of Painted4Combat shared a tool he created to make 3D models meant for resin printers — the kind popular with tabletop gamers — easier to port to FDM. It comes in the form of a Blender add-on called Resin2FDM. Intrigued, but wary of your own lack of experience with Blender? No problem, because he also made a video that walks you through the whole thing step-by-step.
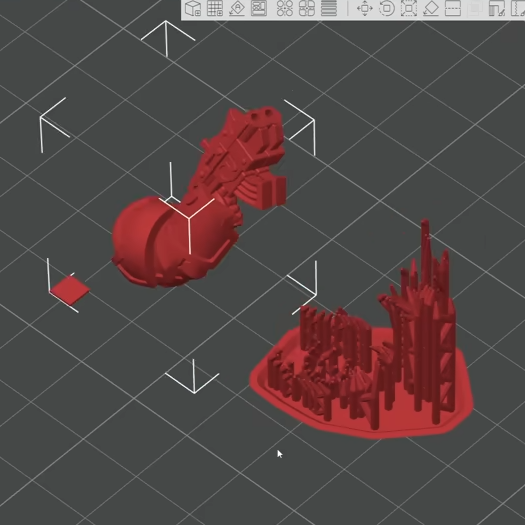
Resin2FDM separates the model from the support structure, then converts the support structure to be FDM-friendly.
3D models intended for resin printing aren’t actually any different, format-wise, from models intended for FDM printers. The differences all come down to the features of the model and how well the printer can execute them. Resin printing is very different from FDM, so printing a model on the “wrong” type of printer will often have disappointing results. Let’s look at why that is, to better understand what makes [Jacob]’s tool so useful.
Rafts and a forest of thin tree-like supports are common in resin printing. In the tabletop gaming scene, many models come pre-supported for convenience. A fair bit of work goes into optimizing the orientation of everything for best printed results, but the benefits don’t carry directly over to FDM.
For one thing, supports for resin prints are usually too small for an FDM printer to properly execute — they tend to be very thin and very tall, which is probably the least favorable shape for FDM printing. In addition, contact points where each support tapers down to a small point that connects to the model are especially troublesome; FDM slicer software will often simply consider those features too small to bother trying to print. Supports that work on a resin printer tend to be too small or too weak to be effective on FDM, even with a 0.2 mm nozzle.
To solve this, [Jacob]’s tool allows one to separate the model itself from the support structure. Once that is done, the tool further allows one to tweak the nest of supports, thickening them up just enough to successfully print on an FDM printer, while leaving the main model unchanged. The result is a support structure that prints well via FDM, allowing the model itself to come out nicely, with a minimum of alterations to the original.
Resin2FDM is available in two versions, the Lite version is free and an advanced version with more features is available to [Jacob]’s Patreon subscribers. The video (embedded below) covers everything from installation to use, and includes some general tips for best results. Check it out if you’re interested in how [Jacob] solved this problem, and keep it in mind for the next time you run across a pre-supported model intended for resin printing that you wish you could print with FDM.
Was your 3D printer working fine over the summer, and now it’s not? With colder temperatures comes an overall surge in print failure reports — particularly with resin-based printers that might reside in outbuildings, basements, or garages. If you think this applies to you, don’t miss [Jan Mrázek]’s tips on improving cold-weather print results. His tips target the main reasons prints fail, helping to make the process a little more resilient overall. [Jan]’s advice is the product of long experience and experimentation, so don’t miss out.
With environmental changes comes the possibility that things change just enough to interfere with layers forming properly. The most beneficial thing overall is to maintain a consistent resin temperature; between 22 and 30 degrees Celsius is optimal. A resin heater is one solution, and there are many DIY options using simple parts. Some of the newer (and more expensive) printers have heaters built in, but most existing hobbyist machines do not.
An extreme case of blooming.
Temperature control isn’t the only thing, either. Layer formation and build plate adhesion can all be improved by adding rest times between layers. Yes, this increases print time. It also allows resin to settle before the next layer, improving adhesion and preventing blooming (a rough texture caused by an imperfect cure.) Since resin flows less readily at lower temperatures, rest times can help improve results. The best setting depends heavily on your particular setup, so [Jan] gives tips on finding optimal rest times.
Most common knowledge and advice from well-meaning communities online focuses on increasing exposure time or blaming the build plate. [Jan] feels that these are ultimately the wrong way to go about addressing failures. Usually, an environmental change (like the arrival of winter) has simply pushed a printer that was not optimized in the first place outside of its narrow comfort zone. A little optimization can set things back on track, making the printer more resilient and reliable overall.
If you’re into pushing tech boundaries from home, this one’s for you. Redditor [mi_kotalik] has crafted ‘Zero’, a custom pair of DIY augmented reality (AR) glasses using a Raspberry Pi Zero. Designed as an affordable, self-contained device for displaying simple AR functions, Zero allows him to experiment without breaking the bank. With features like video playback, Bluetooth audio, a teleprompter, and an image viewer, Zero is a testament to what can be done with determination and creativity on a budget. The original Reddit thread includes videos, a build log, and links to documentation on X, giving you an in-depth look into [mi_kotalik]’s journey. Take a sneak peek through the lens here.
Creating Zero wasn’t simple. From designing the frame in Tinkercad to experimenting with transparent PETG to print lenses (ultimately switching to resin-cast lenses), [mi_kotalik] faced plenty of challenges. By customizing SPI displays and optimizing them to 60 FPS, he achieved an impressive level of real-time responsiveness, allowing him to explore AR interactions like never before. While the Raspberry Pi Zero’s power is limited, [mi_kotalik] is already planning a V2 with a Compute Module 4 to enable 3D rendering, GPS, and spatial tracking.
It takes but an ill-fated second to break a bone, and several long weeks for it to heal in a cast. And even if you have one of those newfangled fiberglass casts, you still can’t get the thing wet, and it’s gonna be itchy under there because your skin can’t breathe. Isn’t it high time for something better?
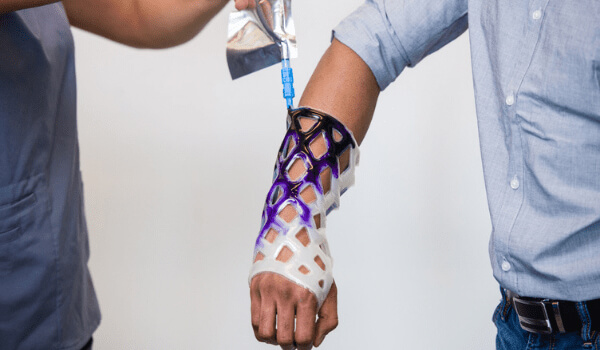
Enter Cast21, co-founded by Chief Technical Officer [Jason Troutner], who has been in casts more than 50 times due to sports injuries and surgeries. He teamed up with a biomedical design engineer and an electrical engineer to break the norms associated with traditional casts and design a new solution that addresses their drawbacks.
So, how does it work already? The latticework cast is made from a network of silicone tubes that harden once injected with resin and a catalyst mixture. It takes ten seconds to fill the latticework with resin and three minutes for it to cure, and the whole process is much faster than plaster or fiberglass.
This new cast can be used along with electrical stimulation therapy, which can reduce healing time and prevent muscle atrophy.
Cast21 is not only breathable, it’s also waterproof, meaning no more trash bags on your arm to take a shower. The doctor doesn’t even need a saw to remove it, just cut in two places along the seam. It can even be used as a splint afterward.


![[miko_tarik] wearing diy AR goggles in futuristic setting](https://hackaday.com/wp-content/uploads/2024/11/diy-ar-goggles-1200.jpg?w=600&h=450)
![[miko_tarik] wearing diy AR goggles](https://hackaday.com/wp-content/uploads/2024/11/diy-ar-goggles-smallphoto.jpg?w=400) Creating Zero wasn’t simple. From designing the frame in Tinkercad to experimenting with transparent PETG to print lenses (ultimately switching to resin-cast lenses), [mi_kotalik] faced plenty of challenges. By customizing SPI displays and optimizing them to 60 FPS, he achieved an impressive level of real-time responsiveness, allowing him to explore AR interactions like never before. While the Raspberry Pi Zero’s power is limited, [mi_kotalik] is already planning a V2 with a Compute Module 4 to enable 3D rendering, GPS, and spatial tracking.
Creating Zero wasn’t simple. From designing the frame in Tinkercad to experimenting with transparent PETG to print lenses (ultimately switching to resin-cast lenses), [mi_kotalik] faced plenty of challenges. By customizing SPI displays and optimizing them to 60 FPS, he achieved an impressive level of real-time responsiveness, allowing him to explore AR interactions like never before. While the Raspberry Pi Zero’s power is limited, [mi_kotalik] is already planning a V2 with a Compute Module 4 to enable 3D rendering, GPS, and spatial tracking.