Entombed Secrets Partially Unearthed As Researchers Dissect Clever Maze-Generating Algorithm

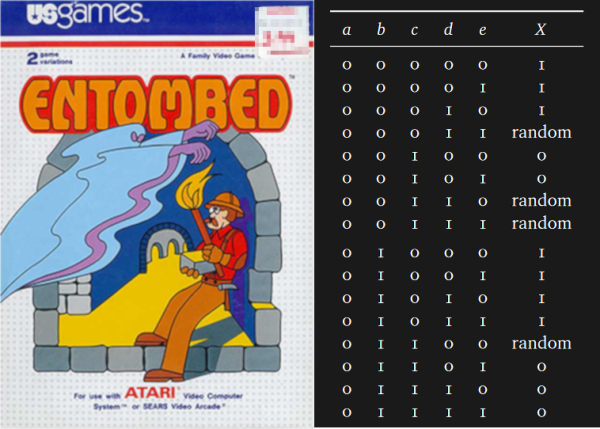
If you look at enough of another developer’s code, you will eventually say, “What were you thinking, you gosh-darn lunatic?” Now, this exchange can precede the moment where you quit a company and check into a padded room, or it can be akin to calling someone a mad genius and offering them a beer. In the case of [Steven Sidley]’s 1982 game Entombed, [John Aycock] and [Tara Copplestone] found a mysterious table for generating pseudo-random mazes and wrote a whitepaper on how it all works (PDF). The table only generates solvable mazes, but if any bits are changed, the puzzles become inescapable.

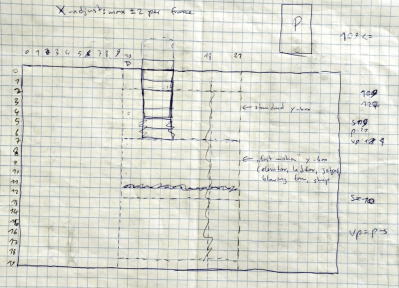
The software archaeologists are currently in a labyrinth of their own, in which the exit is an explanation of the table, but the path is overgrown with decade-old vines. The programmer did not make the table himself, and its creator’s name is buried somewhere in the maze. Game cart storage was desperately limited so mazes had to be generated on-the-fly rather than crafted and stored. Entombed‘s ad-hoc method worked by assessing the previous row and generating the next based on particular criteria, with some PRNG in places to keep it fresh. To save more space, the screen was mirrored down the center which doubles the workload of the table. Someday this mysterious table’s origins may be explained but for now, it is a work of art in its own right.

Aside from a table pulled directly from the aether, this maze game leaned on pseudo-random numbers but there is room for improvement in that regard too.

Via BBC Future.

Adding A Co-Processor To Help SNES Games With Slowdown

The Super Nintendo port of Gradius III is notable for being close to the arcade original, with its large, bright and colorful graphics. However, due to the limitation of the console’s hardware, the port is also well known for having constant slowdowns during gameplay, particularly during later sections. [Vitor] hacked away at the game and made a patched version of the ROM use a co-processor to eliminate those issues.

The slowdown seen here in Gradius is not uncommon to SNES players, many games of that era suffer from it when several sprites appear on the screen at once. This is partially due to the aging CPU Nintendo chose, supposedly in order to maintain NES backwards compatibility before the idea got scrapped. Unable to complete its tasks by the time the next frame needs to be shown, the hardware skips frames to let the processor catch up before it can continue. This is perceived as the aforementioned slowdown.

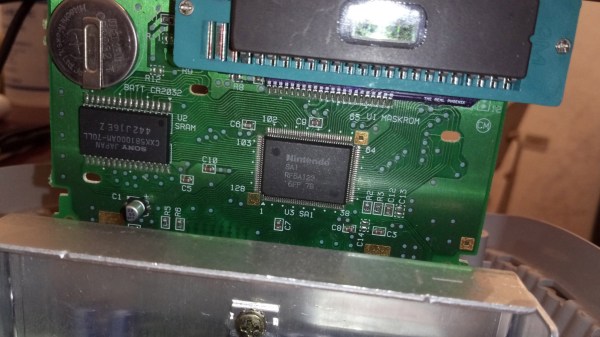
Around the later stage of the SNES’s life, games started using additional chips inside the cartridges in order to enhance the console’s performance. One of them is the SA1, which is a co-processor with the same core as the main CPU, only with a higher clock rate. By using it, games had more time to run through the logic and graphics manipulation before the next frame. What [Vitor] did was port those parts of Gradius III to the SA1, essentially making it just like any other enhanced cartridge from back in the day.

Unlike previous efforts we’ve seen to overclock the SNES by giving it a longer blanking time, this method works perfectly on real unmodified hardware. You can see the results of his efforts after the break, particularly around stage 2 where several bubbles fill the screen on the second video.

Continue reading “Adding A Co-Processor To Help SNES Games With Slowdown”

New Life For Old Nintendo Handhelds With ESP32

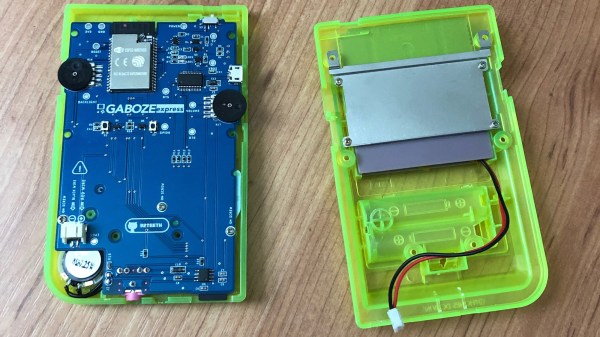
The Game Boy Pocket was Nintendo’s 1996 redesign of the classic 1989 handheld, giving it a smaller form factor, better screen and less power consumption. While it didn’t become as iconic as its predecessor, it still had enough popularity for modders such as [Eugene] to create new hardware for it. His Retro ESP32 board is a drop-in replacement for the console’s motherboard and screen, giving it a whole new life.

[Eugene] is no stranger to making this kind of mod, his previous Gaboze Pocaio project did the exact same thing with this form factor, only with a Raspberry Pi instead of the ESP32-WROVER used here. His choice of integrated SoC was based on the ODROID-GO, which is a similar portable console but with its own custom shell instead.

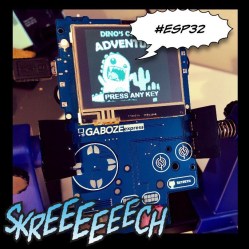
This project doesn’t stop at the hardware though, the Retro ESP32 (previously dubbed Gaboze Express) also offers a user-friendly interface to launch emulators. This GUI code can be used with the ODROID as well since they share the same hardware platform, so if you have one of those you can try it out right now from the software branch of their repository.

If the idea of replacing retro tech innards with more modern hardware is something that interests you, look at what they did to this unassuming Osborne 1, or this unwitting TRS-80 Model 100. Poor thing didn’t even see it coming.

Hail To The King, Baby: Reverse Engineering Duke

If you’re a fan of DOS games from the 1990s, you’ve almost certainly used DOSBox to replay them on a modern computer. It allows you to run software in a virtual environment that replicates an era-appropriate computer. That’s great for historical accuracy, but doesn’t do you much good if you’re trying to leverage modern computing power to breathe some new life into those classic titles. For that, you need to dig in a little deeper.

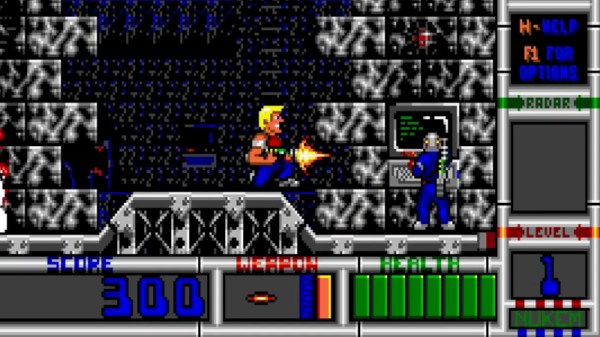
For the last two and a half years, [Nikolai Wuttke] has been doing exactly that for 1993’s Duke Nukem II. The end result is RigelEngine, an open source drop-in replacement for the original game binary that not only runs on a modern Windows, Linux, or Mac OS machine, but manages to improve on the original in a number of ways. An accomplishment made even more impressive once you learn that the original source code for the game has been lost to time, and that he had to do everything blind.

In a blog post chronicling his progress so far, [Nikolai] explains the arduous process he used to make sure his re-implementation was as accurate as possible to the original game. He spent untold hours studying the original game’s disassembled code in Ida Pro, handwriting out pages of notes and pseudocode as he tried to understand what was happening behind the scenes. Once a particular enemy or element of the game was implemented in RigelEngine, he’d record the gameplay from his version and compare it to the original frame by frame so he could fine tune the experience.

So what’s the end result of more than two years of work and over 25K lines of code? Thanks to the incredible advancements in computing power since the game’s release nearly 30 years ago, [Nikolai] has managed to remove the need for loading screens. His engine is also capable of displaying an unlimited number of particle effects on the screen at once, and multiple sound effects can now be played simultaneously. In the future he’s looking to implement smooth character movement (in the original game, movement was in 8 pixel increments) and adaptive volume for sound effects based on their distance from Duke. Ultimately, RigelEngine should be able to replace the original graphics with new high resolution textures once some issues with the rendering buffer gets sorted out.

It’s hard to overstate how important some of these classic games are to those who grew up playing them. With John Romero still releasing DLC for the original DOOM and hackers disassembling nearly 40 year old games to fix bugs, it doesn’t seem like they’re in any danger of being forgotten.

Continue reading “Hail To The King, Baby: Reverse Engineering Duke”

The ArduBoy Community Rolled Their Own Cartridge

The Arduboy, as you might have guessed from the name, was designed as a love letter to the Nintendo Game Boy that many a hacker spent their formative years squinting at. While the open source handheld is far smaller than the classic DMG-01, it retains the same general form factor, monochromatic display, and even the iconic red LED to the left of the screen. But one thing it didn’t inherit from the original was the concept of removable game cartridges. That is, until now.

Over the last year, [Mr.Blinky] and a group of dedicated Arduboy owners have been working on adding a removable cartridge to the diminutive handheld. On paper it seemed easy enough, just hang an external SPI flash chip off of the test pads that were already present on the Arduboy PCB, but to turn that idea into a practical cartridge required an immense amount of work and discussion. The thread on the Arduboy community forums covers everything from the ergonomics of the physical cartridge design to the development of a new bootloader that could handle loading multiple games.

Early cartridge prototypes.

The first problem the group had to address was how small the Arduboy is: there’s simply no room in the back to add in a cartridge slot. So a large amount of time is spent proposing different ways of actually getting the theoretical cartridge attached to the system. There was some talk of entirely redesigning the case so it could take the cartridge internally (like the real Game Boy), but this eventually lost out for a less invasive approach that simply replaced the rear of the Arduboy with a 3D printed plate that gave the modders enough room to add a male header along the top edge of the system.

As an added bonus, the cartridge connector doubles as an expansion port for the Arduboy. While perfecting the design, various forum users have chimed in with different gadgets that make use of the new port, from WS2812B LEDs to additional input devices like joysticks or a full QWERTY keyboard. Even if you aren’t interested in expanding the storage space on your Arduboy, being able to plug in new hardware modules certainly opens up some interesting possibilities.

In fact, the project so impressed Arduboy creator [Kevin Bates] that he chimed in on the topic last month to announce he would start looking into integrating the community’s cartridge modification into the production hardware. If all goes well, pretty soon there might be an official upgrade path for those who want to expand what this tiny nostalgia machine is capable of.

Continue reading “The ArduBoy Community Rolled Their Own Cartridge”

Super Mario Land DX Game Boy

Super Mario Land DX ROM Hack Shows What Game Boy Could Have Looked Like

It was about time (Mario Time) that Super Mario Land for the original Game Boy was revisited. The game served as the entry point into the world of portable gaming for millions, and it was an early example of the type of adventure players could expect from a handful of AA batteries. The original Game Boy system itself may have only been able to display four shades of grey, however, that never stopped players of Super Mario Land from imagining what the game would have looked like in stunning color. Now thanks to [toruzz] we no longer have to imagine, because their Super Mario Land DX ROM Hack does just that…and then some.

The Super Mario Land DX ROM hack adheres to the Game Boy Color’s 16-bit color palette, so it actually runs on real hardware. No changes to the gameplay were made and it also runs in the native 10:9 aspect ratio for the Game Boy. According to the patch readme file, it is recommended to use a legally sourced dump of the 1.0 version of Super Mario Land and utilize Lunar IPS to apply the patch. Additionally a CRC check sum is provided to ensure everyone is working from the same starting point.

Super Mario Land was a launch title for the Game Boy in 1989, but there was another handheld game system that released that year as well (the Atari Lynx). The Lynx featured a full color backlit LCD display, so it was not as if handheld game systems of the era were restricted to being monochromatic. Granted the Lynx came with a price tag nearly twice that of the Game Boy, but a transformative ROM hack such as the Super Mario Land DX one can serve almost as an alternate history. An alternate history that we all can experience now be it on a desktop or in true portable form.

To see the Super Mario Land DX ROM Hack in motion, there is the gameplay video from YouTube user Vincent Hernandez below:

Continue reading “Super Mario Land DX ROM Hack Shows What Game Boy Could Have Looked Like”

Thumbs Up For This CRT Handheld Gaming Console

Despite all the progress video game graphics have made, it is safe to say that we won’t see any decline in oldschool 8-bit games any time soon. For some it’s about nostalgia, for others it’s just a great and simple-enough first step into game development itself. For [gocivici] it was a bit of both when he built this camcorder style, one-button gaming console.

With a Raspberry Pi Zero running PICO-8 at its core, [gocivici] salvaged the viewfinder of an old camcorder for the display, and that way turned it into a whole other kind of handheld console. For full ergonomic handling, one single, thumb-operated push button serves as only control option. This of course makes it a bit challenging to re-use existing games that would require more input options, so he and some friends decided to just write a suitable game on their own with the hopes that others might follow.

Unfortunately we don’t see a lot of projects using these old camcorder viewfinders, and considering modern LCD and OLED options it’s not really that surprising, but there’s just something intriguing about these tiny CRTs. So in case you want to see more of them, have a look at this tiny Atari display, and the DIY night vision monocle from a few years back. And to keep your eyes safe and sound, [gocivici] got you covered as well.

Continue reading “Thumbs Up For This CRT Handheld Gaming Console”