Learn The Secrets Of Matching Bottle Cap Threads To One Another

Do you want to design something to match existing threads on a bottle, or a cap? It turns out there’s an easier way than reaching tiredly for the calipers and channeling one’s inner reverse-engineer. Bottle cap threads — whose industry term is the neck finish — aren’t arbitrary things; they are highly standardized, and [Noupoi] researched it all so that you don’t have to! The Bottle Cap Thread Calculator takes a few key measurements and spits out everything needed to model exact matches. Need some guidance on how exactly to use the information the calculator spits out? There is a handy link to a Fusion360 tutorial on creating bottle threads (YouTube video) to demonstrate.

This all came from [Noupoi] wanting to model an adapter to transfer the contents of one bottle to another, smaller bottle. By identifying which thread was used on each bottle, the job of modeling a matching adapter was much easier. It turns out that the bottle necks were an SP 28-415 (larger) and a 24-415 (smaller), and with that information the adapter was far simpler to design. If you want to check the adapter out, it’s available on Thingiverse.

If truly reverse-engineering bottle threads is needed, here’s a method we covered that involves making a simple cast and working from that.

[via Reddit]

Looking For Pi In The 8087 Math Coprocessor Chip

Even with ten fingers to work with, math can be hard. Microprocessors, with the silicon equivalent of just two fingers, can have an even harder time with calculations, often taking multiple machine cycles to figure out something as simple as pi. And so 40 years ago, Intel decided to give its fledgling microprocessors a break by introducing the 8087 floating-point coprocessor.

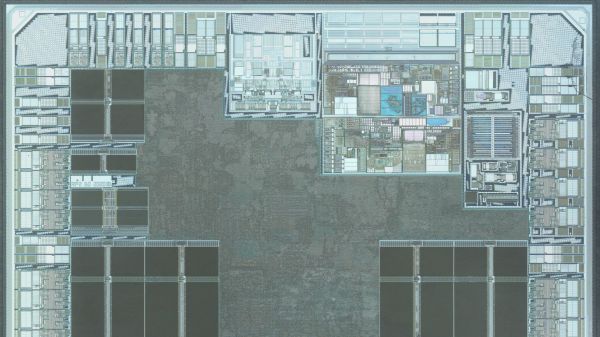
If you’ve ever wondered what was going on inside the 8087, wonder no more. [Ken Shirriff] has decapped an 8087 to reveal its inner structure, which turns out to be closely related to its function. After a quick tour of the general layout of the die, including locating the microcode engine and ROM, and a quick review of the NMOS architecture of the four-decade-old technology, [Ken] dug into the meat of the coprocessor and the reason it could speed up certain floating-point calculations by up to 100-fold. A generous portion of the complex die is devoted to a ROM that does nothing but store constants needed for its calculation algorithms. By carefully examining the pattern of NMOS transistors in the ROM area and making some educated guesses, he was able to see the binary representation of constants such as pi and the square root of two. There’s also an extensive series of arctangent and log2 constants, used for the CORDIC algorithm, which reduces otherwise complex transcendental calculations to a few quick and easy bitwise shifts and adds.

[Ken] has popped the hood on a lot of chips before, finding butterflies in an op-amp and reverse-engineering a Sinclair scientific calculator. But there’s something about seeing constants hard-coded in silicon that really fascinates us.

Poking Around Inside Of A Linux Security Camera

This deep dive into the Linux-powered Reolink B800 IP camera started because of a broken promise from its manufacturer. When [George Hilliard] purchased a kit that included six of the cameras and a video recorder, the website said they were capable of outputting standard RTSP video. But once he took delivery of the goods, and naturally after his return window had closed, the site was updated to say that the cameras can only function with the included recorder.

Taking that as something of challenge, [George] got to work. His first big break came when he desoldered the camera’s SPI flash chip and replaced it with a socket. That allowed him to easily take the chip out of the device for reading and flashing as he tinkered with modifying the firmware. After adding cross-compiled versions of busybox, gdb, and strace to the extracted firmware, he bundled it back up and flashed it back to the hardware.

If you think that’s the end of the story, it isn’t. In fact, it’s just the beginning. While getting root-level access to the camera’s OS would have potentially allowed for [George] to dump all the proprietary software it was running and replace it with open alternatives, he decided to take a different approach.

Instead of replacing the camera’s original software, he used his newly granted root powers to analyze it and figure out how it worked. This allowed for to sniff out some very suspect “encryption” routines built into the software, and eventually write his own server side in Rust that finally allowed him to use the cameras with his own server…albeit with a bit more work than he bargained for.

Projects like these are a fantastic look at real world reverse engineering, and a reminder that sometimes achieving your ultimate goal means taking the long way around. Even if you’re not in the market for a hacked security camera, there’s no doubt that reading the thorough write-up [George] has prepared will teach you a few things. But of course, we’d expect no less from a guy who runs Linux on his business card.

Reverse Engineering Saves Trashed LED Panels

While out riding his bike, [Hammond Pearce] came across a dumpster overflowing with large LED panels. Despite the fact that the model numbers didn’t reveal anything helpful after some online searching, he decided to pedal off with as many as he could safely carry. The COVID-19 lockdown left him with only a limited set of tools, be he still managed to crack the protocol used to control his e-waste score and document it for our reading pleasure.

Between the helpful labels on the PCB silkscreen and the advice of a friend that used to work on digital road signs, it didn’t take [Hammond] long to get a general idea of what the panels were looking for in terms of power and control. Especially once he noticed the MBI5024 shift registers dotting the board.

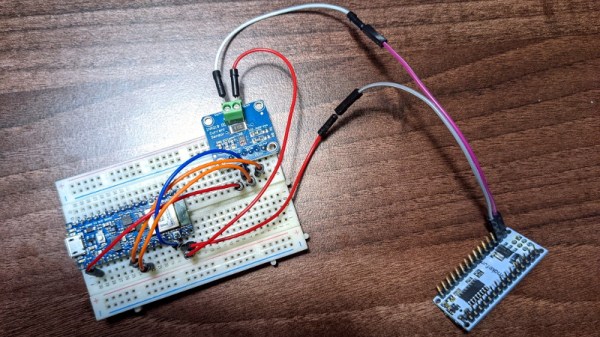
The next step was to take an ATmega328PB based development board and start throwing data at the panel’s input lines to see if he could elicit a response. With careful attention and some custom code, he eventually figured out that each byte of data sent down the line would control a 4 x 2 section of LEDs.

Once he had the basics down, the next step was to start expanding his code to handle things like shapes, text, and daisy-chained panels. After posting some of his work to Reddit, cyber-sleuths determined that the protocol appeared to be some variation of HUB75, which gave [Hammond] hints on what some of the other pins in the connector might be used for. He’s released all of his code online for anyone who might find it useful, but since he still doesn’t know who made these panels and why there’s really no telling how many of them are actually floating around out there.

Figuring out how to talk to an unknown or undocumented piece of hardware can be intimidating, but success stories like these are reminders of why it’s worth putting the effort in. As we’ve seen, the difference between trash and treasure is often a keen eye and a few lines of code.

Brain Transplant Makes One Arcade Machine Play Games From Another

We’re used to games consoles in which the same hardware plays a variety of different games, but if we were to peer inside arcade cabinets of an older vintage we’d find custom boards unique to every game. Some boards from the same manufacturers shared common hardware traits even if they weren’t identical though, and [twistedsymphony] has taken advantage of this to make one vintage Taito game — Gun & Frontier — run on the hardware for another, Ah Eikou no Koshien. It’s a fascinating tale across a forum thread, that’s well worth a read even if you will never touch a vintage arcade board.

We might expect that the tool of choice would be a logic analyser or similar, but unexpectedly the solution to this hack was found in MAME. The arcade emulator conceals a wealth of information about these boards, from which you can discover their differences and try out possible solutions. The hardware hacks are surprisingly straightforward, a few bodge wires and an extra address line for a larger ROM. A programmable logic array required dumping and rewriting to fix a graphics corruption issue and a little bit of ROM tweaking after emulating a controller problem in MAME was required, but it seems that yes, one game can run on another. Certainly less painful than the Taito hack that required a chip to be decapped.

[via r/ReverseEngineering]

How To Keep Unique Equipment Running When Parts Run Out

[JGlass] deals with public-facing technology, which he says includes things like theatre equipment, retail displays, and museum displays. Many of these pieces of technology are literally one-of-a-kind devices, even if they were constructed from what was once off-the-shelf, commercially available parts. When these machines need servicing, replacement parts aren’t always available, and reverse engineering comes in handy. He recently began documenting exactly how to approach this process by using the identification and replacement of an obsolete 7-segment industrial display as an example.

The particular part shown is the Lascar EM32-4-LED, which up and died in a unique piece of equipment. The trouble is that the EM32-4-LED is out of production and unobtainable, and the Programmable Logic Controller (PLC) that drives the whole thing is a black box that cannot be modified. It’s very good news that a datasheet exists, but that’s often just a starting point. To create a one-off, drop-in solution requires a combination of research, troubleshooting, and design work.

To do this, [JGlass] starts off by walking through datasheet elements and explains that it’s important to build a high level understanding of function first, then drill down into details, and always be ready to verify, challenge, or throw out one’s assumptions. After establishing a high level understanding comes matching physical evidence to things like block and functional diagrams, then cracking open the faulty component to see if anything else can be learned. Only then are multimeters and probes taken out for more active research. All of this sleuthing must always be done with the end goal firmly in mind: creating a new device that acts like the one being replaced. Without focus, one can easily get lost in details and unknowns.

Reverse Engineering is a process, and the more tools, the better. If you missed our earlier post about a hacker’s guide to JTAG, here’s your chance to check it out and be all the more prepared for the next time you need to do some electron detective work of your own.

Reverse Engineering A Saab’s In-Dash Display

For [Leigh Oliver], there’s something undeniably appealing about the green on black instrumentation of the 2003 Saab 9-3 Gen2. Perhaps it’s because the Infotainment Control Module 2 (ICM2) screen brings a bit of that classic Matrix vibe to the daily commute. Whatever the reason, it seemed the display deserved better than to be stuck showing the nearly 20 year old stock user interface. Luckily, you can control it via I2C.

Though as you might expect, that fact wasn’t obvious at first. [Leigh] had to start by taking the ICM2 apart and reverse engineering the display board. With a multimeter and high resolution photographs of both sides of the PCB, all of the traces were mapped out and recreated in KiCAD. This might not have been strictly necessary, but it did serve as good practice for using KiCAD; a worthwhile tip for anyone else looking to build practical experience creating schematics.

With everything mapped out, [Leigh] was able to connect a BusPirate V3 up to the board and pretty quickly determine it was using I2C to control the display. As far as figuring out how to repurpose existing displays goes, this was perhaps the best possible scenario. It even allowed for creating a display library based on Adafruit_GFX which offers graphical capabilities far beyond what the ICM2 module itself is capable of.

Even with so much progress made, this project is really just getting started. [Leigh] has managed to put some impressive imagery on the black and green Saab display, but the hardware side of things is still being worked on. For example, there’s some hope that an I2C multiplexer would allow the display to easily and quickly be switched between “stock” mode and whatever enhanced version comes about thanks to the new libraries and an ESP8266 hiding behind the dashboard.

If you don’t have a sufficiently vintage Saab to take advantage of this project, don’t worry. Tapping into the OBD port with an OLED display can get you similar results on a wide range of vehicles.