RGB Monome Clone


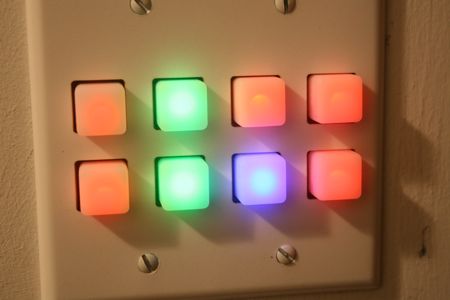
[Julien Bayle] has posted this great breakdown of building an RGB monome clone. He is a musical performer using Ableton Live. He wanted to do away with the need for a computer screen and found that the monome would have been perfect had it been RGB. So he decided to build his own.

The parts list for the entire project is as follows:

  • 1x Arduino board
  • 4x Sparkfun breakout PCB
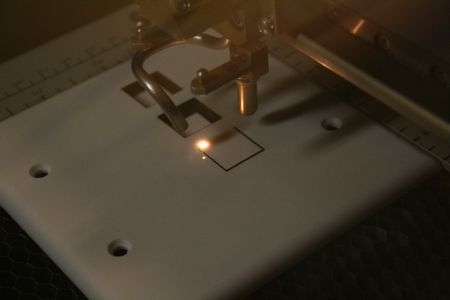
  • 4x Sparkfun buttons pads (like our door lock)
  • 4x Sparkfun buttons bezel
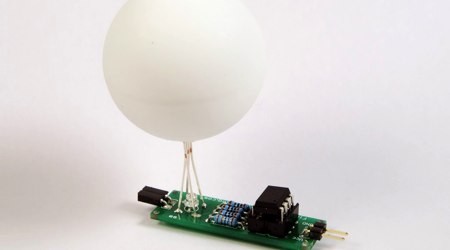
  • 64x RGB LEDs common cathode
  • 64x Diodes Small Signal (1N4148)
  • 1x MAX7221 (LED Driver)
  • 1x 74HC164 (8-Bit Serial-In, Parallel-Out Shift Register)
  • 1x 74HC165 (8-Bit Parallel-In, Serial-Out Shift Register)

He also has files for the schematics and source code as well as information on how to assemble and test it.

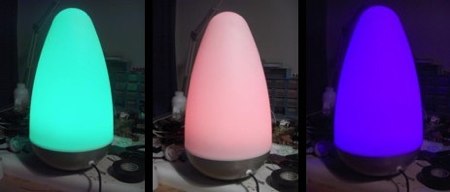
The RGB aspect is still under development. He is using the LEDMatrix-Serial Interface-RGB from Sparkfun Electronics to run it. It is expensive, but is exactly what he was looking for.

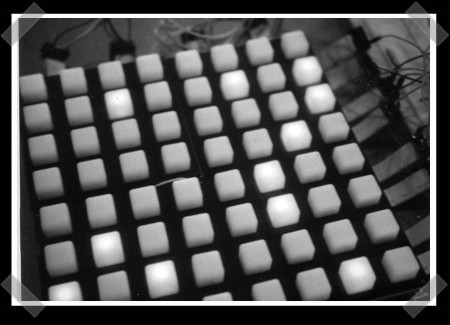
There aren’t very many pictures of the project, and none of the working RGB unit. He makes up for it in sheer information. Many parts have links to manufacturers or support forums. Hopefully he’ll post some pictures and video of the final product soon.

Synchronizing Fireflies NG


[Alex] from Tinkerlog has revisited an old project with Synchronizing Fireflies NG. Fascinated by how fireflies blink at same rate and synchronize with each other, he built a digital version. Each board has an RGB LED and a phototransistor or photoresistor. A ping-pong ball is used as a diffuser. The blink rate is controlled by an ATtiny13v. The board power can be daisy chained, but each firefly mote operates independently of the others. The microcontroller has a fixed flash rate and monitors for other flashes. It attempts to sync by flashing earlier. The color of the LED expresses how satisfied the firefly is with its current sync. You can see a video of eight fireflies attempting to self organize embedded below.

Continue reading “Synchronizing Fireflies NG”

RGB LED Cylinder

[Dave Clausen] from NYC Resistor sent in his open source RGB LED cylinder. We have seen many cubes in the past (even one that display low-res 3D video) so a cylinder is certainly a new concept and the RGB LEDs are a nice upgrade. The LEDs are wired in a 5-way multiplexed grid using four TLC5940NTs (16 channel LED drivers with internal PWM hardware) so each light is individually addressable. The best thing about this project, of course, is that he has source and EAGLE schematics availbale for download and both are licensed under Creative Commons.

[via NYC Resistor]

Tom’s RGB Mood Lamp


[Tom] has been refining a board that drives a high power RGB LED for applications like this moodlight. It’s based around an ATmega8 microcontroller. The goal was to make an RGB LED easy to work with: It can cycle between colors in standalone mode. You can control it via a serial interface. It also has a pin header to hooking up three potentiometers for manual color mixing. Boards aren’t available yet, but he’s already posted a build tutorial. The board looks straightforward enough that it shouldn’t be too hard to layout if you really want to.

How-To: Make An RGB Combination Door Lock (Part 2)


In part 1 we showed you how to build your own prototype RGB keypad. Today we’ll show off some new ideas we worked on to create the project and turn it from prototype to fully functional battle station er door lock.

Continue reading “How-To: Make An RGB Combination Door Lock (Part 2)”

RGB Etched Box

[youtube=http://www.youtube.com/watch?v=KG4PWZyR4Sk&hl=en]
[Dine909] brings us this simple glowing box made out of five etched PCBs. The PCBs control RGB LEDs inside the box, which is also filled with clear glass beads. The four walls are connected to a base controller board that has a Cypress PSoC chip for color mixing. There’s no writeup, and even though it looks a lot like the Lament Configuration, it should be a lot easier to build; any transportation to other dimensions it provides will be strictly figurative.

[via ladyada]

How-To: Make An RGB Combination Door Lock (Part 1)


Part 2 can be found here

Putting a custom designed electronic lock on your space seems like a geek right of passage. For our latest workspace, we decided to skip the boring numbered keypad and build a custom RGB backlit keypad powered by an Arduino. Instead of typing in numbers, your password is a unique set of colors. In today’s How-To, we’ll show you how to build your own and give you the code to make it all work.

Continue reading “How-To: Make An RGB Combination Door Lock (Part 1)”