A Pick-And-Place That Is A Work Of Art

It’s a Holy Grail among hackerspaces, the possession of a pick-and-place machine. These robotic helpers for placing surface-mount components on PCBs are something of a gateway to electronic production, but they can carry a fearsome cost. Happily for the cash-strapped would-be electronic manufacturer, it is possible to build a pick-and-place for yourself. [Mcuoneclipse] has demonstrated this with a rather impressive build that works with the freely available OpenPnP software.

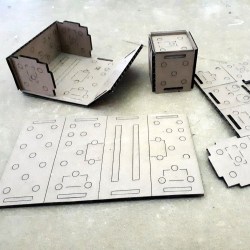
Superficially it shares much with what you might expect from a small CNC mill, in that it has a frame made from extruded aluminium that carries rails that trace an X and a Y axis supporting a tool head. But instead of a blade it has a box made from laser-cut ply that contains a camera and a vacuum pick-up tool that can collect a component from the tapes and deposit it in the correct point on the board. At the machine’s heart is a Smoothieboard, and the work is done by an assortment of solenoid valves and actuators. A huge amount of attention to detail has been paid to this build, with a holder for all the interchangeable nozzles for different component sizes, laser-cut mountings for all the motorised components, and automatic feeders for the SMD tapes all being carefully designed and built. Several iterations of the design are presented, in particular around the head itself which has passed through more than one form to remove as much vibration as possible. But don’t take it from us, have a look at the video we’ve pasted in below the break.

This isn’t the first pick-and-place machine we’ve brought you here at Hackaday. If you already have a 3D printer, would you consider this upgrade?

Continue reading “A Pick-And-Place That Is A Work Of Art”

Roboshield Helps Your Robot Walk And Talk

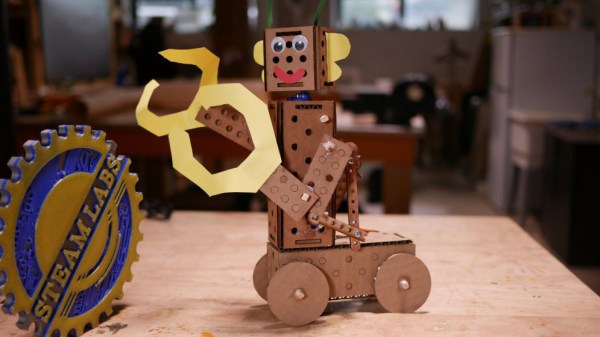
The joy of building robots comes from being able to imbue them with as much or as little personality and functionality as you wish during the design and build process. While creative flair and originality is always a good thing, there’s a lot of basic needs many robots have in common with each other, so where possible it’s good to avoid reinventing the wheel so more time can be spent on more advanced features. Roboshield aims to help make the basics easy so you can let your robot freak flag fly!

At its core, it’s an Arduino shield that packs in a host of hardware to get your robot up and running. As far as motion is concerned, a PCA9685 module is used to allow the control of 8 servos, plus there’s a TB6621FNG dual motor speed controller that offers both speed control and forward/reverse. That’s enough to get your electronic buddy scooting about the floor and waving its arms in the air.

The party piece, however, is the Vstamp text-to-speech module. This device produces a beautiful cliche electronic voice, which your robot is legally required to use to recite Asimov’s Laws of Robotics. Overall, it’s a tidy project that can take the hassle out of getting your robot design up and running, leaving you to focus on the fun bits like death rays and tractor beams. We can’t wait to see it powering the next wave of sassy DIY robots.

Drawing Lines In The Sand: Taking Beach Graffiti To The Next Level

When strolling down the beach, there’s always an urge to draw in the sand – it seems compulsory to make your mark by inscribing something. But there’s a dilemma: how do you go about physically drawing it? You could opt to remain standing and attempt to deploy a toe, but that requires a level of dexterity few possess. The only other option is to bend down and physically use your hands. Ultimately, there’s no way to draw anything in the sand without losing your dignity.

The solution? A robot, of course – the brainchild of [Ivan Miranda]. The idea is simple and elegantly executed: make a large linear actuator, place it on wheels, and attach a servo which can position an etching tool to be either in the sand or above it. The whole contraption moves forward one column at a time, making a vertical pass with the marker being engaged or disengaged as required. The columns are quite thin, giving relatively high-resolution text, though this does mean it take a while. Adding another servo and marking two adjacent columns at the same time would be an easy way to instantly double the speed.

The wheels are big and chunky, to ensure the horizontal distance travelled does not change between the top and the bottom. Of course, when making big parts like these it always helps if you’ve already built a giant custom 3D printer. If you want to read more of [Ivan]’s large scale 3D printing antics, checkout his tank with suspension, or plus-sized seven-segment clock.

Continue reading “Drawing Lines In The Sand: Taking Beach Graffiti To The Next Level”

Handmade Robot Brings Stop Motion To Life

Stop motion animation is often called a lost art, as doing it (or at least, doing it well) is incredibly difficult and time consuming. Every detail on the screen, no matter how minute, has to be placed by human hands hundreds of times so that it looks smooth when played back at normal speed. The unique look of stop motion is desirable enough that it still does get produced, but it’s far less common than hand drawn or even computer animation.

If you ever wanted to know just how much work goes into producing even a few minutes of stop motion animation, look no farther than the fascinating work of [Special Krio]. He not only documented the incredible attention to detail required to produce high quality animation with this method, but also the creation of his custom robotic character.

Characters in stop motion animation often have multiple interchangeable heads to enable switching between different expressions. But with his robotic character, [Special Krio] only has to worry about the environments, and allow his mechanized star do the “acting”. This saves time, which can be used for things such as making 45 individual resin “drops” to animate pouring a cup of tea (seriously, go look).

To build his character, [Special Krio] first modeled her out of terracotta to get the exact look he wanted. He then used a DIY 3D laser scanner to create a digital model, which in turn he used to help design internal structures and components which he 3D printed on an Ultimaker. The terracotta original was used once again when it was time to make molds for the character’s skin, which was done with RTV rubber. Then it was just the small matter of painting all the details and making her clothes. All told, the few minutes of video after the break took years to produce.

This isn’t the first time we’ve seen 3D printing used to create stop motion animation, but the final product here is really in a league of its own.

[Thanks to Antonio for the tip.]

Continue reading “Handmade Robot Brings Stop Motion To Life”

Controlling Robotics Visually

The world — and the Hackaday Prize — is filled with educational robots. These are small, wheeled robots loaded up with sensors, actuators, a few motor drivers, and some sort of system that is easy to program. The idea behind these educational robots is to give students an easy-to-use platform to test out code, learn inverse kinematics, and realize odometry is a lot harder than you think it is. Give these kids some time and patience, and you’ll have a fleet of Battlebots at the end of the semester, if the teacher is cool.

But there’s a problem with all educational robots. The programming. For someone just starting out in robotics club, being able to code isn’t a guarantee. You need an easy to use programming interface. This project for the Hackaday Prize gives all students a great visual programming interface. It’s basically like the first generation of Lego Mindstorms, only you don’t need a weird IR tower attached to a serial port.

Of course you can’t program a robot without a board, and this project brings it in spades. The brain for this platform is built on an ARM microcontroller, has Bluetooth, supports up to six DC motors, twelve analog inputs, PWM and serial ports, and all the ports are color-coded for kids who can’t read so good.

This is a visual programming environment, though, and with that, you get a fancy IDE filled with loops that wrap around commands, IO access that’s in easy to read blocks, and control software that gives students a dashboard filled with buttons and odometers and the video feed from the camera. It’s a great Hackaday Prize entry, and an excellent way to introduce kids to robotics.

ROPS Will Be The Board X86 Robot Builders Are Waiting For

If your robot has outgrown a Raspberry Pi and only the raw computing power of an x86 motherboard will suffice, you are likely to encounter a problem with its interfaces. The days of ISA cards are long gone, and a modern PC is not designed to easily talk to noisy robot hardware. Accessible ports such as USB can have interfaces connected to them, but suffer from significant latency in the process.

A solution comes from ROPS, or Robot on a PCI-e Stick, a card that puts an FPGA on a blazing-fast PCI-e card that provides useful real-world interfaces such as CAN and RS485 and a pile of I/O lines as well as an IMU, barometer, and GPS. If you think you may have seen it before then you’d be right, it was one of the first-round winners of the Open Hardware Design Challenge. They’re very much still at the stage of having an FPGA dev board and working out the software so there aren’t any ROPS boards to look at yet, but this is a project that’s going somewhere, and definitely one to watch.

Festo BionicFinWave underwater robot

[Festo]’s Underwater Robot Uses Body-Length Fins

[Festo] have come up with yet another amazing robot, a swimming one this time with an elegant propulsion mechanism. They call it the BionicFinWave. Two fins on either side almost a body-length long create a wave which pushes water backward, making the robot move forward. It’s modeled after such fish as the cuttlefish and the Nile perch.

The BionicFinWave's fin mechanismWhat was their elegant solution for making the fins undulate? Nine lever arms are attached to each fin. Those lever arms are controlled by two crankshafts which extend from the front of the body to the rear, one for each side. A servo motor then turns each crankshaft. Since the crankshafts are independent, that means each fin operates independently. This allows for turning by having one fin move faster than the other. A third motor in the head flexes the body, causing the robot to swim up or down.

There’s also a pressure sensor and an ultrasonic sensor in the head for depth control and avoiding objects and walls. While these allow it to swim autonomously in its acrylic, tubular track, there is wireless communication for recording sensor data. Watch it in the video below as it effortlessly swims around its track.

[Festo] has created a lot of these marvels over the years. We’ve previously covered their bionic hopping kangaroo (we kid you not), their robot ants with circuitry printed on their exoskeleton, and perhaps the most realistic flapping robotic bird ever made.

Continue reading “[Festo]’s Underwater Robot Uses Body-Length Fins”