Continuing his tradition of making bits of wire and scraps of wood work wonders, [HomoFaciens] is back with a unique and clever design for an electromechanical encoder.
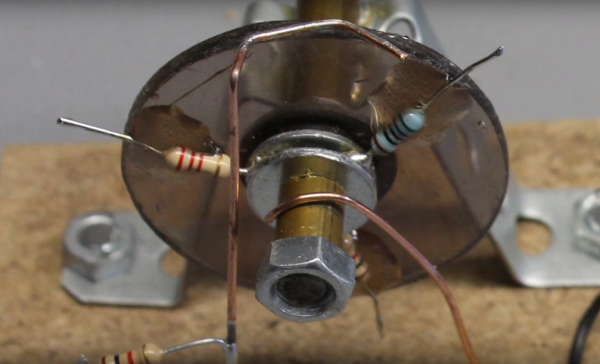
There are lots of ways to build an encoder, and this is one we haven’t seen before. Not intended in any way to be a practical engineered solution, [HomoFaciens]’ build log and the video below document his approach. Using a rotating disc divided into segments by three, six or eight resistors, the encoder works by adding each resistor into a voltage divider as the disc is turned. An Arduino reads the output of the voltage divider and determines the direction of rotation by comparing the sequence of voltages. More resistors mean higher resolution but decreased maximum shaft speed due to the software debouncing of the wiped contacts. [HomoFaciens] has covered ground like this before with his tutorial on optical encoders, but this is a new twist – sort of a low-resolution continuous-rotation potentiometer. It’s a simple concept, a good review of voltage dividers, and a unique way to sense shaft rotation.
Is this all really basic stuff? Yep. Is it practical in any way? Probably not, although we’ll lay odds that these encoders find their way into a future [HomoFaciens] CNC build. Is it a well-executed, neat idea? Oh yeah.
Continue reading “Wheel Of Resistors Form Unique Rotary Encoder”