The convergence of mechanics and electronics in robotics brings with it a lot of challenges. Thanks to 3D printing and low cost components, it’s possible to quickly and easily experiment with a variety of robotics mechanism for various use cases. [Paul Gould] has been doing exactly this, and is giving us a taste of ten designs he will be open sourcing in the near future. Video after the break.
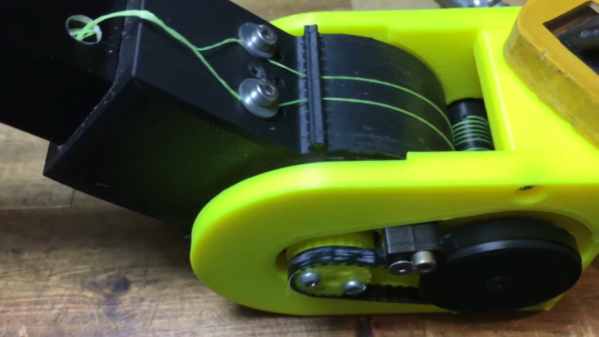
Three of the designs are capstan mechanisms, with different motors and layouts, tested for [Paul]’s latest quadruped robot. Capstan mechanisms are a few centuries old, and were originally used on sailing ships to give the required mechanical advantage to tension large sails and hoist cargo.
Two of the mechanisms employ GUS Simpson Drives, which use a combination of belts and a rolling joint. These were inspired by the LIMS2-AMBIDEX developed at the University of Korea. The ever-popular cycloidal gearbox also makes and appearance in the form of a high torque dual disk linked, two stage, NEMA17 driven gearbox.
[Paul] also built a room sized skycam-like claw robot for his daughter, suspended by four ball chain strings reeled in by four brushless motors with ESP32 powered motor controllers. We are looking forward to having a close look at these designs when [Paul] releases them, and to see how his quadruped robot will turn out.
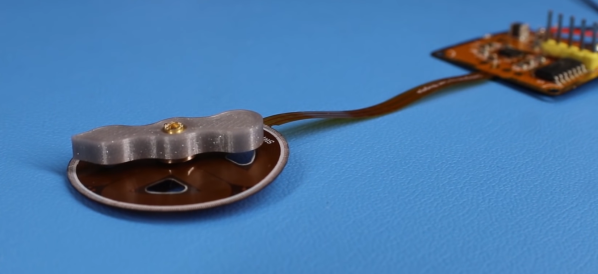
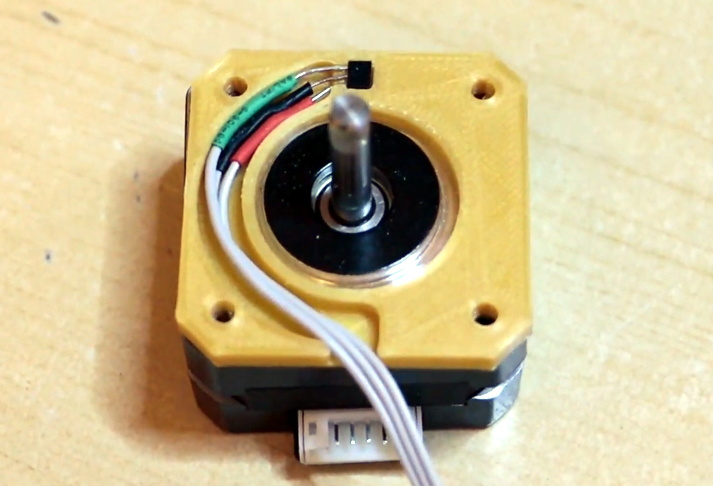
The NEMA stepper motors most of us know are synchronous stepper motors, while [Carl]’s design is a permanent magnet design. It uses four coils on the stator, and two permanent magnets on the rotor/dial. By varying the current through each of the four poles with a stepper driver (microstepping), the position of the rotor should theoretically be controllable with good resolution. Unfortunately, this was easier said than done. He achieved position control, but it kept skipping steps in certain positions.
The motor and controller consist of a single flexible PCB, to reduce the layer spacing and increase the coils’ magnetic field strength. However, this created other problems, since the motor shaft didn’t have a solid mounting point, and the PCB flexed as the stator coils were energized. Soldering the controller was also a problem, as the through-hole headers ripped out easily and the PCB bulged while reflowing on a hot plate, in one case even popping off components. [Carl] eventually mounted one of the PCB motors inside a 3D printed frame to rigidly constrain all the motor components, but it still suffered from missed steps. Any suggestions for fixing the problem? Drop them in the comments below.
Like his other PCB motors, the torque is very low, but should be suitable for gauges or clocks. A PCB clock with an integrated motor would be pretty cool to have on the workshop wall.
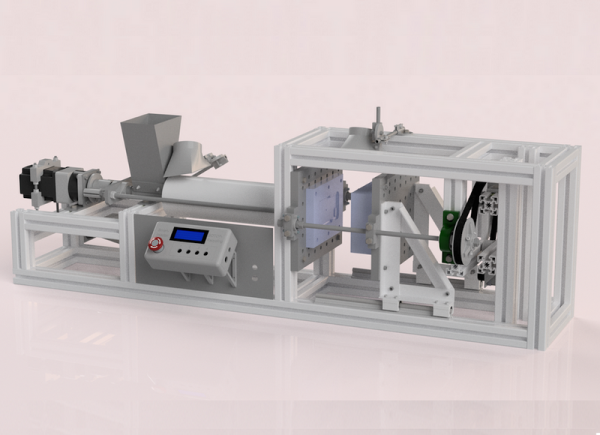
Many people have the means now to create little plastic objects thanks to 3D printing. However, injection molding is far less common. Another uncommon tech is plastic recycling, although we do occasionally see people converting waste plastic into filament. [Manuel] wants to solve both of those problems and created an injection molder specifically for recycling.
The machine — Smart Injector — is automated thanks to an Arduino. It’s pretty complex mechanically, so in addition to CAD models there are several PDF guides and a ton of pictures showing how it all goes together.
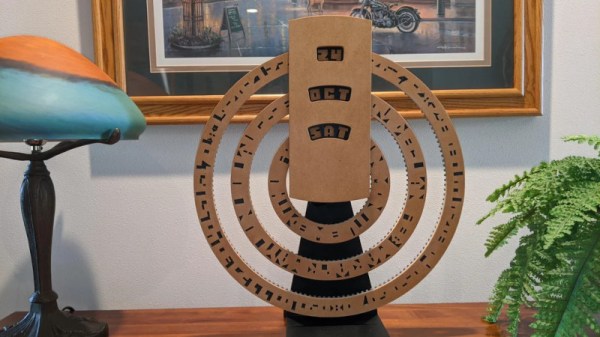
Hackers love a good clock build, but its longer term cousin, the calendar, is more seldom seen in the wild. Regardless, they can be just as useful and elegant a project, as this cryptic design from [Wolfspaw] demonstrates.
The project consists of a series of rotating wheels, displaying a series of arcane symbols. When the markings on the wheel align correctly with the viewing window, they display the date, month, and day of the week, respectively. The wheels themselves are fitted with 3D printed gear rings, which are turned by stepper motors under the control of an Arduino Nano. Hall effect sensors and magnets are used to keep everything appropriately aligned, while a DS3231 real time clock handles timekeeping duties.
It’s a tidy build, and we think the cryptic design adds a little mystery, making this an excellent conversation piece. The build is actually a remix of a project we’ve featured before, scaled and given a unique twist to suit [Wolfspaw]’s own personal aesthetic. Video after the break.
What could be more terrifying than ghosts, goblins, or clowns? How about a shapeless pile of fright on your bedroom floor that only moves when you’re not looking at it? That’s the idea behind [Sciencish]’s nightmare robot, which is lurking after the break. The Minecraft spider outfit is just a Halloween costume.
In this case, “looking at it” equates to you shining a flashlight on it, trying to figure out what’s under the pile of clothes. But here’s the thing — it never moves when light is shining on it. It quickly figures out the direction of the light source and lies in wait. After you give up and turn out the flashlight, it spins around to where the light was and starts moving in that direction.
The brains of this operation is an Arduino Uno, four light-dependent resistors, and a little bit of trigonometry to find the direction of the light source. The robot itself uses two steppers and printed herringbone gears for locomotion. Its chassis has holes in it that accept filament or wire to make a cage that serves two purposes — it makes the robot into more of an amorphous blob under the clothes, and it helps keep clothes from getting twisted up in the wheels. Check out the demo and build video after the break, because this thing is freaky fast and completely creepy.
While we usually see a candy-dispensing machine or two every Halloween, this year has been more about remote delivery systems. Don’t just leave sandwich bags full of fun size candy bars all over your porch, build a candy cannon or a spooky slide instead.
We’d love to say that all of our projects worked perfectly on the first try, but the average Hackaday reader is a bit too experienced to buy a fib like that. The reality is, DIY projects rarely get everything right out of the gate. It takes some time to identify issues and work out all the kinks. But of course, that’s half the fun.
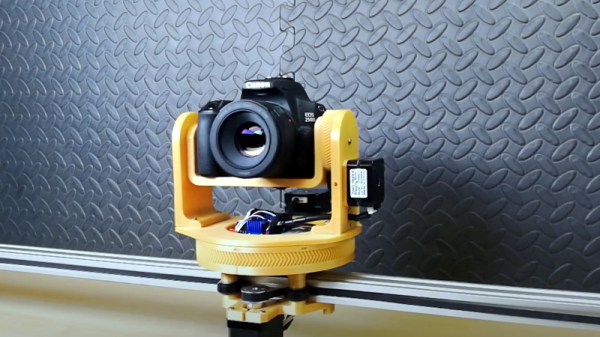
For a perfect example of this process, check out the latest update on the 3D printed DSLR camera mount that [isaac879] has been working on. When we last checked in with this project over the summer the mount was already impressive, but with the latest improvements and the addition of a whole new axis of movement, this homebrew camera motion system is an extremely compelling project for anyone who wants to take their project videos to the next level.
The new Hall effect sensor mounts are a very nice touch.
Back in June, the mount [isaac879] showed off was only capable of pan and tilt. But as you can see in the video after the break, he’s since mounted that to a track made of 20×40 aluminum extrusion and added another stepper motor. This allows the pan/tilt mount to move itself back and forth on the track to get those slick panning shots that all the cool kids use in their videos nowadays.
But even if you’re not interested in the slider aspect, the core pan/tilt mount has also received a number of refinements over the last few months. Perhaps the most obvious is the switch over to thinner and lighter stepper motors. Reducing mass is always an improvement with a moving system like this, and in the case of the pan motor, the shorter can prevents a potential collision with the camera itself. Obviously the smaller motors are weaker, but [isaac879] considers that a feature; the mini motors will just start skipping steps if things get bound up instead of potentially damaging your expensive camera.
He’s switched to flange bearings to help hold the frame together, improved wire routing, added a mounting point for the electronics, reprinted the pinion gears in a flexible filament to help absorb some vibrations, and switched over to TMC2208 stepper drivers. The new drivers may actually be one of the biggest usability upgrades, as they allow the entire mount to move faster and more accurately. Critically, [isaac879] also reports the new drivers have solved a troublesome vibration issue he was seeing when the camera was moving slowly.
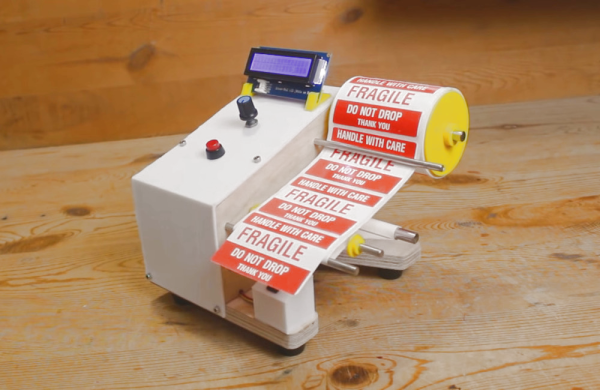
If you have any kind of business, chances are it involves stickers at some point in the process. More accurately it involves you peeling the backs off of sticker after sticker, slowly wasting time and working your way toward a repetitive stress injury. Why do that to yourself when you could have a machine do it for you?
That’s exactly the thinking behind [Mr Innovative]’s automatic label dispensing machine. All he has to do is load up the roll of labels, dial in the length of each label, and away the machine goes, advancing and dispensing and taking up the empty paper all at once. In fact, that’s how it works: the take-up reel is on the shaft of a NEMA-17 stepper motor, which gets its instructions from an Arduino Nano and an A4988 motor driver. Our favorite part is the IR sensor located underneath the sticker that’s ready to take — the machine doesn’t feed another until it senses that you’ve taken the previous sticker. We stuck the demo and build video after the break.
Our other favorite thing about this build is that [Mr Innovative] seems to have used the same PCB as his freaky fast bobbin winder.