Digital Oscilloscope Does Its Best Analog Impression

Do you ever find yourself yearning for the days before digital storage oscilloscopes (DSOs)? Where even the basic scopes commanded four figures, and came in a bench-dominating form factor? No, of course you don’t. The DSO is a wonder of modern technology: for a couple hundred bucks you can have capabilities that previously would have been outside the reach of hobbyists, all in a package that’s small enough to fit on even the most cramped workbenches.

Which is why the good folks of the EEVblog forums are so confused about the OWON AS101, a modern digital oscilloscope that’s designed to look and operate like the analog CRT monsters of old. Despite the 3.7 inch LCD, users are treated to the classic analog scope look, and the switches and knobs on the front should trigger a wave of nostalgia for hackers of a certain age.

But this isn’t just some “retro” look-alike, OWON is committed to delivering on that analog experience by taking away all those modern digital features we’ve become so dependant on. This single-channel scope can’t save data to USB, doesn’t have any sort of protocol decoding capabilities, and forget about automatic…well, anything. It’s even limited to 20 MHz, just like the old-school CRT scopes that you pick up for a song at any swap meet. All for the low, low, price of $150 USD from the usual importers.

In the EEVblog thread, the best idea anyone can come up with is that the OWON AS101 is designed for educational markets in developing countries, where outdated equipment is so common that there may actually be a need for faux-analog oscilloscopes to match what’s already in use. These new-manufactured “analog” trainers can be used to get students ready for a professional life of using antiquated technology. It’s hard to believe, but sometimes we can forget how fortunate many of us are to have easy access to cheap tools and equipment.

Even still, when you can get a pocket-sized 10 MHz DSO for around $50, it’s difficult to imagine how this analog-digital hybrid could possibly attract any takers at 3x times the price. If any of our readers would care to shed some light on this unusual piece of gear, we’d love to hear it.

Continue reading “Digital Oscilloscope Does Its Best Analog Impression”

A Function Generator In Its Purest Form

If you have a modern function generator on your bench it is quite likely to contain a direct-digital synthesis circuit that creates arbitrary waveforms using a microprocessor controlled DAC. If you have a cheap function generator it’s likely to contain a one-chip solution that generates approximations to sine and triangle waveforms through modifying a square wave with a set of filters.

These methods both produce adequate waveforms for most of your function generator needs, but they are both far from perfect for the purist. Both methods introduce some distortion, and to address this [michal777] has produced a generator that takes the process back to basics with all stages implemented using building block ICs and transistors. The circuit follows the same square-wave-modifying path as the cheaper integrated devices, but with significant attention paid to the design to ensure that it does as good a job as possible. It also makes for a fascinating dive into function generator design.

The generator hardware has been neatly fitted onto a PCB with a riser for a set of front panel controls. He shares a few pictures of previous designs. We particularly like one that appears to have been fitted into a redundant cooking pot.

We’ve brought you a few function generators over the years. If you’ve got one of the cheaper examples, we’ve even covered how you might improve it a little.

Restoring An HP LCZ Meter From The 1980s

We are fantastically lucky not only in the parts that are easily available to us at reasonable cost, but also for the affordable test equipment that we can have on our benches. It was not always this way though, and [NFM] treats us to an extensive teardown and upgrade of a piece of test equipment from the days when a hacker’s bench would have been well-appointed with just a multimeter and a 10MHz ‘scope.

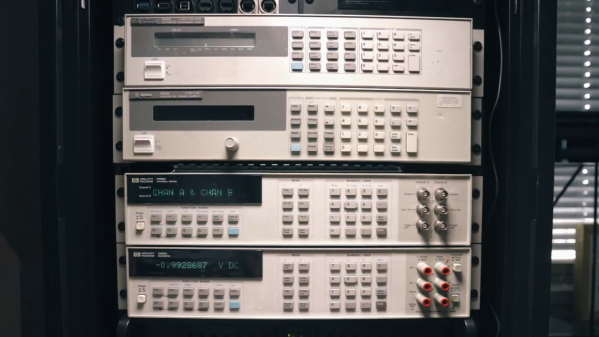
The Hewlett Packard 4276A LCZ meter is, or perhaps was, the king of component testers. A 19″ rack unit that would comfortably fill a shelf, it has a host of functions and a brace of red LED displays. This particular meter had clearly seen better days, and required a look inside just to clean up connectors and replace aged batteries.

In the case is a backplane board with a series of edge connectors for a PSU, CPU, and analogue boards. Aged capacitors and those batteries were replaced, and those edge connectors cleaned up again. The CPU board appears to have a Z80 at its heart, and we’re sure we spotted a 1987 date code. There are plenty of nice high-quality touches, such as the individual 7-segment digits being socketed.

An after-market option for this equipment included a DC offset board, and incredibly HP publish its full schematic and a picture of its PCB in their manual. It was thus a simple process and quick PCB ordering to knock up a modern replica, with just a few component substitutions and single resistors replacing an HP specific encapsulated resistor pack.

As a treat we get a ringside seat for the set-up and alignment of the machine. The DC offset board gives the wrong voltage, which he traces to a voltage reference with a different tolerance to the original HP part. [NFM] makes some adjustments to resistor values, and is able to pull the voltage to the correct value. Finally we see the instrument put through its paces, and along the way have a demonstration of how capacitance of a ceramic capacitor can vary with voltage close to its working voltage. Even if you never have the need for an LCZ meter or never see an HP 4276A, this should be worth a watch. And if you now have an urge to find a bench full of similar treasures, take a look at our guide to old test equipment.

Continue reading “Restoring An HP LCZ Meter From The 1980s”

Open Hardware Board For Robust USB Power Monitoring

We’ve all seen the little USB power meters that have become popular since nearly every portable device has adopted some variation of USB for charging. Placed between the power source and the device under test, they allow you to see voltage and current in real time. Perfect for determining how long you’ll be able to run a USB powered device on batteries, or finding out if a USB power supply has enough current to do the business.

[Jonas Persson] liked the idea of these cheap little gadgets, but wanted something a bit more scientific. His design, which he refers to as UPM, is essentially a “smart” version of those ubiquitous USB gadgets. Instead of just showing the data on a little LCD screen, it can now be viewed on the computer and analyzed. His little gadget even allows you to cut power to the device under test, potentially allowing for automated testing of things such as inrush current.

Essentially the UPM works in much the same way as the simple USB meters: one side of the device goes towards the upstream power source, and the device under test plugs into the other side. Between the two devices is a 16 bit ADC and differential amplifier which measures the voltage and current. There’s a header on the board which connects to the ADC if you wanted to connect the UPM to an external microcontroller or other data logging device.

But most likely you would be using the internal microcontroller to analyze the output of the ADC over I2C, which [Jonas] very cleverly connected to the upstream port with an integrated USB hub. One side of the hub goes off to the device being tested, and the other to the microcontroller. So the host device will see both the UPM’s integrated microcontroller and the target device at the same time. From there, you can use the ncurses user interface to monitor and control the device in real-time.

While the hardware looks more or less finished, [Jonas] has some more plans for the software side of UPM, including support for remote control and monitoring over TCP/IP as well as robust logging capabilities. This is definitely a very interesting project, and we’re excited to see it develop further.

In the past we’ve seen homebrew USB power meter builds, and even commercial offerings which boasted computer-based logging and analysis, so it was only a matter of time before somebody combined them into one.

The Crystal (Testing) Method

It used to be any good electronics experimenter had a bag full of crystals because you never knew what frequency you might need. These days, you are likely to have far fewer because you usually just need one reference frequency and derive all the other frequencies from it. But how can you test a crystal? As [Mousa] points out in a recent video, you can’t test it with a multimeter.

His approach is simple: Monitor a function generator with an oscilloscope, but put the crystal under test in series. Then you move the frequency along until you see the voltage on the oscilloscope peak. That frequency should match the crystal’s operating frequency.

Continue reading “The Crystal (Testing) Method”

Arduino Powered Portable Function Generator

It’s probably not much of a stretch to say that many of us have taken on a project or two that were little more than thinly veiled excuses to add a new tool or piece of gear to our arsenal. There’s something to be said for a bench full of button-festooned test equipment blinking away, it’s like bling for nerds. But just like getting your name written out in diamonds, it can get expensive quick.

Luckily, the hacker has enough technology at their disposal these days that DIY test equipment can help fill your bench without emptying your wallet. [Faransky] has created a very impressive Arduino function generator that doesn’t skimp on the features. Capable of generating sine, triangle, and square waves up to 10MHz with its all-digital circuitry, it’s a piece of gear that’s well worth the $30 USD or so it should cost to build your own version.

For those worrying that [Faransky] is relying on the PWM functionality of the Arduino Nano to generate waveforms, have no fear. At the heart of the device is a AD9833 waveform generator; with the Arduino, rotary encoder, and 16×2 LCD providing an interface to control it over SPI.

Unfortunately, the AD9833 doesn’t have a way to control amplitude, something which is pretty important in a function generator. So [Faransky] uses a X9C104P 100KOhm 8-bit digital potentiometer as a voltage divider on the chip’s output.

To wrap up the build, he added a 2000mAh 3.7V Li-Ion battery and TP4056 charger, with a DC-DC boost converter to get 5V for the Arduino. Though if you wanted to create a benchtop version of this device, you could delete those components in favor of a 5V AC/DC adapter.

We’ve seen our fair share of DIY function generators, ranging from minimalist builds to hardware that could pass for a commercial offering. We’ve even seen some cheap turn-key function generators, though the usual warnings about getting what you pay for apply.

Continue reading “Arduino Powered Portable Function Generator”

Review: SMD Tweezer Meter Or Tweezer Probes For Your Multimeter?

It’s remarkable how tiny electronics have become. Heaven knows what an old-timer whose experience started with tubes must think, to go from solder tags to SMD in a lifetime is some journey. Even  the generation that started with discrete transistors has lived through an incredible shift. But it’s true, SMD components are tiny, and that presents a challenge aside from the one you’ll face when soldering them. Identifying and measuring the value of a chip component too small to have any writing upon it becomes almost impossible with a pair of standard test probes.

Happily the test equipment manufacturers have risen to the challenge, and produced all sorts of meters designed for SMD work that have a pair of tweezers instead of test prods. When I was looking for one I did my usual thing when it comes to Hackaday reviews. I looked at the budget end of the market, and bought an inexpensive Chinese model for about £16($21). And since I was browsing tweezers I couldn’t resist adding another purchase to my order. I found a pair of tweezer test probes for my multimeter which cost me just over a pound ($1.30) and would provide a useful comparison. For working with SMD components in situ, do you even need the special meter?

Continue reading “Review: SMD Tweezer Meter Or Tweezer Probes For Your Multimeter?”