Play Tetris On A Transistor Tester, Because Why Not?

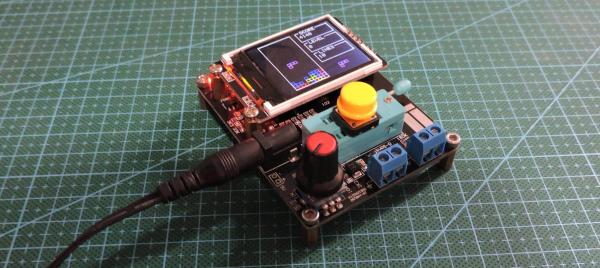
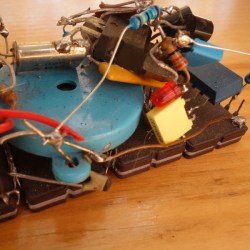
[Robson] had been using the same multimeter since he was 15. It wasn’t a typical multimeter, either. He had programmed it to also play the Google Chrome jumping dinosaur game, and also used it as a badge at various conferences. But with all that abuse, the ribbon cable broke and he set about on other projects. Like this transistor tester that was just asking to have Tetris programmed onto its tiny screen.

The transistor tester is a GM328A made for various transistor testing applications, but is also an LCR meter. [Robson]’s old meter didn’t even test for capacitance but he was able to get many years of use out of that one, so this device should serve him even better. Once it was delivered he set about adding more features, namely Tetris. It’s based on an ATmega chip, which quite easy to work with (it’s the same chip as you’ll find in the Arduino Uno but [Robson’s] gone the Makefile route instead of spinning up that IDE). Not only did he add more features, but he also found a mistake in the frequency counter circuitry that he fixed on his own through the course of the project.

If you’ve always thought that the lack of games on your multimeter was a total deal breaker, this project is worth a read. Even if you just have a random device lying around that happens to be based on an ATmega chip of some sort, this is a good primer of getting that device to do other things as well. This situation is a fairly common one to be in, too.

Continue reading “Play Tetris On A Transistor Tester, Because Why Not?”

Years Don’t Dim The Shine Of These Curious Gadgets

[Maarten Tromp] recently took the time to document some of the unusual and creative electronic projects he received as gifts over the years. These gadgets were created in the early 2000’s and still work flawlessly today. Two of our favorites are shown here: Hardware Tetris Unit (shown in the image above) and Heap of Electronic Parts.

The “Heap of Electronic Parts” makes sounds when in sunlight.

Heap of Electronic Parts was a kind of hardware puzzle and certainly lives up to its name. It’s a bunch of parts soldered in a mystifying way to the backs of four old EPROMs — the chips with the little window through which UV is used to erase the contents. Assured that the unit really did have a function, [Maarten] eventually figured out that when placed in sunlight, the device ticks, buzzes, and squeals. [Jeroen] had figured out that the EPROMs could act like tiny solar cells when placed in sunlight, and together the four generate just enough power to drive an oscillator connected to a piezo speaker. It still chirps happily away, even today.

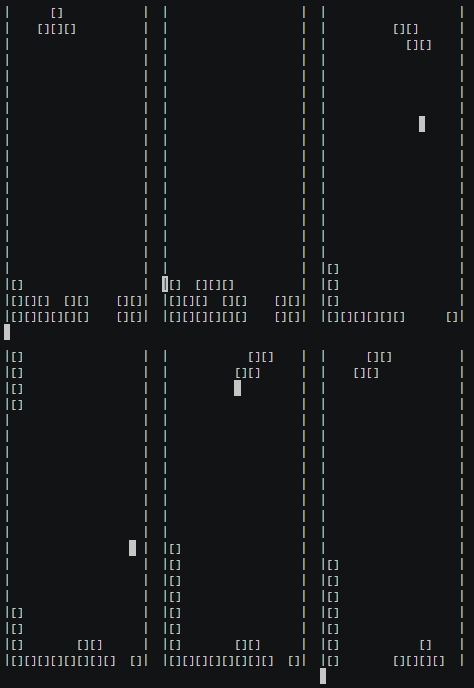
Hardware Tetris plays in a terminal window.

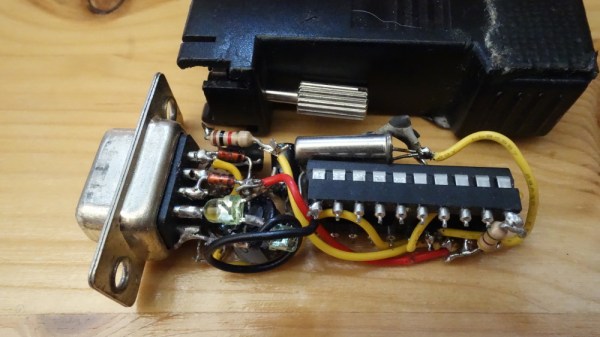
Hardware Tetris Unit was a black box intended to be plugged into a serial port. With a terminal opened using the correct serial port settings, a fully-functional Tetris game using ASCII-art graphics could be played. It was even self-powered from the serial port pins.

Inside Hardware Tetris is an AVR microcontroller with some level shifters, and the source code and schematics are available for download. 14 years later, computers no longer have hardware serial ports but [Maarten] says a USB-to-serial converter worked just fine and the device still functions perfectly.

There are a couple more devices documented on [Maarten]’s gifts page, including a Zork-inspired mini text adventure and a hardware board that does some trippy demos on an old Nokia color LCD.  [Maarten]’s friend [Jeroen Domburg] (aka Sprite_tm) had a hand in creating most of the gadgets, and he’s someone whose brilliant work we have had the good fortune to feature many times in the past.

Delicious Vector Game Console Runs Pac-Man, Tetris, And Mario

The only question we have about [mitxela]’s DIY vector graphics game console is: Why did he wait five years to tell the world about it?

Judging by the projects we’ve seen before, from his tiny LED earrings to cramming a MIDI synthesizer into both a DIN plug and later a USB plug, [mitxela] likes a challenge. And while those projects were underway, the game console you’ll see in the video below was sitting on the shelf, hidden away from the world. That’s a shame, because this is quite a build.
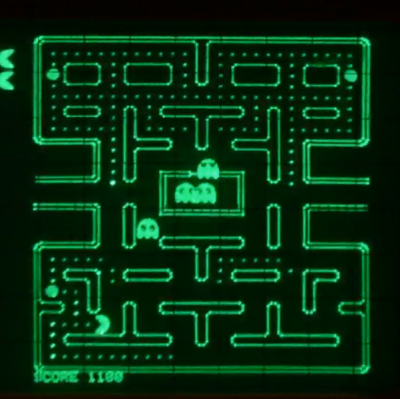
Using a CRT oscilloscope in X-Y mode as a vector display, the console faithfully reproduces some classic games, most of which, curiously enough, were not originally vector games. There are implementations of the Anaconda, RetroRacer, and AstroLander minigames from Timesplitter 2. There are also versions of Pac-Man, Tetris, and even Super Mario Brothers. Most of the games were prototyped in JavaScript before being translated into assembly and placed onto EEPROM external cartridges, to be read by the ATMega128 inside the console. Sound and music are generated using the ATMega’s hardware timers, with a little help from a reverse-biased transistor for white noise and a few op-amps.
From someone who claims to have known little about electronics at the beginning of the project, this is pretty impressive stuff. Our only quibbles are the delay in telling us about it, and the lack of an Asteroids implementation. The former is forgivable, though, because the documentation is so thorough and the project is so cool. The latter? Well, one can hope.

Continue reading “Delicious Vector Game Console Runs Pac-Man, Tetris, And Mario”

Unique Flat-Screen Display Put To Use In CRT Game Boy

The cathode-ray tube ruled the display world from the earliest days of TV until only comparatively recently, when flat-screen technology began to take over. CRTs just kept getting bigger over that time until they reached a limit beyond which the tubes got just too bulky to be practical.

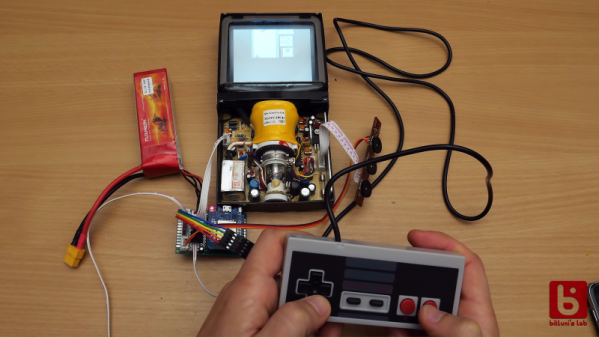
But there was action at the low end of the CRT market, too. Tiny CRTs popped up in all sorts of products, from camcorders to the famous Sony Watchman. One nifty CRT from this group, a flat(tish) tube from a video intercom system, ended up in [bitluni]’s lab, where he’s in the process of turning it into a retro Game Boy clone with a CRT display. The display, which once showed the video from a door-mounted camera, was a gift from a viewer. Date codes on the display show it’s a surprisingly recent device; were monochrome TFT displays that hard to come by in 2007? Regardless, it’s a neat design, with the electron gun shooting upward toward a curved phosphor screen. With a little Google-assisted reverse engineering, [Bitluni] was able to track done the video connections needed to use his retro game console, which uses an ESP32 that outputs composite video. He harvested the intercom speaker for game audio, added a temporary Nintendo gamepad, and soon he was playing Tetris in glorious monochrome on the flat screen.

The video below is only the first in a series where the prototype will be stuffed into one nice tidy package. It certainly still needs some tweaking, but it’s off to a great start. We can’t wait to see the finished product.

Continue reading “Unique Flat-Screen Display Put To Use In CRT Game Boy”

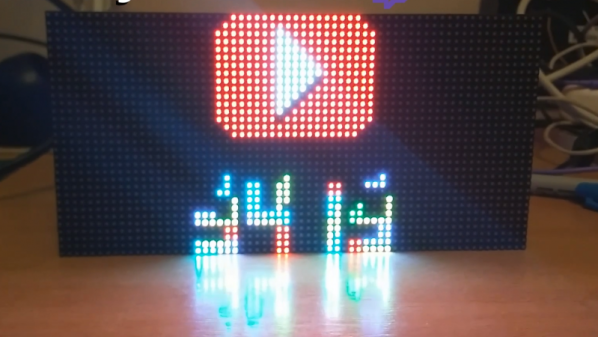
A YouTube Subscriber Counter With A Tetris Twist

When it comes to YouTube subscriber counters, there’s not much wiggle room for creativity. Sure, you can go with Nixies or even more exotic displays, but in the end a counter is just a bunch of numbers.

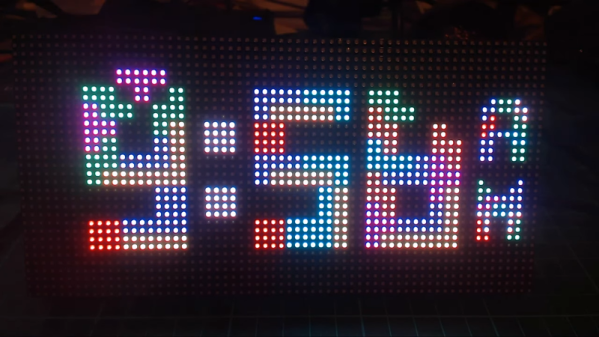
But [Brian Lough] found a way to jazz things up with this Tetris-playing YouTube sub counter. For those of you not familiar with [Brian]’s channel, it’s really worth a watch. He tends toward long live-stream videos where he works on one project for a marathon session, and there’s a lot to learn from peeking over his virtual shoulder. This project stems from an earlier video, posted after the break, which itself was a condensation of several sessions hacking with the RGB matrix that would form the display for this project. He’s become enamored of the cheap and readily-available 64×32 pixel RGB displays, and borrowing an idea from Mc Lighting author [toblum], he decided that digits being assembled from falling Tetris blocks would be a nice twist. [Brian] had to port the Tetris-ifying code to Arduino before getting the ESP8266 to do the work of getting the subs and updating the display. We think the display looks great, and the fact that the library is open and available means that you too can add Tetris animations to your projects.

None of this is to say that more traditional sub counters can’t be cool too. From a minimalist display to keeping track of all your social media, good designs are everywhere. And adding a solid copper play button is a nice touch too.

Continue reading “A YouTube Subscriber Counter With A Tetris Twist”

Tiny Sideways Tetris On A Business Card

Everyone recognizes Tetris, even when it’s tiny Tetris played sideways on a business card. [Michael Teeuw] designed these PCBs and they sport small OLED screens to display contact info. The Tetris game is actually a hidden easter egg; a long press on one of the buttons starts it up.

It turns out that getting a playable Tetris onto the ATtiny85 microcontroller was a challenge. Drawing lines and shapes is easy with resources like TinyOLED or Adafruit’s SSD1306 library, but to draw those realtime graphics onto the 128×32 OLED using that method requires a buffer size that wouldn’t fit the ATtiny85’s available RAM.

To solve this problem, [Michael] avoids the need for a screen buffer by calculating the data to be written to the OLED on the fly. In addition, the fact that the smallest possible element is a 4×4 pixel square reduces the overall memory needed to track the screen contents. As a result, the usual required chunk of memory to use as a screen buffer is avoided. [Michael] also detailed the PCB design and board assembly phases for those of you interested in the process of putting together the cards using a combination of hot air reflow and hand soldering.

PCB business cards showcase all kinds of cleverness. The Magic 8-Ball Business Card is refreshingly concise, and the project that became the Arduboy had milled cutouts to better fit components, keeping everything super slim.

Building Badges The Hard Way

What’s a hacker to do to profess his love for his dearest beloved? [Nitesh Kadyan] built his lady-love this awesome LED pendant – the LED BLE Hearty Necklace Badge.

The hardware is pretty vanilla by today’s hacker standards. An ATMega328p  does most of the heavy lifting. An HM-11 BLE module provides connection to an Android mobile app. Two 74HC595 shift registers drive 16 columns of red LEDs and a ULN2803 sinks current from the 8 rows. The power section consists of a charger for the 320mAh LiPo and an LDO for the BLE module. All the parts are SMD with the passives mostly being 0603, including the 128 LEDs.

128 LEDs soldered wrong way around

[Nitesh] didn’t get a stencil made for his first batch of boards, so all the parts were painstakingly soldered manually and not in a reflow oven. And on his first board, he ended up soldering all of the LED’s the wrong way around. Kudos to him for his doggedness and patience.

The Arduino code on the ATmega is also quite straightforward. All characters are stored as eight bytes each in program memory and occupy 8×8 pixels on the matrix. The bytes to be displayed are stored in a buffer and the columns are left shifted fast enough for the marquee text effect. The Android app is built by modifying a demo BLE app provided by Google. The firmware, Android app, and the KiCAD design files are all hosted on his Github repository.

[Nitesh] is now building a larger batch of these badges to bring them to hillhacks – the annual hacker-con for making and hacking in the Himalayas. Scheduled for later this month, you’ll have to sign up on the mailing list for details and if you’d like to snag one of these badges. To make it more interesting, [Nitesh] has added two games to the code – Tetris and Snakes. Hopefully, this will spur others to create more games for the badge, such as Pong.

Continue reading “Building Badges The Hard Way”