Power Planer Brought Back To Life

Having the right tool for the right job is not always possible, but it’s an ideal that’s nice to try to live up to. The problem is that a lot of the time, the right tool is often very expensive. We have found lots of ways around this, though, from building our own CNC machines to finding new ways to electroplate metal. Sometimes, though, the right tool for the job doesn’t have to be improvised or built from scratch, it just falls in your lap.

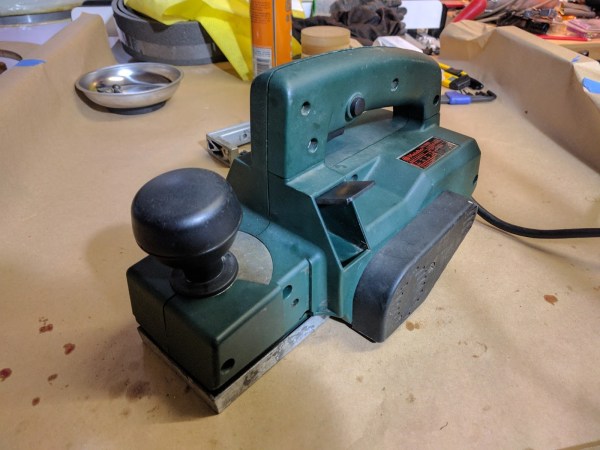
Admittedly, [Sam]’s power planer didn’t literally fall into her lap, but she did pull this neglected tool from the garbage. With no idea what was wrong with it, [Sam] let it sit on the shelf for years until she finally needed it. Assuming there was a major problem with the tool, she set about replacing the blades and bearings only to find that the likely culprit behind why the planer was thrown away in the first place was a faulty switch. This was likely a deal and circuit-breaker for someone who would use it all day, but not so for someone who only needs it for occasional use.

While some might not consider this a “hack”, it is at least a reminder that one man’s trash is another man’s treasure, especially if that trash only needs new bearings and a switch. There are two lessons here: first, that tools aren’t usually beyond repair, and that it’s possible to find all kinds of tools in the dumpster from people who don’t heed this advice.

3D-Printed Turbine Rotary Tool Tops 40,000 RPM

For your high speed, low torque needs, few things beat a rotary tool like a Dremel. The electric motor has its limits, though, they generally peak out at 35,000 rpm or so. Plus there’s the dust and the chips to deal with from whatever you’re Dremeling, so why not kill two birds with one stone and build a turbine-driven rotary tool attachment for your shop vac?

Another serious shortcoming of the electric Dremels that is addressed by [johnnyq90]’s 3D-printed turbine is the lack of that dentist’s office whine. His tool provides enough of that sound to trigger an attack of odontophobia as it tops out at 43,000 rpm. The turbine’s stator and rotors are 3D-printed, as is the body, inlet scoop, and adapter for the vacuum line. A shaft from an old rotary tool is reused, but a new one could be turned pretty easily. The video below shows the finished tool in action; there’ll no doubt be objections in the comments to ingesting dust, chips, and incandescent bits of metal, but our feeling is that the turbine will hold up to these challenges pretty well. Until it doesn’t, that is.

We like [johnnyq90]’s design style, which you may recall from his micro Tesla turbine or nitro-powered rotary tool. He sure likes things that spin fast.

Continue reading “3D-Printed Turbine Rotary Tool Tops 40,000 RPM”

Hackaday Prize Entry: 3D Printed Mini-Lathe

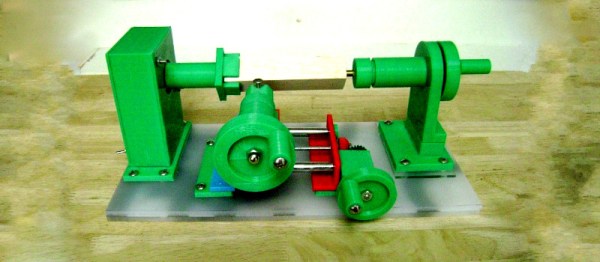
Lathes can be big, powerful, dangerous machines. But sometimes there’s a call for making very small parts out of soft materials, like plastic and wood. For jobs like this, you could use something like this 3D printed mini-lathe.

The benefits of 3D printing a tool like this are plentiful. The design can be customized and refined by the end user; [castvee8] notes that the machine can be made longer simply by increasing the length of the lead screw and guide rails. The machine does rely on some metal parts and a motor; but the real power here is that if you can’t source the exact components, you can always customize the files to suit what you have on hand.

[castvee8] aimed to make the entire build as easy as possible for the novice – even the motor and speed controller are off-the-shelf modules. It’s a testament to the golden age we live in that an entire lathe can be built out of modules and 3D printed parts. The project makes up another member of the family of 3D printed tools [castvee8] is showing off on Hackaday.io.

Cordless Water Pump!

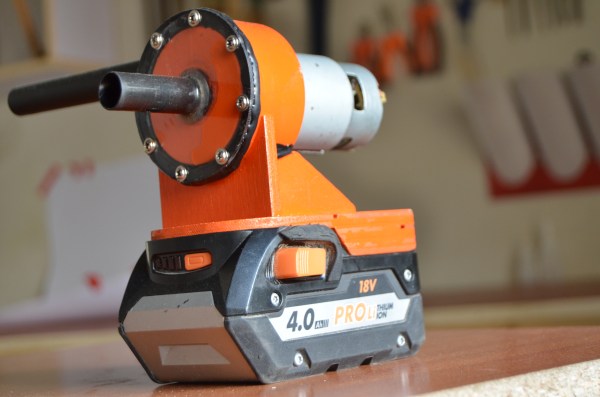
A water pump is one of those items that are uncommonly used, but invaluable when needed. Rarer still are cordless versions that can be deployed at speed. Enter [DIY King 00], who has shared his build of a cordless water pump!

The pump uses an 18 volt brushed motor and is powered by an AEG 18V LiPo battery. That’s the same battery as the rest of [DIY King]’s power tools, making it convenient to use. UPVC pipe was used for the impeller — with a pipe end cap for a housing. A window of plexiglass to view the pump in motion adds a nice touch.

A bit of woodworking resulted in the mount for the pump and battery pack, while a notch on the underside allows the battery to lock into place. Some simple alligator clips on the battery contacts and the motor connected through a switch are all one needs to get this thing running.

Continue reading “Cordless Water Pump!”

Old Thermometer Gets New Eyes

As much as we’d like to have the right tools for the right job all of the time, sometimes our parts drawers have other things in mind. After all, what’s better than buying a new tool than building one yourself from things you had lying around? That’s at least what [Saulius] must have been thinking when he needed a thermometer with a digital output, but only had a dumb, but feature-rich, thermometer on hand.

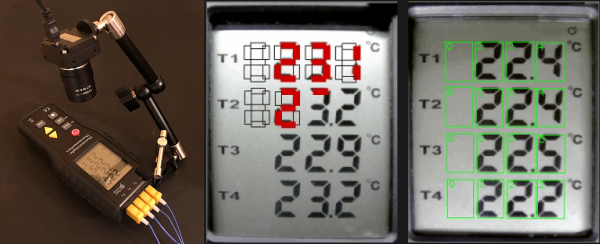
Luckily, [Saulius] had a webcam lying around as well as an old thermometer, and since the thermometer had a LCD display it was relatively straightforward to get the camera to recognize the digits in the thermometer’s display. This isn’t any old thermometer, either. It’s a four-channel thermometer with good resolution and a number of other useful features (with an obvious lack of communications abilities), so it’s not something that he could just overlook.

Once the camera was mounted to an arm and pointed at the thermometer’s screen, an algorithm running on a computer detects polygons and reports its information into a CSV file. This process is made simpler by the fact that LCD screens like this are very predictable. From there, the data is imported into LibreOffice and various charts and graphs can be made.

Although perhaps not the most elegant of hacks, sometimes you have to work with the supplies that are on hand at the time. Sometimes the tools you need are too expensive, politically dangerous, or too impractical to obtain. To that end [Saulius]’s hack is a great example of what hacks are possible with the right mindset.

Add Broken Tool Detection To Your CNC Mill

A tool breaking in the midst of a CNC machining operation is always a disaster. Not only do you have a broken tool (no small expense), but if the program continues to run there is a good chance it’ll end up ruining your part too. In particularly bad cases, it’s even possible to for this to damage the machine itself. However, if the breakage is detected soon enough, the program can be stopped in time to salvage the part and avoid damage to your machine.

Many new machining centers have the ability to automatically detect tool breaks, but this is a feature missing from older machines (and inexpensive modern machines). To address this issue, [Wiley Davis] came up with a process for adding broken tool detection to an older Haas mill. The physical modifications are relatively minor: he simply added a limit switch wired to the existing (but unused) M-Function port on the Haas control board. This port is used to expand the functionality of the machine, but [Wiley] didn’t need it anyway.

Continue reading “Add Broken Tool Detection To Your CNC Mill”

Hack A Whiteboard And Never Lose Screws Again

If you are reading this, it is a fair bet you like to take things apart. Sometimes, you even put them back together. There are two bad moments that can occur when you do this. First, when you get done and there is some stuff left over. That’s usually not good. The other problem is when you are trying to find some little tiny bolt and a washer and you can’t find it. SMD parts are especially easy to lose.

A few months ago, I was browsing through a local store and I saw a  neat idea. It was basically a small whiteboard with lines dividing it into cells. It was magnetic and the idea is you’d put your small loose (and ferrous) parts like screws, bolts, nuts, and resistors on the board. Since it was a marker board, you could make notes about what each cell contained. Great idea! But the thing was about $20 and I thought I could do better than that. As you might guess from the picture, I was successful. I spent about $5, although I had some rare-earth magnets hanging around. If you don’t, strong magnets aren’t that expensive and you can often raid them out of hard drives.

Continue reading “Hack A Whiteboard And Never Lose Screws Again”