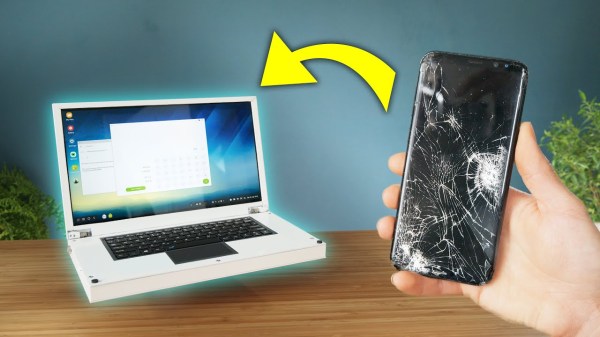
Knob over display

Dialing It In: A 3D-Printed Knob With Touchscreen Flair

Knobs are ubiquitous in technology user interfaces, but touchscreens are increasingly replacing them for interface controls. The latest project from [upir] combines a rotating knob with a touchscreen for a stunning result. The knob-over-display design features a touchscreen where you can place and remove a spinning knob, creating an interface reminiscent of Microsoft’s Surface Dial but at a fraction of the cost.

The core functionality of this device relies on the MT6701 magnetic encoder, which precisely tracks the orientation of the surrounding magnetic field. This encoder is held in place with a 3D-printed jig behind the small touchscreen, hiding the encoder without blocking the magnetic field generated by the magnet above the display. Most circular magnets are axially magnetized, meaning their larger face is one pole. However, diametrically magnetized magnets, where opposite sides of the smaller face are the poles, are used here.

To avoid scratching the screen and ensure smooth turning, [upir] designed a knob that holds the diametrically magnetized magnet slightly above the screen, with a ball bearing connecting the outside of the knob to the center resting on the screen. All the design files needed to recreate this are available on [upir]’s GitHub page; be sure to check them out. Also, browse through our back catalog for other knob-related projects.

Continue reading “Dialing It In: A 3D-Printed Knob With Touchscreen Flair”

A Web-Based Graphics Editor For Tiny Screens

These days, adding a little LCD or OLED to your project is so cheap and easy that you can do it on a whim. Even if your original idea didn’t call for a display, if you’ve got I2C and a couple bucks burning a hole in your pocket, why not add one? Surely you’ll figure out what to show on it as the project develops.

But that’s where it can get a little tricky — in terms of hardware, adding a screen just takes running a few extra wires, but the software side is another story. Not only do you have to contend with the different display libraries, but just creating the image assets to display on the screen can be a hassle if it’s not something you do regularly. Enter Lopaka, a graphics and user interface editor for electronic projects created by [Mikhail Ilin].

Continue reading “A Web-Based Graphics Editor For Tiny Screens”

Heat Pump Control That Works

Heat pumps are taking the world by storm, and for good reason. Not only are they many times more efficient than electric heaters, but they can also be used to provide cooling in the summer. Efficiency aside, though, they’re not perfectly designed devices, largely with respect to their climate control abilities especially for split-unit setups. Many of them don’t have remotely located thermostats to monitor temperature in an area, and rely on crude infrared remote controls as the only user interface. Looking to make some improvements to this setup, [Danilo] built a setup more reminiscent of a central HVAC system to control his.

Based on an ESP32 from Adafruit with an integrated TFT display, the device is placed away from the heat pump to more accurately measure room temperature. A humidity sensor is also included, as well as an ambient light sensor to automatically reduce the brightness of the display at night. A large wheel makes it quick and easy to adjust the temperature settings up or down. Armed with an infrared emitter, the device is capable of sending commands to the heat pump to more accurately control the climate of the room than the built-in controls are able to do. It’s also capable of logging data and integrating with various home automation systems.

While the device is optimized for the Mitsubishi heat pumps that [Danilo] has, only a few lines of code need to be changed to get this to work with other brands. This is a welcome improvement for those frustrated with the inaccurate climate controls of their heat pumps, and since it integrates seamlessly into home automation systems could also function in tandem with other backup heat sources, used in cold climates when it’s too cold outside to efficiently run the heat pump. And, if you don’t have a heat pump yet, you can always try and build your own.

Sci Fi UI Made Easy With Arwes

Many of us grew up watching Star Trek, marvelling at the beautiful colorful interfaces on the computers that ran the Starship Enterprise. Today’s computer interfaces have certainly grown fancier since the Windows 3.1 and Mac System 7 days, but they’re still nowhere near that gorgeous. The Arwes framework aims to change that, at least where web apps are concerned.

The framework is inspired by the cyberprep and synthwave aesthetics, while drawing from media like TRON: Legacy and Halo. You can get a peek at what it can do on the Arwes website, or look at how it runs on sites like SoulExtract or the Cyber Movie Database. It’s very much about glowing lines, 1980s computer sounds, and screens with animated text fills.

It’s still in an alpha release, and likely isn’t yet ready for business-critical production use. It currently consists of a set of basic components that can be assembled into a functional futuristic website design, but you’ll need some experience to use the tools at hand. There’s a sandbox for experimenting that should help in that regard.

You might just find that it’s the perfect tool to create an interface for your very own cyberdeck, or you might put it to work on your next website design. Either way, if you create something fantastic, don’t hesitate to drop us a line.


Broken Smartphones: Laptops In Disguise

Modern smartphones are a dizzying treatise on planned obsolescence. Whether it’s batteries that can’t be removed without four hours and an array of tiny specialized tools, screens that shatter with the lightest shock, or (worst of all) software that gets borked purposefully to make the phone seem older and slower than it really is, around every corner is some excuse to go buy a new device. The truly tragic thing is that there’s often a lot of life left in these old, sometimes slightly broken, devices.

This video shows us how to turn an old smartphone into a perfectly usable laptop. The build starts with a screen and control board that has USB-C inputs, which most phones can use to output video. It’s built into a custom aluminum case with some hinges, and then attached to a battery bank and keyboard in the base of the laptop. From there, a keyboard is installed and then the old phone is fixed to the back of the screen so that the aluminum body doesn’t interfere with the WiFi signal.

If all you need is internet browsing, messaging, and basic word processing, most phones are actually capable enough to do all of this once they are free of their limited mobile UI. The genius of this build is that since the phone isn’t entombed in the laptop body, this build could easily be used to expand the capabilities of a modern, working phone as well. That’s not the only way to get a functioning laptop with parts from the junk drawer, either,  if you’d prefer to swap out the phone for something else like a Raspberry Pi.

Thanks to [NoxiousPluK] for the tip!

Continue reading “Broken Smartphones: Laptops In Disguise”

Toddler-Friendly MP3 Player Navigates With Light

When designing this custom MP3 player for his grandson, [Luc Brun] ran into a unique problem. He wanted the boy to be able to operate the player on his own, but being only 2½ years old, the user interface would have to be exceedingly straightforward. Too many buttons would just be a distraction, and a display with text would be meaningless at his age.

In the end, [Luc] came up with a very interesting way of navigating through directories full of MP3 files using a few push buttons and a ring of WS2812 LEDs. The color of the LEDs indicate which directory or category is currently being selected: spoken nursery rhymes are red, music is orange, nature sounds are yellow, and so on. The number of LEDs lit indicate which file is selected, so in other words, three orange LEDs will indicate the third music track.

At his grandson’s age, we imagine at least a little bit of him navigating through this system is just luck. But as he gets older, he’ll start to form more solid connections between what he’s hearing and the color and number of the LEDs. So not only is this interface a way to help him operate the device himself, but it may serve as a valuable learning tool in these formative years.

On the other hand, if your goal is just to distract a youngster for as long as possible, an overwhelming number of LEDs, buttons, and switches might be exactly what you want.

A Smart Controller For Your DIY UV Cure Box

Resin 3D printers are finally cheap enough that peons like us can finally buy them without skipping too many meals, and what means we’re starting to see more and more of them in the hands of hackers. But to get good results you’ll also want a machine to cure the prints with UV light; an added expense compared to more traditional FDM printers. Of course you could always build one yourself to try and save some money.

An earlier prototype build of the interface.

To that end, [sjm4306] is working on a very impressive controller for all your homebrew UV curing needs. The device is designed to work with cheap UV strip lights that can easily be sourced online, and all you need to bring to the table is a suitable enclosure to install them in. Here he’s using a metal paint can with a lid to keep from burning his eyes out, but we imagine the good readers of Hackaday could come up with something slightly more substantial while still taking the necessary precautions to not cook the only set of eyes you’ll ever have.

Of course, the enclosure isn’t what this project is really about. The focus here is on a general purpose controller, and it looks like [sjm4306] has really gone the extra mile with this one. Using a common OLED display module, the controller provides a very concise and professional graphical user interface for setting parameters such as light intensity and cure time. While the part is cooking, there’s even a nice little progress bar which makes it easy to see how much time is left even if you’re across the room.

At this point we’ve seen a number of hacked together UV cure boxes, but many of them skip the controller and just run the lights full time. That’s fine for a quick and dirty build, but we think a controller like this one could help turn a simple hack into a proper tool.

Continue reading “A Smart Controller For Your DIY UV Cure Box”