Printed It: Logitech C270 Conversion

One of the most practical applications for a home 3D printer is the ability to produce replacement parts; why wait a week for somebody to ship you a little plastic widget when you’ve got a machine that can manufacture a facsimile of it in a couple of hours? But what if your skills and passion for the smell of melting PLA push you even farther? You might move on from printing replacement parts to designing and building whole new devices and assemblies. Arguably this could be considered “peak” 3D printing: using a printer to create new devices which would otherwise be difficult or impractical for an individual to manufacture by more traditional means.

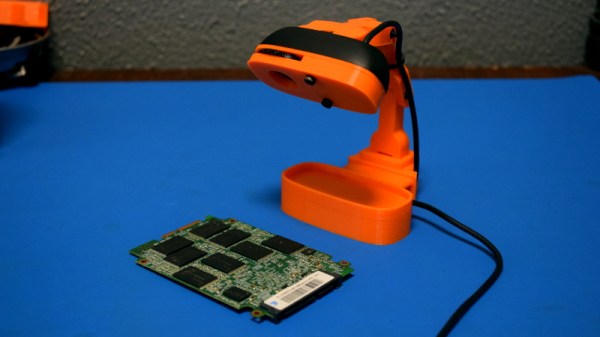
A perfect example is this fantastic total conversion for the Logitech C270 webcam designed by [Luc Eeckelaert]. Officially he calls it a “tripod”, and perhaps that’s how the design started, but the final product is clearly much more than that. It puts the normally monitor-mounted Logitech camera onto an articulated arm, greatly improving the device’s usability. The conversion even includes the ability to manually adjust the focus, a feature the original hardware doesn’t have. It turns the affordable and widely available Logitech C270 into an excellent camera to have on the workbench for documenting projects, or pointing at the bed of your 3D printer.

Continue reading “Printed It: Logitech C270 Conversion”

Chromebook Trades Camera For WiFi Freedom

There are a number of companies now providing turn-key computers that meet the Free Software Foundation’s criteria for their “Respects Your Freedom” certification. This means, in a general sense, that the computer is guaranteed not to spy on you or otherwise do anything else you didn’t explicitly ask it to. Unfortunately these machines often have a hefty premium tacked on, making it an unpleasant decision between privacy and performance.

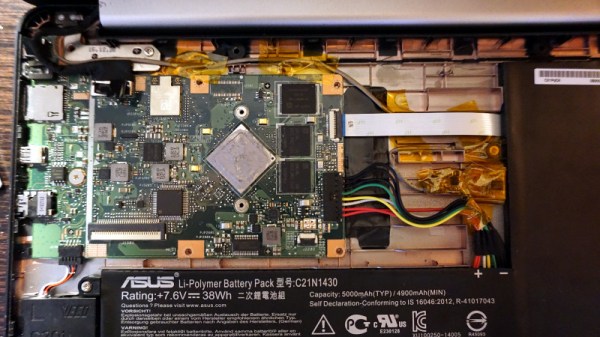
Freedom-loving hacker [SolidHal] writes in to tell us about his quest to create a FSF-compliant laptop without breaking the bank. Based on a cheap Asus C201 Chromebook, his custom machine checks off all the appropriate boxes. The operating system was easy enough with an install of Debian, and the bootloader was rid of any Intel Management Engine shenanigans with a healthy dose of Libreboot. But there was one problem: the permanently installed WiFi hardware that required proprietary firmware. To remedy the issue, he decided to install an internal USB Wi-Fi adapter that has the FSF seal of approval.

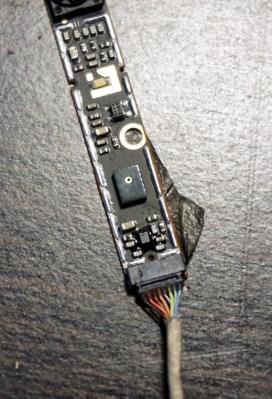
As the Chromebook obviously doesn’t have an internal USB port, this was easier said than done. But as [SolidHal] is not the kind of guy who would want his laptop taking pictures of him in the first place, he had the idea to take the internal USB connection used by the integrated webcam and use that. He pulled the webcam out, studied the wiring, and determined which wires corresponded to the normal USB pinout.

The FSF approved ThinkPenguin Wi-Fi adapter he chose is exceptionally small, so it was easy enough to tuck it inside some empty space inside of the Chromebook. [SolidHal] just needed to solder it to the old webcam connection, and wrap it up in Kapton tape to prevent any possible shorts. The signal probably isn’t great considering the antenna is stuck inside the machine with all the noisy components, but it’s a trade-off for having a fully free and open source driver. But as already established, sometimes these are the kind of tough choices you have to make when walking in the righteous footsteps of Saint Ignucius.

Internal laptop modifications like this one remind us of the Ye Olden Days of Hackaday, when Eee PC modifications were all the rage and we still ran black and white pictures “taped” to the screen. Ah, the memories.

Low-Cost Eye Tracking With Webcams And Open-Source Software

“What are you looking at?” Said the wrong way, those can be fighting words. But in fields as diverse as psychological research and user experience testing, knowing what people are looking at in real-time can be invaluable. Eye-tracking software does this, but generally at a cost that keeps it out of the hands of the home gamer.

Or it used to. With hacked $20 webcams, this open source eye tracker will let you watch how someone is processing what they see. But [John Evans]’ Hackaday Prize entry is more than that. Most of the detail is in the video below, a good chunk of which [John] uses to extol the virtues of the camera he uses for his eye tracker, a Logitech C270. And rightly so — the cheap and easily sourced camera has remarkable macro capabilities right out of the box, a key feature for a camera that’s going to be trained on an eyeball a few millimeters away. Still, [John] provides STL files for mounts that snap to the torn-down camera PCB, in case other focal lengths are needed.

The meat of the project is his Jevons Camera Viewer, an app he wrote to control and view two cameras at once. Originally for a pick and place, the software can be used to coordinate the views of two goggle-mounted cameras, one looking out and one focused on the user’s eye. Reflections from the camera LED are picked up and used to judge the angle of the eye, with an overlay applied to the other camera’s view to show where the user is looking. It seems quite accurate, and plenty fast to boot.

We think this is a great project, like so many others in the first round of the 2018 Hackaday Prize. Can you think of an awesome project based on eye tracking? Here’s your chance to get going on the cheap.

Continue reading “Low-Cost Eye Tracking With Webcams And Open-Source Software”

Portable Photo Booth Named Buzz

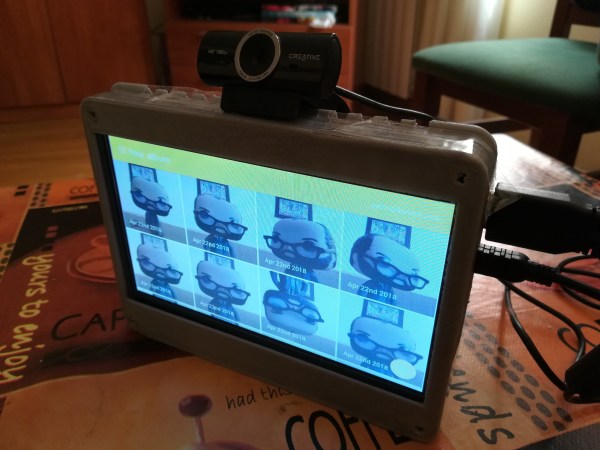
We’re all used to posing for a picture — or a selfie — but there’s something about photo booths that make getting your photo taken an exciting and urgent affair. To make this experience a bit easier to tote about, Redditor [pedro_g_s] has laboriously built, from the ground up, a mobile photo booth named Buzz.

He needed a touchscreen, a Raspberry Pi, almost definitely a webcam, and a 3D printer to make a case — although any medium you choose will do — to build this ‘booth.’ That said, he’s built the app in a way that a touchscreen isn’t necessary, but carting around a mouse to connect to and operate your portable photo booth seems a bit beside the point. On the back end, he used Electron to code the photo booth app, React helped him build a touchscreen UI, and Yarn kept the necessary dependencies in order.

Operation is simple, and every time a photo is taken it is sent to and collated within a previously set-up email service. To set it up, [pedro_g_s] is here to guide you through the process.

Continue reading “Portable Photo Booth Named Buzz”

A Wireless Webcam Without A Cumbersome Cloud Service

After a friend bought a nannycam that required the use of a cloud service to make the device useful,  [Martin Caarels] thought to himself — as he puts it — ”I can probably do this with a Raspberry Pi!

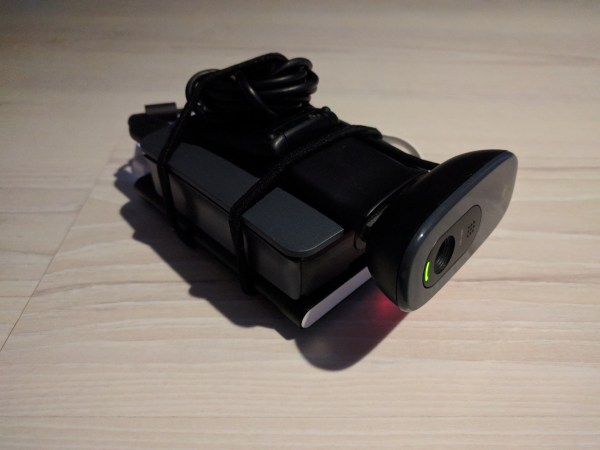
Altogether, [Caarels] gathered together a 4000mAh battery, a Raspberry Pi 3 with a micro SD card for storage, a Logitech c270 webcam, and the critical component to bind this project together: an elastic band. Once he had downloaded and set up Raspbian Stretch Lite on the SD card, he popped it into the Pi and connected it to the network via a cable. From there, he had to ssh into the Pi to get its IP so he could have it hop onto the WiFi.

Now that he effectively had a wireless webcam, it was time to turn it into a proper security camera.

Continue reading “A Wireless Webcam Without A Cumbersome Cloud Service”

Giving A 4k Webcam Special Eyes

It’s a problem as old as photography: your camera is only as good as your lens. As cameras shrink, so do lenses, and so do the options for upgrading to a better lens. And forget about switching to a different focal length or aperture — it’s often just not an option. Unless you make it an option by adding a CS lens mount to a high-end webcam.

We’ll stipulate that at 4k resolution and packed with all sorts of goodies, the Logitech Brio Pro is a heck of a nice camera. And the lens isn’t bad either, as you’d hope for a camera with almost 9 megapixels at its disposal. But with an optical field of view optimized for video conferencing, it’s hard to use this premium camera for much else. [Saulius] fixed that by taking the camera apart and adding a new case with a built-in C- and CS-mount, resulting in literally thousands of lens choices. [Saulius]’ post has valuable teardown information, which includes exposing the CCD sensor completely. The new case is sold as a kit, but it looks like a 3D-printed case would be pretty easy to whip up.

[Salius] sure seems to love those optical hacks, whether they be a budget microscope camera, high-resolution LIDAR, or capturing license plates at great distances.

Controlling A Robot Over The Internet Grows Up

Since the beginning of the Internet people have been controlling robots over it, peering at grainy gifs of faraway rec rooms as the robot trundles around. RunMyRobot.com has taken that idea and brought it fully into the teens. These robots use wifi or mobile connections, are 3D printed, and run Python.

The site aims to provide everything to anyone who wants to participate. If you’re just an anonymous visitor, you can still play with the robots, but anyone can also play with the same one, and sometimes a whole bunch of visitors create a cacophony of commands that makes it not fun—but you can always move to a different robot. Logged-in members of the site have the option to take over a robot and not allow anyone else to use it.

If you want to build a robot and add it to the site, the creators show how to do that as well, with a Github code repository and 3D-printable designs available for download, as well as YouTube instructions on how to build either the printed robot or one made with off-the shelf parts. They’re also looking for patrons to help with development, with the first item on their list being a mobile app.

Thanks to [Sim] for the link.