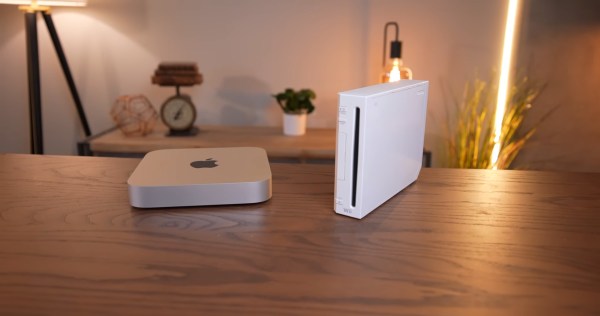
An M1 Mac mini sits next to a white Wii on a wooden table. In the background are various Edison-style LED light fixtures with an incadescent-like light profile.

This Wii Has An Apple M1 Inside

The conveniently tiny logic board of the M1 Mac mini has lead to it giving the Mini ITX format a run for its money in case mods. The latest example of this is [Luke Miani]’s M1 Wii. (Youtube via 9to5Mac)

[Miani] chose the Wii as a new enclosure for this Mac mini given its similar form factor and the convenient set of doors in the top to maintain access to the computer’s I/O, something he wasn’t able to do with one of his previous M1 casemods. The completed build is a great stealth way to have a Mac mini in your entertainment center. [Miani] even spends the last several minutes of the video showing the M1 Wii running Wii, GameCube, and PS2 games to really bring it full circle.

A Microsoft Surface power brick was spliced into the original Wii power cable since the Wii PSU didn’t have enough wattage to supply the Mac mini without significant throttling. On the inside, the power runs through a buck converter before making its way to the logic board. While the Mini’s original fan was too big to fit inside the Wii enclosure, a small 12V fan was able to keep performance similar to OEM and much higher than running the M1 fanless without a heat spreader.

If you’d like to see some more M1 casemods, check out this Lampshade iMac or the Mac Mini Mini.

Continue reading “This Wii Has An Apple M1 Inside”

Wii Meets Its End In Breadcrumb Jail

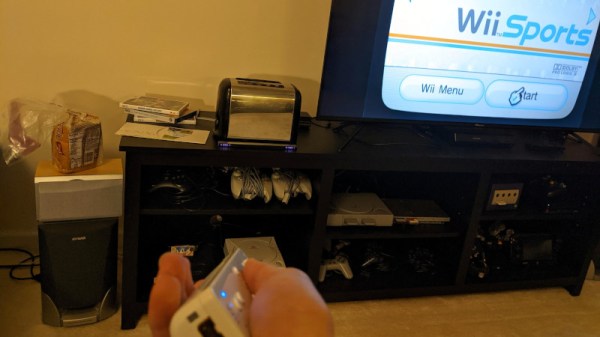
One of often encountered traits of a hacker is an ability to build devices into places where they don’t belong. Perhaps, [sonictimm]’s self-descriptive WiiinToaster was somewhat of an inevitability. Inspired by the legendary Nintoaster project which used a NES, this is a modern take on the concept, putting a Wii inside what used to be an ordinary bread-making kitchen appliance. [Sonictimm] has taken care to make it as functional while reusing the user interface options commonly found in a toaster, with some of the Wii’s connections routed to the original buttons and the lever. It’s compatible with everything that the Wii supports in its standard, non-toaster form – the only function that had to be sacrificed was the “making toast” part of it, but some would argue it’d be a bit counterproductive to leave in.

[Sonictimm] says it took five years from building the WiiinToaster to documenting it, which sounds about right for an average project. If you, like many, have a Wii laying around that you haven’t been using for years, building it into a toaster (or any other place a Wii shouldn’t be) is a decent weekend project. Perhaps, a spacier chassis will also help with the overheating problems plaguing some earlier Wii models. One thing we would not recommend, however, is building a toaster into a Wii case – unless you like to see your creations self-immolate, in which case, make sure to film it and grace our Tips line with a YouTube link. There’s also a challenge for the achievement-minded hackers out there – making a rebuild so daring, it gets a DMCA notice from Nintendo.

It wouldn’t be the first time we feature a Nintendo console reborn in a toaster’s shell, with NES and SNES projects coming to mind. If you’re interested in other directions of Wii rebuilds, perhaps you could make an Altoids-sized FrankenWii, or an unholy hybrid of three consoles. And if you do build a Switchster, or a ToaDSter (perhaps, best suited for a waffle iron), we’d love to take a look!

Continue reading “Wii Meets Its End In Breadcrumb Jail”

GamecubePC Puts a PC into a Gamecube chassis

GamecubePC Packs Plenty Of Punch Into GameCube Plastics

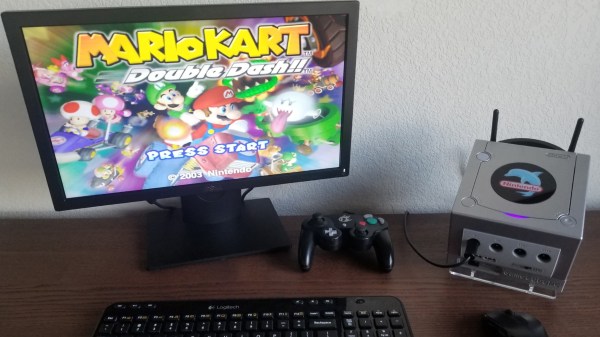
If reading Hackaday teaches us anything, it’s that there is a subset of hackers who take things like emulator builds a step farther than most. [RetroModder] is very clearly one such hacker. Enter the GamecubePC, which you can read about on Hackaday.io. The GamecubePC is a multi-year project that aims to stuff an entire Windows 10 PC into a GameCube shell while still being able to play Wii and GameCube titles at native resolution and performance.

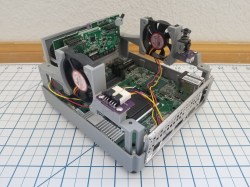
Internals of the GamecubePC with all the custom chassis and PCB's on display
Internals of the GamecubePC with all the custom chassis and PCB’s on display

Although it only takes a spare computer and the Dolphin emulator to make a GameCube and Wii emulator, great attention has been paid to keeping the GameCube at the forefront. Contributing to the illusion is the preservation of the original GameCube power switch and reset buttons by way of custom PCB’s that interface the parts to the mSTX motherboard.

The bottom of the GameCube shell is replaced with a 3D printed base that mounts the motherboard while smartly giving access to the motherboard’s front panel. The minuscule motherboard sports an Intel Core™ i5-7600 with 8GB memory, and SSD storage. Topping off the experience are four functional controller ports that can be switched to be used with the emulator or with PC games too. Surely the GamecubePC will be the subject of many double takes!

Custom game builds are no stranger to Hackaday, and you might appreciate this portable Wii that can play Wii and GameCube games or this GameCube controller hacked into a Joycon for the Nintendo Switch.

Edit from the far future: it’s now a project on Tindie.  Check it out.

Arduino Learns The Martial Arts With Nunchucks Input Device

There is a boring part of every computer introduction class that shows how a computer is made up of input, output, and processing. Maybe it wouldn’t be so boring if the input device was a nunchuck. [Brian Lough] thinks so and he belligerently asserts that nunchucks are the best input device ever. With a simple connection to a Wii controller and an associated library, you get access to an analog joystick, two buttons, and an accelerometer.

The nunchuck is meant to plug into a Wii controller and the connection is I2C, so that’s trivial to interface to an Arduino or other small microcontroller. The only issue is making the connection. We might have just snipped the wires, but [Brian] prefers to use a small breakout board that plugs into the stock connector and provides solder points for your own cable. There are options for the breakout boards, and [Brian] has his own design that you can get from OSHPark for about a buck for three boards. You can also just jam wire into the connector, but that’s not always robust.

Continue reading “Arduino Learns The Martial Arts With Nunchucks Input Device”

WiiBoy Color Is Exactly What It Sounds Like

Anyone can go out and buy a handheld console, and if you want to be the cool kid on the school bus, you can always ask your parents to take you out to get one. But if you want real street cred that lasts through your adult years, you’ve gotta put something together yourself. [GingerOfMods] has done just that with the Wiiboy Color. 

Yes, it’s another home-console-turned-portable, and it’s perfomed with exquisite execution. The Wii motherboard is cut and sliced to the absolute bare minimum, as the aim was to build the entire system to the rough form factor of the original Game Boy Color. Custom PCBs were then used to link the chopped ‘board to peripherals, such as the USB drive used to load games and the circuitry from a Gamecube controller. The screen is a beautiful looking 3.5″ IPS LCD, running at 480p and originally intended for use as an automotive backup camera. Battery life is around 2-3 hours, with a USB-C port included for easy charging. More details are included on the forum build log.

It’s a tidy build, and the 3D printed case, Switch joysticks and DS Lite buttons give it a near-production quality finish. [GingerOfMods] intends to build more for commissions, though expect a hefty price tag given the labor and custom work involved. We’ve seen other portable Wiis before too, like this tightly-packed Kapton-heavy build. Video after the break.

Continue reading “WiiBoy Color Is Exactly What It Sounds Like”

Custom Bluetooth Joystick In A Nunchuk Shell

With the Wii’s unique controller, Nintendo not only provided new gaming experiences to players, but gave hardware hackers a platform for experimentation that’s still going strong. Case in point, this modification of a third party Wii “Nunchuk” by [Giliam de Carpentier] that turns the accessory into a stand-alone wireless controller powered by a ATtiny44A.

Milling a new home for the AVR

It turns out there’s a considerable amount of free space inside the Nunchuk case, so [Giliam] found adding in the new hardware wasn’t nearly as difficult as you might expect. Of course, it helps that the diminutive SMD ATtiny44A and its support hardware are housed on a very neatly milled PCB that attaches to the back of the original board.

Most of the other hardware comes in the form of modular components, like the Bluetooth transmitter and TP4056 charge controller for the 300 mAh battery. A micro USB charging port is mounted where the original Nunchuk cable entered the case, making the whole thing look very professional.

Even if you aren’t interested in making your own controller, [Giliam] covers many interesting topics in this write-up such as handling different methods of Bluetooth connectivity and various power management techniques to eke out as much life from the relatively small battery as possible. It’s not only a fascinating read, but a great example of what thorough project documentation should look like.

In the past we’ve seen Bluetooth conversions for the Wii Nunchuck, but traditionally they left the original electronics in place. On the other side of the spectrum, we’ve also seen the internals get replaced with something as powerful as the Raspberry Pi Zero.

Continue reading “Custom Bluetooth Joystick In A Nunchuk Shell”

Guitar Hero Controller Gets A New Musical Life

Guitar Hero was a big deal, right up until it wasn’t. The best efforts of the video game industry couldn’t resurrect the once-off rush of enthusiasm for rhythm gaming, and thrift stores around the globe are now littered with little plastic instruments. [Analog Sketchbook] decided to give one of these guitars for the Wii a new life, repurposing it as a synth controller.

The build is a straightforward one, thanks to the prevalence of modern maker solutions to electronic problems. Hooking up to the guitar is a solved problem, with an Adafruit Nunchucky breakout board allowing the Guitar Hero controller to be connected via jumper wires to the Raspberry Pi’s IO pins.

Communication is via I2C, and is easy to work with in Pure Data, running on the Pi. [Analog Sketchbook] created a patch that runs a synthesizer, controlled by the buttons and controls on the guitar itself. With this setup, you could create any number of different routines to allow the guitar to be played differently. We’d love to see a chiptune-esque arpeggio patch, or something that plays fat FM synth tones a la the Genesis, but that’s just our opinion. The sky really is the limit here, with plenty of grunt on the Pi for various forms of synthesis.

It’s a fun build that gives new life to an otherwise forgotten gaming accessory. We’ve seen them repurposed before too, as far back as 2010. Video after the break.

Continue reading “Guitar Hero Controller Gets A New Musical Life”