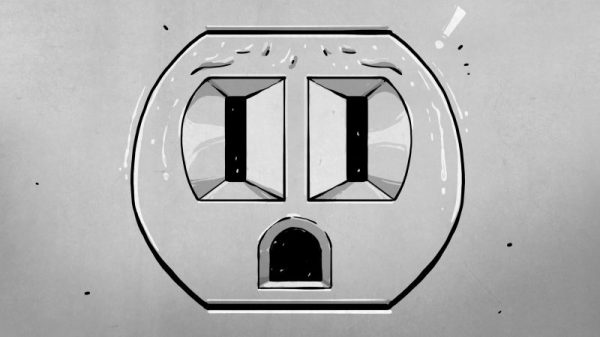
Right now, if you happen to be in Noth America, chances are pretty good that there’s at least one little face staring at you. Look around and you’ll spy it, probably about 15 inches up from the floor on a nearby wall. It’s the ubiquitous wall outlet, with three holes arranged in a way that can’t help but stimulate the facial recognition firmware of our mammalian brain.
No matter where you go you’ll find those outlets and similar ones, all engineered for specific tasks. But why do they look the way they do? And what’s going on electrically and mechanically behind that familiar plastic face? It’s a topic we’ve touched on before with Jenny List’s take on international mains standards. Now it’s time to take a look inside the common North American wall socket, and how it got that way.
Someone who decides to build a house faces a daunting task. It’s hard enough to act as the general contractor for someone else, but when you decide to build your own house, as my parents did in the early 1970s, it’s even tougher. There are a million decisions to make in an information-poor and rapidly changing environment, and one wrong step can literally cast in stone something you’ll have to live with forever. Add in the shoestring budget that my folks had to work with, and it’s a wonder they were able to succeed as well as they did.
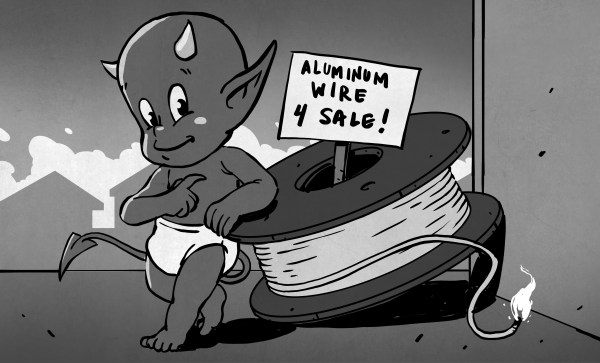
It was a close call in a few spots, though. I can recall my dad agonizing over the wiring for the house. It would have been far cheaper to go with aluminum wiring, with the price of copper wire having recently skyrocketed. He bit the bullet and had the electrician install copper instead, which ended up being a wise choice, as houses that had succumbed to the siren call of cheaper wiring would start burning down all over the United States soon thereafter.
What happened in the late 60s and early 70s in the residential and commercial electrical trades was an expensive and in some cases tragic lesson in failure engineering. Let’s take a look at how it all happened.
On a balmy September evening in 1998, Swissair flight 111 was in big trouble. A fire in the cockpit ceiling had at first blinded the pilots with smoke, leaving them to rely on instruments to divert the plane, en route from New York to Geneva, to an emergency landing at Halifax Airport in the Canadian province of Nova Scotia. But the fire raging above and behind the pilots, intense enough to melt the aluminum of the flight deck, consumed wiring harness after wiring harness, cutting power to vital flight control systems. With no way to control the plane, the MD-11 hit the Atlantic ocean about six miles off the coast. All 229 souls were lost.
It would take months to recover and identify the victims. The 350-g crash broke the plane into two million pieces which would not reveal their secrets until much later. But eventually, the problem was traced to a cascade of failures caused by faulty wiring in the new in-flight entertainment system that spread into the cockpit and doomed the plane. A contributor to these failures was the type of insulation used on the plane’s wiring, blamed by some as the root cause of the issue: the space-age polymer Kapton.
No matter where we are, we’re surrounded by electrical wiring. Bundles of wires course with information and power, and the thing that protects us is the thin skin of insulation over the conductor. We trust these insulators, and in general our faith is rewarded. But like any other engineered system, failure is always an option. At the time, Kapton was still a relatively new wonder polymer, with an unfortunate Achilles’ heel that can turn the insulator into a conductor, and at least in the case of flight 111, set a fire that would bring a plane down out of the sky.
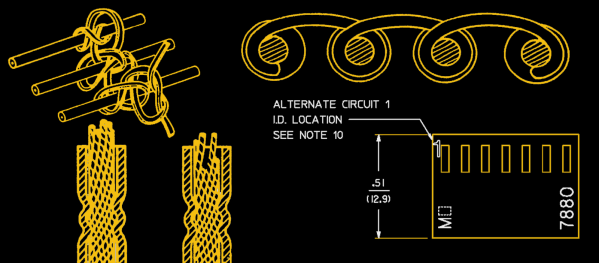
The “Completion Backwards Principle” is a method of reasoning through a problem by visualizing the end result and then working your way backwards from that point. The blog post that [Alan Hawse] has recently written about the intricacies of crimping wires for plug connectors is a perfect example of this principle. The end result of his work is the realization that you probably shouldn’t bother crimping your own connectors, but watching him work backwards from that point is still fascinating. It’s also the name of a rock album from the 80’s by The Tubes, but this is not a useful piece of information in regards to electrical wiring.
Of course, sometimes people do silly things. Even though there are pre-crimped wires available online for a pittance, you might still want to do your own. With this in mind, [Alan] has put together an exceptionally detailed and well-research post that gives you all the information you could possibly want to know about crimping what is often erroneously referred to as the “JST connector”.
He starts by showing off some common examples of this connector, which if you’ve ever opened a piece of consumer electronics will be like looking through a High School yearbook. You might not know their names without reading them, but you definitely remember what they look like.
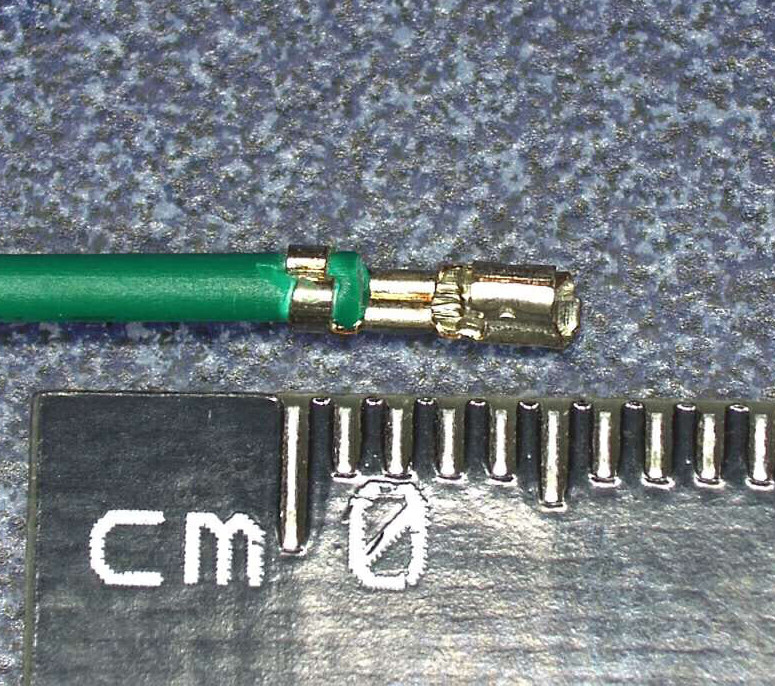
We’re then treated to an array of macro shots showing the scale of the pieces involved. If getting up close and personal with metal bits that are only a few millimeters long is your kind of thing, then you’re really going to love this part.
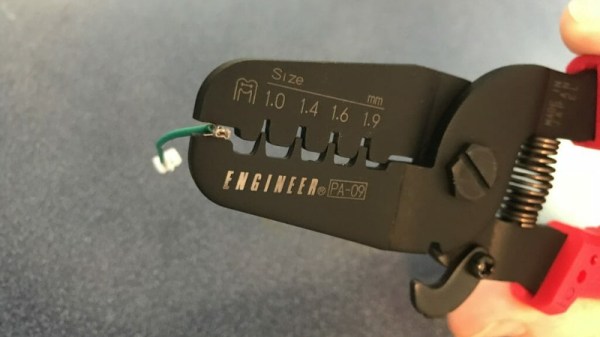
Finally, the post is wrapped up with a few words about the kind of crimping tools that are available on the market, and then a demonstration of his personal crimping method. While some tools would have you crimp both sets of “wings” at the same time, [Alan] tells us he finds taking them on individually leads to better results in his experience.
Wiring — as in plugging wires together and crimping connectors, not the Arduino IDE thingy — is an incredibly deep subject. We all know the lineman’s splice is the best way to solder two wires together, and NASA’s guide to cables and connectors is required reading around these parts. However, there’s a lot that can be said about connectors and cabling, and one of the best people to explain it all is Bradley Gawthrop. He spent the last ten years building pipe organs, and with that comes tens of thousands of relays, solenoids, switches, and valves. All of these parts are connected by thousands of miles of wire, and are arguably as complex as an old-school telephone exchange. If there’s someone you need to talk to about connecting hundreds of thousands of parts together, Bradley is your guy.
Bradley starts his Hackaday Superconference talk with a discussion of the modern prototyping process. We’re pretty far away from dozens of chips sitting around a breadboard with data and address lines these days, and now any sort of prototype is basically a development board with a constellation of modules studded around the perimeter. The best solution for connectors is right angle headers, not only for the reason that the wires stay flat, but also because right angle connectors allow you to probe each and every wire coming out of a board.
Of course, when it comes to wiring, it’s helpful to talk about the wire itself. Instead of having an entire warehouse of wire in every color, gauge, and insulation material hanging above his workshop, Bradley only needs a few options. Right now, he’s only dealing with three gauges of wire — small, medium, and large, or 24, 18, and 12 AWG. That’s one wire for small signals, one wire for a bit of current, and one wire for supply amounts of current. Not only does this cut down on workshop inventory, it also means Bradley only needs three sizes of crimpers and connectors. When it comes to strand count, solid core wire is highly underrated. Not only is it easier to strip and crimp, it can also support its own weight. That’s important, because it means connectors don’t have to bear the weight of the entire cable run.
If you’re looking for the minimal required toolset for running cables and crimping connectors, Bradley has a great little shopping list on his website. The best strippers he’s ever found come from Wiha, but they’ve been EOL’d by the manufacturer. Knipex makes some good strippers, though. You don’t need to spend big money on ferrule crimpers, and some cheapies from BangGood are good enough. Bradley has standardized on Molex SL and Molex KK interconnects, and wire can be sourced easily if you have Amazon Prime.
While the subject matter for Bradley’s talk sounds easy to overlook, connecting parts together in an assembly is a critical skill in itself. We’re glad Bradley could share his experience with us at the Hackaday Superconference.
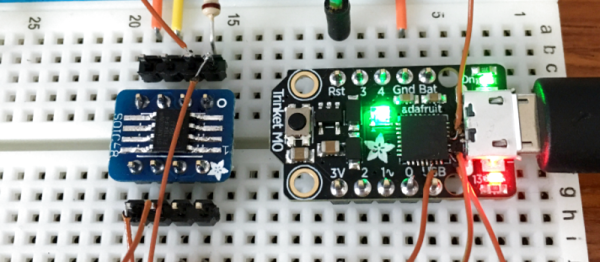
We’ll just get our “kids these days” rant out of the way up front: the stock SAMD21 ARM chip has 256 kB (!) of flash to begin with, and is on a breakout board with only five GPIO pins, for a 51 kB / pin ratio! And now he’s adding 2 MB more? That’s madness. The stated reason for [Curmudegeoclast]’s exercise is MicroPython, which takes up a big chunk of flash just for the base language. We suspect that there’s also a fair amount of “wouldn’t it be neat?” in the mix as well. Whatever.
The hack is a classic. It starts off with sketchy wires soldered to pins and breadboarded up with a SOIC expander board. Following that proof of concept, some degree of structural integrity is brought to the proceedings by gluing the flash chip, dead-bug, on top of the microcontroller. We love the (0805?) SPI pullup resistor that was also point-to-point soldered into place. We would not be able to resist the temptation to entomb the whole thing in hot glue for “long-term” stability, but there are better options out there, too.
This hack takes a minimalist board, and super-sizes it, and for that, kudos. What would you stuff into 2 MB of free flash on a tiny little microcontroller? Any of you out there using MicroPython or CircuitPython care to comment on the flash memory demands? 256 kB should be enough for anyone.
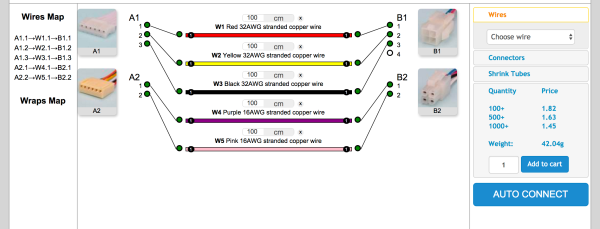
PCB makers Dirty made a name for themselves in the prototype PCB biz, with a convenient web form and numerous options for PCB color, thickness, layers, silk screening, and so on. Now they’ve branched out into custom cabling with Dirty Cables.
You can design it yourself by dragging wires and connectors out of a sidebar and arranging them on a workspace, deciding which wire goes to what pin of the connector. Your choices for wires include various gauges and ribbon configurations. You choose a color (they have eleven) select connectors and drag those out too–choose from 17 cable-to-cable and cable-to-board connector families. We made a quick cable with four 32ga wires and two 16ga wires, with two different connectors on each side, with pricing updated realtime. If you want a sample pack of connectors, Dirty sells them for $10.
The downside to the service: there’s a minimum order of 100, though paying Shenzhen prices might make it worth your while. Just imagining crimping all of those connectors makes Hackaday’s hands hurt.
To get a sense of the diversity of connectors out there, read Elliot’s piece on the connector zoo that we published last year.