Laser Cutting Your Way To An RGB LED Table

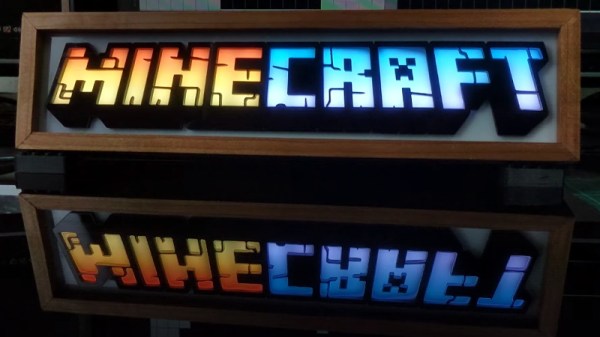
You’ve got the RGB keyboard, maybe even the RGB mouse. But can you really call yourself master of the technicolor LED if you don’t have an RGB table to game on? We think you already know the answer. Luckily, as [ItKindaWorks] shows in his latest project, it’s easy to build your own. Assuming you’ve got a big enough laser cutter anyway…

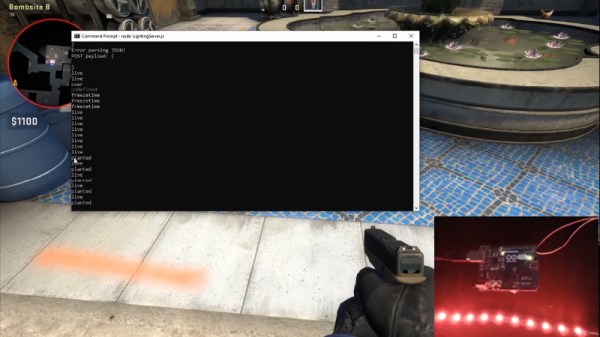
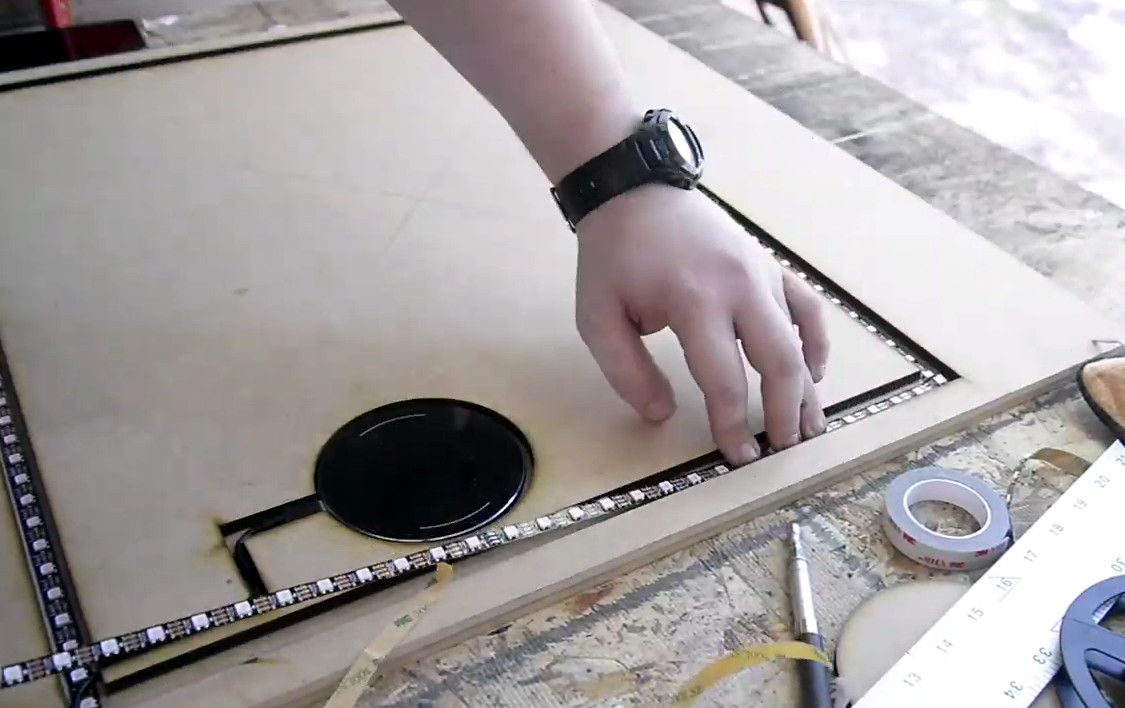
The construction of the table is quite straightforward. Using an 80 watt laser cutter, he puts a channel into a sheet of MDF to accept RGB LED strips, a pocket to hold a Qi wireless charger, and a hole to run all the wires out through. This is then backed with a second, solid, sheet of MDF.

Next, a piece of thin wood veneer goes into the laser cutter. In the video after the break you can see its natural tendency to roll up gave [ItKindaWorks] a little bit of trouble, but when strategically weighted down, it eventually lays out flat. He then uses the laser to blast an array of tiny holes in the veneer, through which the light from the LEDs will shine when it’s been glued over the MDF. A few strips of plastic laid over the strips serve both to diffuse the light and support the top surface.

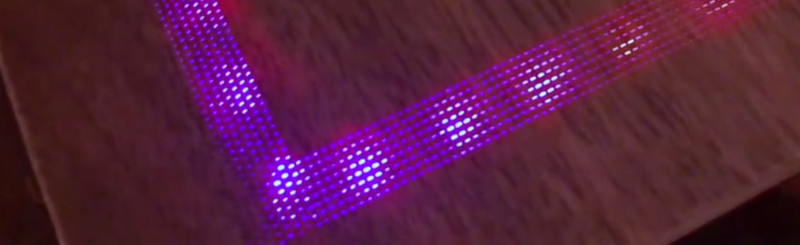
The end result is truly gorgeous and has a very futuristic feel. Assuming you’ve got the equipment, it’s also a relatively simple concept to experiment with. It’s yet another example of the unique construction techniques possible when you add a high-powered laser to your arsenal.

Continue reading “Laser Cutting Your Way To An RGB LED Table”

RGB Minecraft Sign Isn’t Just For Looks

This laser cut and LED illuminated version of the Minecraft logo created by [Geeksmithing] looks good enough to occupy a place of honor on any gamer’s shelf. But it’s not just decoration: it can also notify you about your Minecraft’s server status and tell you when players are online by way of its addressable LEDs.

In the first half of the video after the break, [Geeksmithing] shows how the logo itself was built by cutting out pieces of white and black acrylic on his laser cutter. When stacked up together, it creates an impressive 3D effect but also isolates each letter. With carefully aligned rows of RGB LEDs behind the stack, each individual letter can be lit in its own color (or not at all) without the light bleeding into either side.

Once he had a way of lighting up each letter individually, it was just a matter of writing some code for the Raspberry Pi that can do something useful with them. Notifying him when the server goes down is easy enough, just blink them all red. But the code [Geeksmithing] came up with also associates each letter with one of the friends he plays with, and lights them up when they go online. So at a glance he can not only tell how many friends are already in the game, but which ones they are. Naturally this means the display can only show the status of nine friends…but hey, that’s more than we have anyway.

We’ve been seeing people connect the real world to Minecraft in weird and wonderful ways for years now, and it doesn’t seem like there’s any sign of things slowing down. While we recognize the game isn’t for everyone, but you’ve got to respect the incredible creativity it’s inspired in young and old players alike.

Continue reading “RGB Minecraft Sign Isn’t Just For Looks”

An RGB Backlight For The Nokia 5110 LCD

Hardware hackers love the Nokia 5110 LCD. Or at least, they love the clones of it. You can pick up one of these panels for a couple bucks wherever electronic bits and bobs are sold, and integrating it into your project is a snap thanks to all the code and documentation floating around out there. But while it might be cheap and reliable, it’s not a terribly exciting component.

Which is perhaps why [Miguel Reis] thought he’d spruce it up a bit with an RGB backlight. While we’ll admit that this hack is mostly about looking cool, it’s not entirely without practical application. If your gadget experiences some kind of fault, having it flash the LCD bright red is sure to get somebody’s attention from across the room.

The board itself is very straightforward, with four MHPA1010RGBDT RGB LEDs and a couple of passives to keep them happy. The Nokia 5110 LCD module just pops right on, and beyond the extra pins added for the three LED colors, gets wired up the same as before. The backlight LEDs just need a few spare GPIO pins on your microcontroller to drive them, and away you go.

[Miguel] is currently selling his RGB version of this iconic LCD on Tindie for only a couple dollars more than the standard version, so it looks like a pretty cheap way to add a little bling to your next project. (Tindie is owned by Supplyframe, which also owns Hackaday. But they didn’t put us up to adding this link.)

RGB Kitchen Uses Pots To Stir Up Color

Anyone who has done anything with RGB LEDs knows that their ability to display pretty much any color is somehow both the best and worst thing about them. How do you get it right? How do you make your results repeatable? [Thomas] has the answer. He dug around in the ol’ parts cupboard, found a few pots, and got to work making this stay-home stew of a project — an on-demand RGB LED color mixer.

Three cleverly color-coded potentiometers and an Arduino let [Thomas] step through 0-255 to mix various values of red, blue, and green. The shade that gets made is displayed live on a set of 10 individual NeoPixels that are laid out under a frosty diffusing panel. Each of the RGB values are also shown on an 16×2 LCD.

This is one of those projects that hits a sweet spot of being simple, useful, and fun. It’s even nice-looking and compact. What more could you want from a project cobbled together from ingredients on hand? [Thomas] is even giving away the code recipe.

Once you dial in your ideal colors, why not make a gesture-controlled lamp?

Reverse Engineering An RGB Keyboard Under Linux

Hardware support under Linux is far better than it ever has been in the past. These days, most things “just work” out of the box, and you probably won’t have to compile any custom kernel modules. Certainly a far cry from where things were a decade ago. But that doesn’t mean everything will work to 100% of its abilities. Take for example, the Duck keyboard that [Cynthia Revström] has. Sure it works as a basic keyboard under any OS, but getting those fancy RGB LEDs working is another story entirely.

Don’t get the wrong idea here, [Cynthia] isn’t just trying to get the keyboard to flash along to music; the goal was to use the RGB lighting of the Ducky keyboard for notifications that the user can’t possibly ignore. Even the most laser-focused among us would have a hard time not noticing that the entire keyboard is blinking red. But the “DuckyRGB” software that you need to do something like that is Windows-only and apparently distributed via a sketchy Google Drive link. Yikes.

The first step to creating an alternative was to spin up a Windows VM and install DuckyRGB. From there, Wireshark could listen in between the virtual computer and the Ducky keyboard to see what the software was sending over the wire. After identifying a version number being sent in the clear, [Cynthia] was able to isolate the LED commands by searching for the hex color codes. From there, it was a relatively simple matter of writing some glue code to connect it up to an alert service and get notifications going.

There was only one problem; the keyboard didn’t work anymore. Turns out the tool that [Cynthia] wrote to control the keyboard’s LEDs was claiming the device so the kernel couldn’t access it for normal input. It took a detour with HIDAPI to get everyone playing together nicely, and now changing the color of your Ducky keyboard on Linux doesn’t turn it into a paperweight.

Even if you don’t have a Ducky keyboard, or aren’t particularly interested in having its LEDs blinked at you if you do, this project is a phenomenal example of practical USB reverse engineering. [Cynthia] says the inspiration for this project came from friend [Ben Cox], who’s write-up on creating USB userspace drivers we covered last year. If you’ve got and old USB gadget with Windows-only drivers, maybe it’s time you take a crack at unlocking it.

Adding RGB To A CRT

There was a time when all TVs came with only an antenna socket on their backs, and bringing any form of video input to them meant dicing with live-chassis power supplies. Then sets with switch-mode supplies made delving into a CRT TV much safer, and we could bodge in composite video and even RGB sockets by tapping into their circuitry. For Europeans the arrival of the SCART socket gave us ready-made connectivity, but in the rest of the world there was still a need to break out the soldering iron for an RGB input. [Jacques Gagnon] is in Canada, and has treated us to a bit of old-school TV input hacking as he put an RGB socket on his JVC CRT set.

Earlier hacks had inventive incursions into discrete analogue circuitry, but on later sets such as this one the trick was to take advantage of the on-screen-display features. The signal processing chip would usually have an RGB input with a blanking input to turn of the picture during the OSD chip’s output. These could be readily hijacked to provide an RGB input, and this is the course taken here. We see a VGA socket on the rear panel going to a resistor network on a piece of protoboard stuck in a vacant space on the PCB, from which a set of lines then go to the signal processing chip. The result is a CRT gaming monitor for retro consoles, of the highest quality.

For those of us who cut our teeth on CRT TVs it’s always good to see a bit of TV hacking. It’s a mod we’ve seen before, too.

Counter-Strike Gets The RGB LED Treatment

Inspired by the over-the-top stage lighting and pyrotechnics used during e-sport events, [Hans Peter] set out to develop a scaled-down version (minus the flames) for his personal Counter-Strike: Global Offensive sessions. It might seem like pulling something like this off would involve hacking the game engine, but as it turns out, Valve was kind enough to implement a game state API that made it relatively easy.

According to the documentation, the CS:GO client can be configured to send out state information to a HTTP server at regular intervals. It even provided example code for implementing a simple state server in Node.js, which [Hans] adapted for this project by adding some conditional statements that analyze the status of the current game.

These functions fire off serial commands to the attached Arduino, which in turn controls the WS2812B LEDs. The Arduino code takes the information provided by the HTTP server and breaks that down into various lighting routines for different conditions such as wins and losses. But things really kick into gear when a bomb is active.

[Hans] wanted to synchronize the flashing LEDs with the beeping sound the bomb makes in the game, but the API doesn’t provide granular enough data. So he recorded the audio of the bomb arming sequence, used Audacity to precisely time the beeps, and implemented the sequence in his Arduino code. In the video after the break you can see that the synchronization isn’t perfect, but it’s certainly close enough to get the point across in the heat of battle.

With the special place that Counter-Strike occupies in the hearts of hackers and gamers alike, it’s little surprise people are still finding unique ways to experience the game.

Continue reading “Counter-Strike Gets The RGB LED Treatment”