The Raspberry Pi Portable Console You Wish You Had

A retro game console is a fun all-arounder project. You’ve got electronics, mechanical design, and software considerations. For this year’s Hackaday Prize, is going all in. The Portable Retro Game Console with 7.9-inch Display is a work of art, and everything that a retro console could be.

This build is based on the Raspberry Pi 3 A+ instead of the B model for space-saving considerations. The screen is a beautiful 7.9 inch IPS panel with 2048 x 1536 resolution. Stereo 3 W speakers pump out the tunes, and an 8000 mAh provides somewhere between 3 and 6 hours of play time.

While using a Raspberry Pi 3 for retro gaming is fun, there’s a world of oppurtunity for emulating bigger and badder consoles thanks to more powerful single board computers. The Nvidia Jetson Nano is far more powerful than the Raspberry Pi 3, and could conceivably emulate N64 and PlayStation games. The Atomic Pi, the fantastic computer that totally isn’t industrial surplus repackaged as an educational computer, already is proven to emulate N64 games. Imagine taking a portable console out of your backpack and playing Conker’s Bad Fur Day on the bus. Oh, that’s cheeky, but it is possible thanks to the amazing work of hardware creators.

A Retro Handheld Console As They Used To Be Made

Before there were Nintendo Switches, there were Game Boys. And before that there were all the successive generations of Game Boys and other consoles right back to the Game and Watch, and then those handheld Simon and Space Invaders games of the late 1970s. These devices typically packed a 4-bit microcontroller and an array of discrete LEDs, and movements in-game were simply created by alternate LEDs on the game field being flashed.

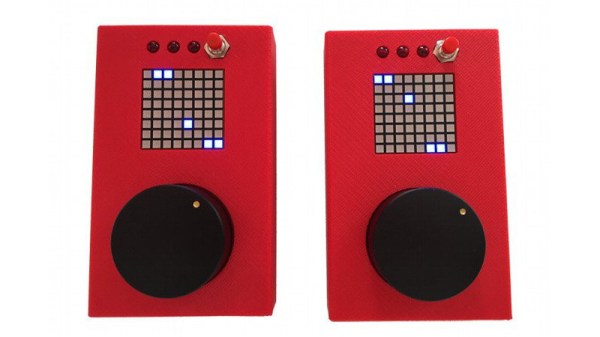
The TeleBall from [sv2002] is a handheld game in the vein of those early handheld games, in that it features a matrix of LEDs as a screen on which it can display simple games. So far it plays Breakout, and Tennis for Two, which might seem odd were it not for its built-in radio for two-person play with two consoles.

Inside the TeleBall is an Arduino Nano, a Maxim display driver for the LED matrix, and the familiar Nordic Semiconductor RF module. Control is via a potentiometer, and everything sits in a smart 3D-printed case. Everything is open-source, so should you wish to have your own you can head over to the project’s web site and grab all the files. You can watch it in action playing tennis with two consoles in the video below the break.

The original Tennis for Two created in 1958 was an oscilloscope game using an analogue computer, and is credited as the first video game created purely for entertainment purposes. If you’d like to see a recreation of it, we covered one over a decade ago.

Continue reading “A Retro Handheld Console As They Used To Be Made”

A Z80 Homebrew Console, With A Bit Of Modern Help

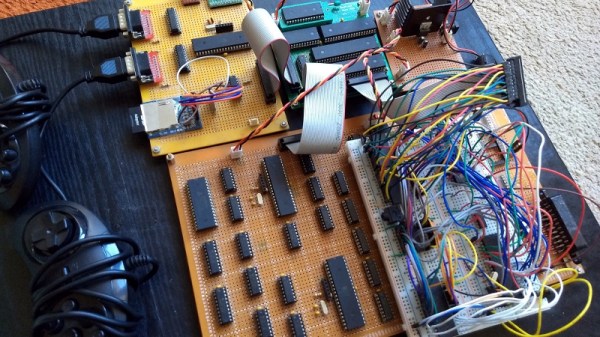
We see a lot of retrocomputing projects here at Hackaday that take devices from the 8-bit era and re-create them in the 21st century. Sometimes they remain period-accurate and stick to all contemporary devices, but in other cases they take full advantage of four decades of advancing technology. [Pkiller]’s Z80 console is one of this later category, creating peripherals for the classic CPU using microcontrollers in the place of the banks of 74 logic or ULA chips that might have graced a 1980s machine.

The video generation hardware produces a PAL signal using an interesting technique involving two RAM buffers. An ATmega644 microcontroller composites a single frame into one of the buffers while another ATmega644 is generating the previous frame of video from the other buffer. On each change of frame the buffers are switched between the two microcontrollers, requiring some extra 74 logic chips. Another AtMega chip provides the Z80 with I/O interfacing, and the sound comes via another dual-buffer microcontroller setup and a quick return to classic hardware with a YM3438 FM synthesis chip. The result can be seen in the video below, and would have not looked out of place in a late-’80s or even early-’90s living room.

Some people might ask why so much trouble should be gone to in the pursuit of a project like this one, but to do so is to miss the point. Sure, a Sega Master System can be had from the usual sources, but in creating  project such as this one the builder has to truly understand the technologies such as PAL generation or the internals of a Z80 in great detail. The result while it is undeniably impressive is almost secondary to the process of reaching it.

Continue reading “A Z80 Homebrew Console, With A Bit Of Modern Help”

GBA Consolizer Kit RetroRGB

GBA On The Big Screen: FPGA Delivers HDMI And Every Feature Imaginable

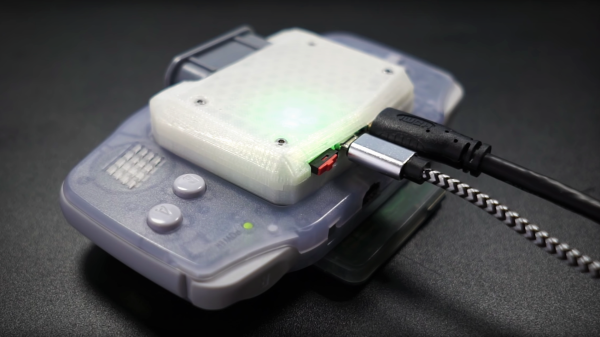
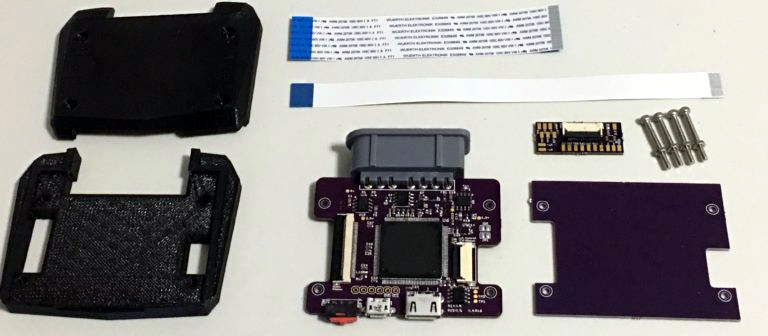
The concept of creating a gaming portable out of a home console has been around for some time, but it’s hardly seen the other way around. There have been a few devices that dared to straddle the line (i.e., Sega Nomad, Nintendo Switch, etc.), but the two worlds typically remain separate. [Stephen] looked to explore that space by attempting to turn the Game Boy Advance into a “big boy” console. The FPGA-based mod kit he created does just that, and comes complete with controller support and digital video output in 720p over a mini HDMI cable.

The kit itself was designed specifically for the original model GBAs containing the 40-pin LCD ribbon cable. These original models were the early run of non-backlit screens that are also denoted by a motherboard designation that can be seen by peering into the battery compartment. RGB signals are read directly from the GBA LCD socket by removing the handheld’s screen in favor of a fresh flat flex ribbon cable. This method enables a noise-free digital-to-digital solution as opposed to the digital-to-analog output of Nintendo’s own Game Boy Player add-on for the GameCube.

At an astonishing 240×160 native resolution, GBA video is scaled by the FPGA up to 5x within a 720p frame. Of course some of the image is cutoff in the process, so options for 4x and 4.5x scales were included. As a wise man once said, “Leave no pixel behind”. Since Nintendo designed the GBA clock to run at 59.7276 Hz, [Stephen] removed the oscillator crystal in order to sync the refresh rate to a more HDMI friendly 60 Hz. This means that the mod kit overclocks GBA games ever so slightly, though [Stephen] included a GBA cycle accurate mode as an option if your display can handle it.

The video below is [Stephen]’s initial test using a SNES controller. Tests must have gone well, because he decided to incorporate a SNES controller port in the final design. Now all those Super Nintendo ports on the GBA are back home once again thanks to this “consolizer” kit.

Continue reading “GBA On The Big Screen: FPGA Delivers HDMI And Every Feature Imaginable”

Xbox One X Gets Aluminum Laptop Makeover

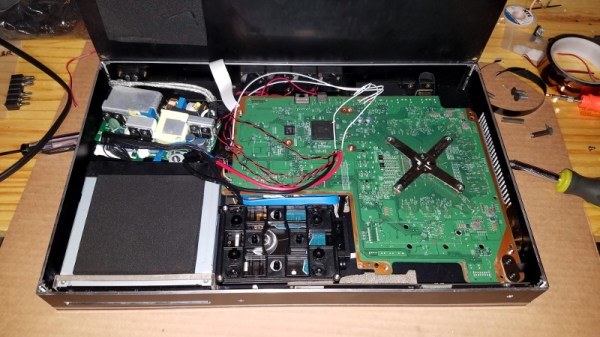
While many a gamer was willing to brave hand-to-hand combat this Black Friday just to get a few bucks off of Microsoft’s premium-tier game console, [jomega] was already cutting his to pieces from the comfort of his own home. Not dissuaded by the system’s fairly high sticker price or relatively limited modding scene, he decided to transplant his Xbox One X into an incredibly slick laptop-style aluminum enclosure.
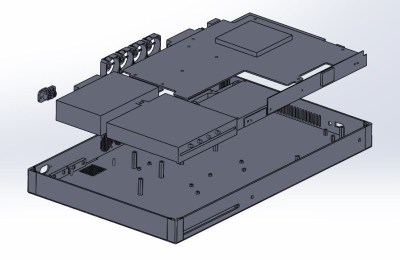
Turning a game console into a “laptop” is hardly new, Ben Heck has been doing it for over a decade now, but in general they tend to look pretty clunky. With a few exceptions, the builder’s goal is not so much to make the final result look sleek and professional, but simply to take their favorite games on the go. But from the start [jomega] wanted something that would not only allow him to take long walks in the park with Master Chief, but look gorgeous doing it.

One of his goals was to make the final device thinner than the original system, so the first step was to assemble virtual representations of the Xbox’s principal components in CAD to find the most efficient placement for everything. Long before the first pieces of aluminum were cut, [jomega] already knew where each part and screw was going to end up. The time he invested in planning out the build in CAD more than made up for itself when it came time to assemble the final product, and also means this design is highly reproducible should he decide to build another one on commission.

Even though the final system seems impossibly thin, no hardware or functionality had to be left out. Even the optical drive, which on the stock console is something of an afterthought to begin with in an era of digital downloads (rumor has it the next Xbox will drop optical discs entirely), has been retained. Special consideration did need to be given to cooling the 4K powerhouse though, and [jomega] warns that running the system with the case open or the fans off can have dangerous consequences.

Thanks to the Xbox One’s wireless capabilities (for both Internet connection and controllers), there’s a notable lack of ports on the case. This made the design a bit easier, as [jomega] really only needed to have a connector for the AC power cord in the back and a couple of holes for the system’s power, eject, and controller sync buttons. He did add in a USB port for convenience, but even that could be skipped to make things easier.

In the past we’ve seen some rather husky Xbox 360 laptop builds, and at least one attempt to build a more slimline version, but this latest entry in the long line of portable-ized Xboxen has set the bar very high.

Continue reading “Xbox One X Gets Aluminum Laptop Makeover”

Unleash Your Inner Starship Captain With This Immersive Simulator Console

We like a good video game as much as the next person. Heck, a few hours wasted with “Team Fortress 2” on a couple of big monitors is a guilty pleasure we’ll never be ashamed of. But this starship bridge simulation console brings immersive gameplay to a new level, and we wholeheartedly endorse it even if we don’t quite get it.

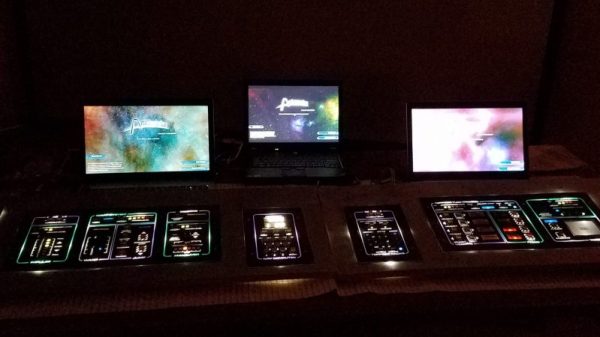
The game in question is “Artemis Spaceship Bridge Simulator”, a game played by anywhere from 2 to 11 players, each of whom mans a different station on the bridge of a generic starship, from Engineering to Communications to the vaunted Captain’s chair. The game is generally played on laptops linked together in a LAN with everyone in the same room, and as cool as that sounds, it wasn’t enough for [Angel of Rust]. The whole mousing back and forth to control the ship seemed so 21st-century, so he built detailed control panels for each of the bridge stations. The level of detail is impressive, as is the thought put into panel layouts and graphics. The panels are mostly acrylic in MDF frames, which allows for backlighting to achieve the proper mood. With the help of a bunch of Arduinos, everything talks to the game software over DMX, the protocol used mainly for stage lighting control. There’s a cool demo video below.

This is uber-nerd stuff, and we love it. Pyrotechnics and atmospherics would be a great addition for “realistic” battles, and dare we hope that someday this ends up on a giant Stewart platform flight simulator for the ultimate experience?

Continue reading “Unleash Your Inner Starship Captain With This Immersive Simulator Console”

Analog Meters Become A Clock For Father’s Day

Around Father’s Day each year, we usually see a small spate of dad-oriented projects. Some are projects by dads or granddads for the kids, while others are gifts for the big guy. This analog meter clock fits the latter category, with the extra bonus of recognizing and honoring the influence [Micheal Teeuw]’s father had on him with all things technological.

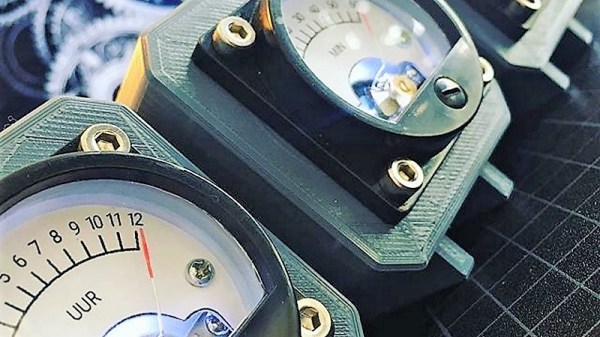
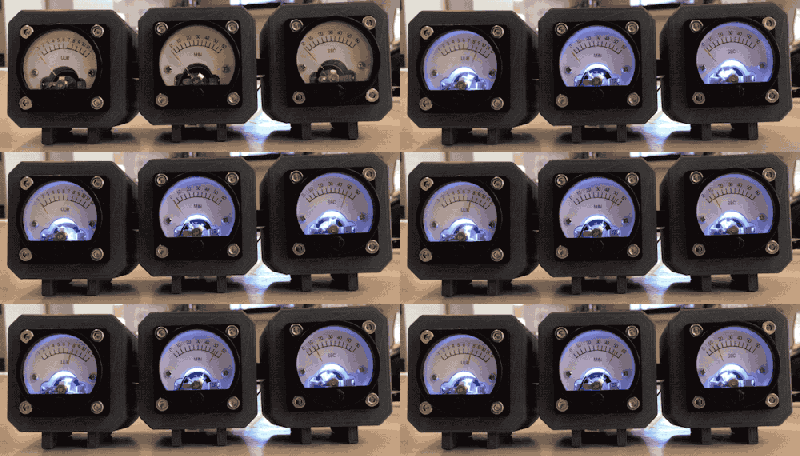
[Michael] had been mulling over a voltmeter clock, where hours, minutes and seconds are displayed on moving coil meters, for a while.  A trio of analog meters from Ali Express would lend just the right look to the project, but being 200-volt AC meters, they required a little modification. [Michael] removed the rectifying diode and filtering capacitor inside the movement, and replaced the current-limiting resistor with a smaller value to get 5 volts full-range deflection on the meters. Adobe Illustrator helped with replacing the original scales with time scales, and LEDs were added to the meters for backlighting. A TinyRTC keeps time and generates the three PWM signals to drive the meters. Each meter is mounted in its own 3D-printed case, the three of which are linked together into one sleek console. We love the look, which reminds us of an instrument cluster in an airplane cockpit.

Bravo to [Michael’s Dad] for getting his son into the tinkering arts, and cheers to [Michael] on the nice build. We like seeing new uses for old meters, like these server performance monitoring meters.

[via r/DIY]