Fail Of The Week: Epic 312 Weeks Of Fixing A Broken Project

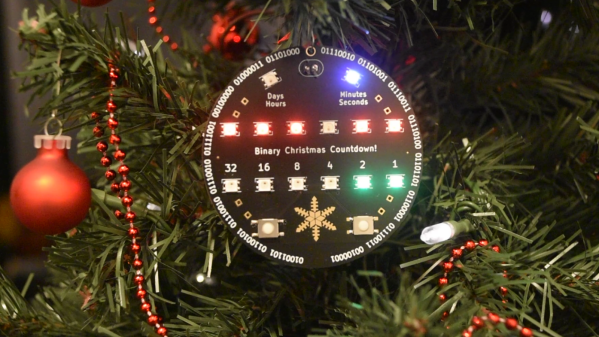
If a hacker guardian angel exists, then we’re sure he or she was definitely AWOL for six long years from [Aaron Eiche]’s life as he worked on perfecting and making his Christmas Countdown clock. [Aaron] started this binary clock project in 2016, and only managed to make it work as expected in 2022 after a string of failures.

In case you’d like to check out his completed project first, then cut the chase and head over to his Github repository for his final, working version. The hardware is pretty straightforward, and not different from many similar projects that we’ve seen before. A microcontroller drives a set of LED’s to show the time remaining until Christmas Day in binary format. The LEDs show the number of days, hours, minutes and seconds until Christmas and it uses two buttons for adjustments and modes. An RTC section wasn’t included in the first version, but it appeared and disappeared along the six year journey, before finding a spot in the final version.

The value of this project doesn’t lie in the final version, but rather in the lessons other hackers, specially those still in the shallow end of the pool, can learn from [Aaron]’s mistakes. Thankfully, the clock ornament is not very expensive to build, so [Aaron] could persevere in improving it despite his annual facepalm moments.

Continue reading “Fail Of The Week: Epic 312 Weeks Of Fixing A Broken Project”

A wooden box sits on a darker wooden table. The box has a red, glowing number 8 on it.

Ambient Display Tells You If Borealis Is Coming To Town

For those times when you’d rather not get sucked down another internet rabbit hole when you really just wanted the weather, an ambient display can be great. [AlexanderK106] built a simple ambient display to know the probability the Northern Lights would visit his town.

Starting with a NodeMCU featuring the ESP8266, [AlexanderK106] walks us through a beginner-friendly tutorial on how to do everything from configure the Arduino IDE, the basics of using a breadboard. finding a data source and parsing it, and finally sticking everything into an enclosure.

The 7-segment display is taped and set into the back of the 1/4″ pine with enough brightness to shine through the additional layer of veneer on top. The display is set to show one digit and then the next before a three second repeat. A second display would probably make this easier to use day-to-day, but we appreciate him keeping it simple for this tutorial.

Looking for more ambient displays? Checkout the Tempescope or this clock that lets you feel the temperature outside!

ESP8266 Coaster Keeps Your Drink Warm

Looking for the perfect winter desk accessory? [Wq] has created a beautiful coaster made out of PCBs  that can keep your drink warm with an internal heater. (Chinese).

An ESP8266 sits as the main controller, with an additional MQTT control option, where the whole unit is powered over a USB-C connection. On board PCB traces, in the shape of a Hilbert curve, create the heating element used to heat beverages placed on the coaster, where [Wq] reports a measured resistance of the PCB trace network at 1.2 ohms. [Wq] writes that an AON6324 MOSFET replaces the D4184 that was previously being used, but might need some testing to get working properly. There are two capacitive touch sensors which has a TTP223E capacitive touch controller attached to detect input, with a multi-colored FM-3528 RGB LED for user feedback.

We love the artistry that went into building the coaster. For adventurous hackers wanting to build their own, the bill of materials (BOM), source code and board files are all available. We’ve seen everything from coasters and to PCB reflow boards, so it’s nice to see experimentation with a combination of these ideas.

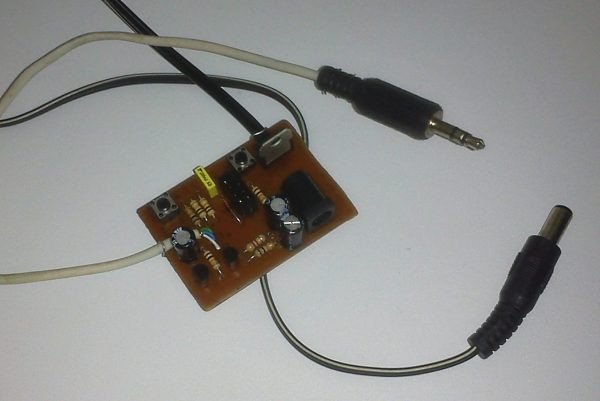
A small brown PCB with various components on it. There is a headphone cable and DC barrel connector cable coming out of it.

Put Your Serial Port On The Web

Today, everything from your computer to your dryer has wireless communications built in, but devices weren’t always so unencumbered by wires. What to do when you have a legacy serial device, but no serial port on the computer you want to connect? [vahidyou] designed a wireless serial dongle to solve this conundrum.

Faced with a CNC that took instructions over serial port, and not wanting to deal with the cabling involved in a serial to USB adapter, [vahidyou] turned to an ESP8266 to let his computer and device talk wirelessly. The hand-made PCB connects via a 3.5 mm headphone jack to DB9 adapter which he describes in another article. While [vahidyou] did write a small Windows program for managing the device, it is probably easier to simply access it in a web browser from any device you have handy.

Want to see another wireless serial port application? This Palm Portable Keyboard Bluetooth dongle will let you type in comfort on the go, or you can use a PiModem to get your retrocomputer online!

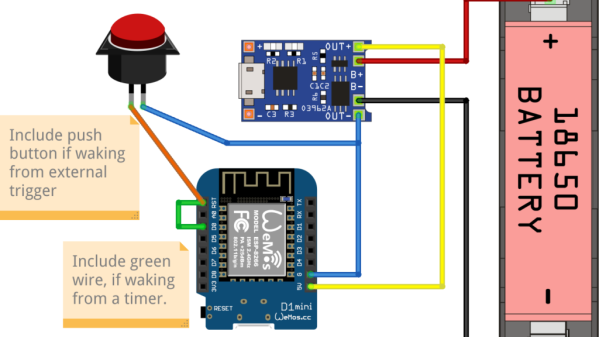
Fritzing diagram of connections between the Wemos D1 board, the TP4056 board, the pushbutton and the LiIon battery

Battery-Powered ESP8266 Sensor? Never Been Simpler

Say, you’re starting your electronics journey with a few projects in mind. You have an ESP8266 board like the Wemos D1, a Li-Ion battery, you want to build a small battery-powered sensor that wakes up every few minutes to do something, and you don’t want to delve into hardware too much for now. Well then, does [Mads Chr. Olesen] have a tutorial for you! Here, you’ll learn the quick and easy way to get your sensor up and running, learn a few tricks for doing sleep Arduino environment, and even calculate how long your specific battery could last. Continue reading “Battery-Powered ESP8266 Sensor? Never Been Simpler”

A Christmas-themed LEGO train engine and coal car

ESPHome Powers Festive Lego Train Set

While the basic concept of LEGO bricks might have changed little since the mid-20th century, some components such as motors and sensors are still affected by technological progress and end up obsolete and unsupported. [Travis] ran into this problem when he was building a festive train setup and realized he didn’t have the speed controller to match his train engine. Without that part, the engine would only run at full speed and derail as soon as it hit a curve. The official speed controller had been discontinued and was hard to find, so [Travis] had to resort to building his own.

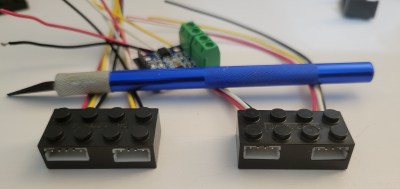
The basic components needed were an H-bridge driver to operate the motor and an ESP8266 to generate PWM signals. In order to keep the bricky appearance of the train engine intact, [Travis] hollowed out a few cheap imitation LEGO bricks to house the electronics. He also cut out slots for JST connectors, which are far more convenient to work with than LEGO’s brick-style connectors.

Two imitation LEGO bricks with electronics insideThe ESP8266 runs ESPHome, which enables [Travis] to control the entire setup using Home Assistant. The train is programmed to run a few laps at the top of the hour and play choo-choo sounds from a mini MP3 player hidden in the coal car. That car also holds a standard AA battery holder to power the system, which makes it easy to swap the batteries without having to partially disassemble the train.

There are various ways to control LEGO creations using standard computer platforms: we’ve seen the ESP32 powering a LEGO tank, for instance. If you need a bit more computing power, there’s even an official LEGO Raspberry Pi HAT.

Continue reading “ESPHome Powers Festive Lego Train Set”

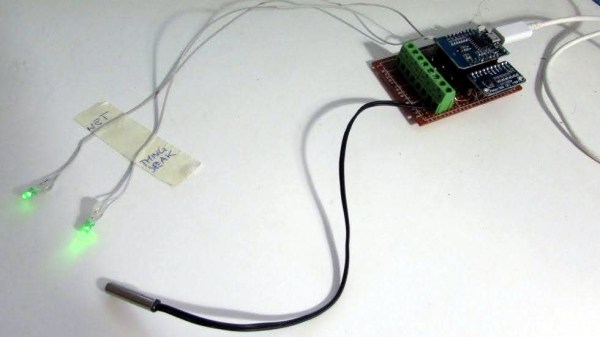
NTC Thermistor To ThingSpeak Meter Makes A Great IoT Starter Project

There are a lot of IoT solutions and frameworks out there, and [Davide] demonstrates how to make a simple data logging and tracking application with his ESP8266-to-ThingSpeak project, which reads up to four NTC (negative temperature coefficient) thermistors and sends the data to ThinkSpeak over WiFi.

IoT can be a pretty deep rabbit hole, so if you’re looking for a simple project to demonstrate the working parts and provide a starting point, the project’s GitHub repository might help you get started. We’ve also seen ThingSpeak used to track toilet paper sheet usage, which is a nice demonstration of how to interface to a physical object with moving parts.

On the other hand, if you find reading NTC thermistors to be the more interesting part, you’re in luck because [Davide] has more information about that along with a modified ESP8266 Arduino library. Watch a tour of his temperature logging hardware in action in the video, embedded below.

Continue reading “NTC Thermistor To ThingSpeak Meter Makes A Great IoT Starter Project”