Responsive Paintings Do It With Heat And Light

Art is a conversation, yes. But normally, it’s a short one: the artist makes a statement and the audience responds, each bringing their own interpretations. The hard thing about being an artist is that once you release a piece into the world, it’s sort of bound and gagged in that it can’t defend itself from comments and misinterpretation.

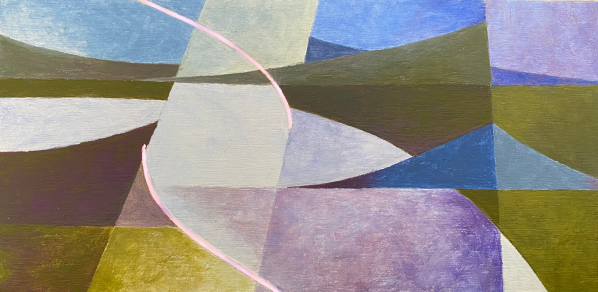
On the other hand, interactive art allows for a longer discussion. Pieces are responsive and no longer mute. But so much of the interactive art out there is purely digital, and lacks a certain analog warmth that comes from physicality. For this year’s Hackaday Prize, [Laura] sought to put a digital interface on an analog visual piece and make paintings that change based on data inputs.

For now, [Laura] is focusing on adding two dynamic elements to her paintings: shifting color and light patterns in response to a viewer’s presence and/or actions using an Arduino and TinyML. For the color changes, [Laura] ended up mixing thermochromic pigment powder with a transparent gel medium.

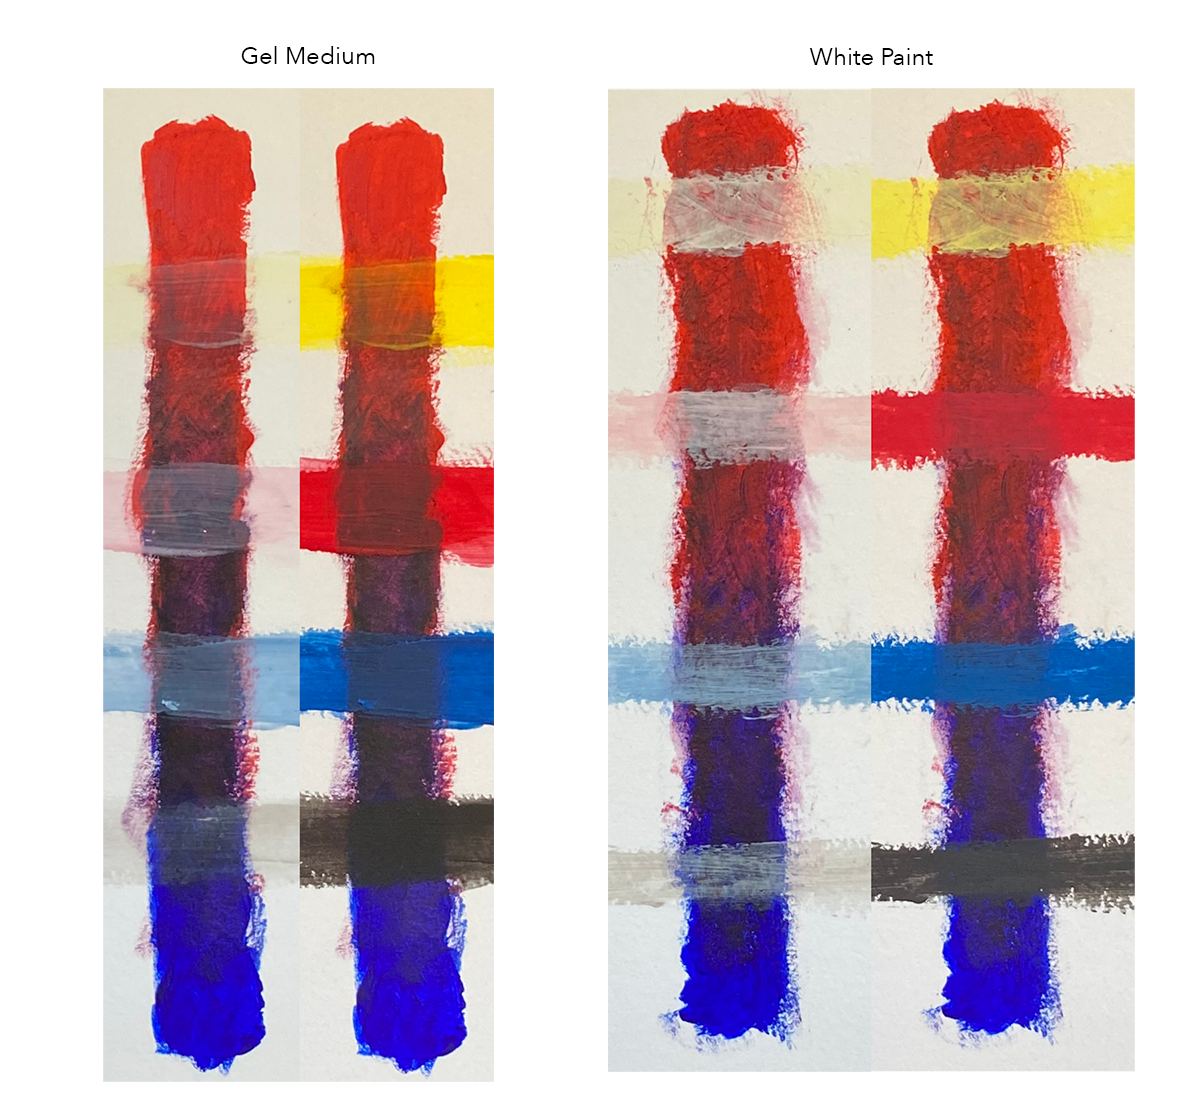
This was a bit of a journey, because the regular kind of transparent medium came out too runny, and mixing the pigments with white paint made the colors come out lighter than [Laura] wanted and left white behind when heated. But transparent gel medium was just right. You can see the difference in this picture — the colors come out darker with the gel medium, and disappear almost completely with heat.

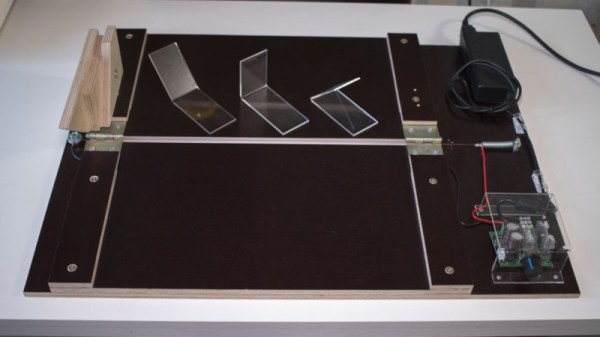
[Laura] didn’t want to just poke LEDs through the canvas, which in this case is a 1/8″ birch panel. Instead, there’s an RGB matrix shining behind a pair of thin, diffused cutouts filled with thermoplastic.

Check out the video after the break of a painting sketch that uses both techniques. Keep your eye on the purple triangles on the right side, and watch them slowly turn blue in real time as light patterns dance behind the diffused cutouts. Stick around for the second brief video that shows an updated light animation.

We’ve seen many ways of making interactive art, like this Rube Goldberg fairy tale ball maze that you control with your phone.

Continue reading “Responsive Paintings Do It With Heat And Light”

School Project Turns Plastic Waste Into Bricks

Many plastics are, in theory at least, highly recyclable. Unfortunately, in reality, most plastic ends up as waste instead, harming the environment and providing no ongoing value to society. Wanting to investigate possible ways to repurpose this material, [Rehaan33] built a rig to create bricks out of waste plastic for a school project.

The aim of the project is to take waste plastic, in this case high-impact polystyrene, and reform it into a brick that could be used as a low-cost building material. The material is shredded, before being packed into a steel mould and heated to 270 degrees in an oven. As polystyrene is a thermoplastic, it can readily be heated in this way for reforming without harming the material’s properties. Once heated, the mould is placed into the press rig, which uses parts of an old drill press to force down a steel plate, helping shape the final form of the brick.

While you’re unlikely to see old soda bottles used to build a skyscraper in New York any time soon, such techniques could be a good way to help eliminate plastic waste in impoverished areas and stem the flow of plastic into the world’s oceans. The project served as a useful learning experience, allowing [Rehaan33] to pick up skills in metalworking, machine design, and working with thermoplastics. Recycling plastics is a key area of interest for many, particularly in the 3D printing space, with many exploring ways to reuse thermoplastics in more efficient ways. If you’ve got your own project turning waste plastics into useful material, be sure to let us know!

Get Your Acrylic Bends Just Right

Acrylic is a popular material. It’s easy to find, attractive, and available in all manner of colors, thicknesses, and grades. Being a thermoplastic, it’s also simple to apply heat and form it in various different ways. If you’re wanting to build parts out of sheet acrylic, you might find a purpose-built bender useful. [DIY Perspective] built just such a tool to get the job done.

Plywood is used as the base of the tool, and several off-the-shelf hinges are used to make the folding apparatus. Stops are cut out of scrap wood to allow the bender to accurately recreate angles of 45, 90, and 135 degrees. Heat is supplied via a nichrome wire, powered by a laptop power supply and a PWM controller. This allows the temperature of the wire to be controlled, to avoid melting or otherwise damaging the acrylic being bent.

If you find yourself routinely working with acrylic, you might find this tool useful to have around the workshop. Vacuum forming may also be relevant to your interests. Video after the break.

Continue reading “Get Your Acrylic Bends Just Right”

DIY Socket For Prosthetics Contains Power Supply, Charger

Innovation in prosthetics is open to anyone looking to enhance the quality of life, but there’s an aspect of it that is sometimes under-served. The DIY Prosthetic Socket entry to the Hackaday Prize is all about the foundation of a useful prosthesis: a custom, form-fitting, and effective socket with a useful interface for attaching other hardware. While [atharvshringaregt] is also involved with a project for a high-tech robotic hand with meaningful feedback, socket fitting and design is important enough to be its own project.

The goal is not just to explore creating these essential parts in a way that’s accessible and affordable to all, but to have them include a self-contained rechargeable power supply that can power attachments. Thoughtful strap placement and a power supply design that uses readily available components with a 3D printed battery housing makes this DIY prosthetic socket a useful piece of design that keeps in mind the importance of comfort and fitting when it comes to prosthetics; even the fanciest robot hand isn’t much good otherwise.

Blown plastic from a plastics blow oven

Blowing Arcylic Canopies Using Stuff From Around The Shop

Blowing an acrylic sheet after heating it is an easy way to make a smooth and transparent canopy or bubble for anything from clams to light fixtures. [Michael Barton-Sweeney] does it using plastic blow ovens he made cheaply, mainly from stuff which most of us already have in our workshops.

Plastics blow oven
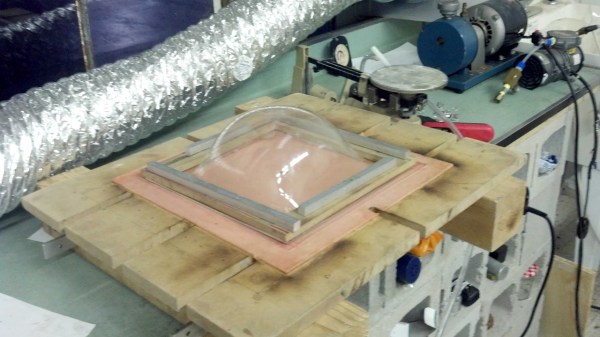
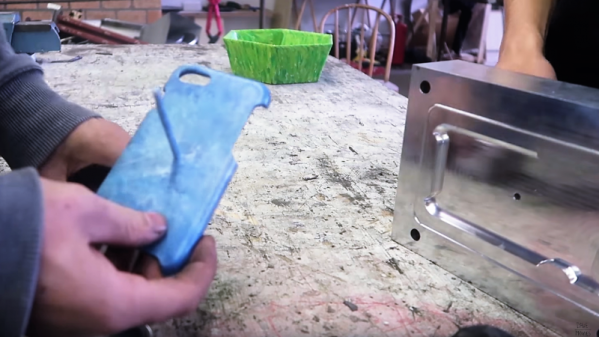
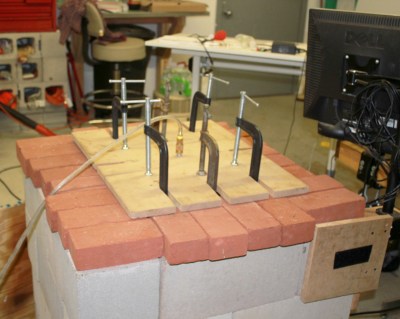
All you need is a way to heat the plastic, to then clamp it down around the edges, and finally to blow air into it as you would when blowing up a balloon. Of course, there are things to watch out for such as making sure the plastic is heated evenly and letting it cool slowly afterward but he covers all that on his hackaday.io page.

He’s also on his second plastics blow oven. The first one worked very well and is perhaps the easiest to make, building up an enclosure of CMUs (cinder blocks) and brick. He had success heating it with both propane and with electric current run through Kanthal wire. But the CMUs absorbed a lot of heat, slowing down the process. So for his second one he made a cast concrete enclosure with aluminum reflectors inside to focus the heat more to where needed.

We’re not sure of everything he’s blown acrylic bubbles for but we first learned of his ovens from the transparent clams in his underwater distributed sensor network. In fact, he was inspired to do plastics blowing from a childhood memory of the Air Force museum in Dayton, Ohio, where they visited the restoration hanger and watched the restorers blowing bubbles for a B-17 ball turret.

Though if you want to go smaller and simpler for something like a light fixture then you can get away with using a toaster oven, a PVC pipe, and a toilet flange.

Intra-Oral Device Detects Opioid Overdose

As you may have heard, the U.S. is in the grips of an opioid epidemic. Overdose deaths from heroin, oxycontin, and fentanyl have quadrupled since 1999. The key to detecting opioid overdose before it’s too late is in monitoring respiration. Opioids in particular cause depressed respiration, which is slow and ineffective breathing that’s inadequate for the gas exchange that keeps us alive. Depressed respiration becomes fatal unless the patient is given nalaxone, an antidote that works by blocking opioid receptors in the brain.

[Curt White] is developing an intra-oral device to prevent opioid overdose via early detection. It tracks a patient’s inhale/exhale rate and sends the data over Bluetooth to an open-source website.  The tiny device uses an air pressure sensor, a humidity sensor, and a thermopile thermometer to accurately track a person’s full respiration waveform whether their mouth is open or closed. The brain is one of [Curt]’s hacked $35 activity trackers that we told you about a few days ago.

All of the hardware including the battery is embedded in a custom retainer made from thermoplastic. [Curt] used Tyvek and surgical tape to isolate the air pressure sensor. Both are waterproof and breathable, which means that air can get to the sensor, but not saliva. Hold your breath and click past the break to watch [Curt] demonstrate this amazing tool on himself.

Continue reading “Intra-Oral Device Detects Opioid Overdose”

DIY Injection Mold Design For The Home Shop

3D printing is great for prototyping, and not bad for limited runs of parts. Unfortunately though it really doesn’t scale well beyond a few pieces, so when you’re ready for the mass market you will need to think about injection molding your parts. But something like that has to be farmed out, right? Maybe not, if you know a thing or two about designing your own injection molds.

The video below comes from [Dave Hakkens] by way of his Precious Plastic project, whose mission it is to put the means of plastic recycling into the hands of individuals, rather than relying on municipal programs.  We’ve covered their work before, and it looks like they’ve come quite a way to realizing that dream. This tutorial by [Dave]’s colleague [Jerry] covers the basic elements of injection mold design, starting with 3D modeling in Solidworks. [Jerry] points out the limitations of a DIY injection molding effort, including how the thickness of parts relates to injection pressure. Also important are features like gentle curves to reduce machining effort, leaving proper draft angles on sprues, and designing the part to ease release from the mold. [Jerry] and [Dave] farmed out the machining of this mold, but there’s no reason a fairly complex mold couldn’t be produced by the home gamer.

When you’re done learning about mold design, you’ll be itching to build your own injection mold machine. Precious Plastic’s tutorial looks dead simple, but this machine looks a little more capable. And why CNC your molds when you can just 3D print them?

Continue reading “DIY Injection Mold Design For The Home Shop”