DesignSpark Mechanical – The Gift Of Invention

Ever heard of DesignSpark? They are releasing a powerful CAD package on September 16th — for free!

The company is owned by RS Components, a distributor of electronics and maintenance products. They offer a large library of 3D models of parts that they sell, dubbed the ModelSource. So if you are wondering how they are giving out software for free, that’s how. They also have free PCB designing software, and something called DesignShare which hosts open-source project collaboration, sharing and discussions.

By the looks of the demo video, DesignSpark Mechanical is a well laid out CAD package that is rich in features. The software allows for the import and export of several file types, and it looks like ECAD, OBJ, Sketchup, STEP, DXF and STL are all there, as well as the native file types. While it looks like you can import any files, we are willing to bet adding ModelSource files are by far the easiest and most convenient because of the integrated ModelSource library. But we think that’s a small price to pay for an alternative to SketchUp. After all, the component models will be useful for assemblies, even if you don’t order through them. Oh, and it’s perfect for making free models for 3D printing as it includes the ability to export STL files.

Watch the software demo after the break.

Continue reading “DesignSpark Mechanical – The Gift Of Invention”

Motobrain: A Bluetooth Controlled PDU

motobrain

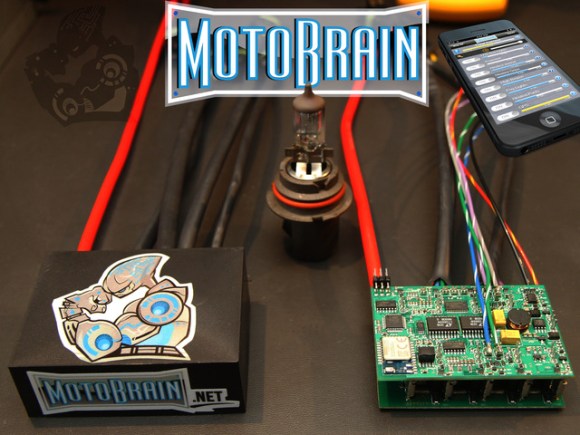
If you’ve ever considered modding your vehicle’s electrical system, [Josh Oster-Morris’s] Motobrain PDU (power distribution unit) might make life easier by providing precision control and protection for auxiliary 12V outputs in your car, bike, boat, etc. Once the Motobrain is paired to a phone over Bluetooth, a companion app displays real-time telemetry and lets you program up to 8 output channels.

Each of these 8 outputs can be directly controlled in the app, but the real power lies in the 4 programmable inputs. Here you can tie systems together and dictate exactly how one should respond to the other, e.g. detecting high-beams and disabling the auxiliary light bar you added. There’s even a “delayed on” option. Programming also has PWM capabilities, so flipping a switch could raise the brightness of some lights over 4 levels of intensity. If those lights are LEDs, the Motobrain can also provide constant current to specification. Each circuit can supposedly handle 15A continuous current and has a programmable circuit breaker, which would make fuses optional.

You can watch an overview video after the break to get a better idea of how it all works, but stop by [Josh’s] project blog to see all the features explained across multiple videos and blog posts as they are developed and tested.

Continue reading “Motobrain: A Bluetooth Controlled PDU”

Tooth Fairy Goes Pneumatic

pneumaticToothFairy

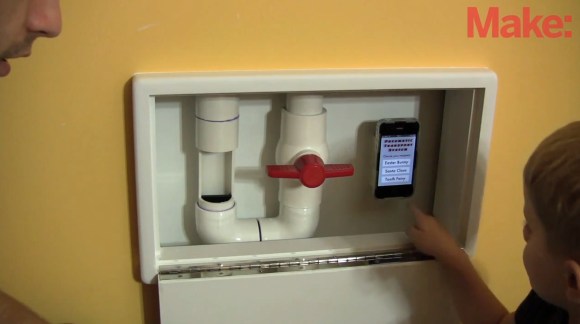
Kids’ fantasy figures are long overdue for some tech upgrades, so MAKE’s [Jeff Highsmith] carved a few holes in the walls and built a pneumatic transport system for his children to deliver their teeth to the Tooth Fairy. The project uses a system of 1.5″ PVC pipe with a central vacuum in the attic and two endpoint stations, one in each child’s room. Alternating which station has the closed valve and open door dictates the airflow path and shuttles a small plastic travel bottle from one station to the next.

Each station has its own iPhone interface that sends data to a Raspberry Pi and relays information, including a simulated map indicating the travel path taken by the tooth. Apart from controlling the vacuum via one of the Pi’s GPIO, the phone serves primarily as a visual distraction for the children while one parent sneaks off into the other room and replaces the tooth with some pocket change. [Jeff] made sure to add a locking door on each station to limit access and hopefully keep the mystery alive.

Watch his son’s face light up with sheer glee at the whole event in the video below, and regret that your childhood happened before the maker revolution. Then celebrate your adulthood with a beer fetching robot.

Continue reading “Tooth Fairy Goes Pneumatic”

Digital Camera Becomes Video Transmitter

canon

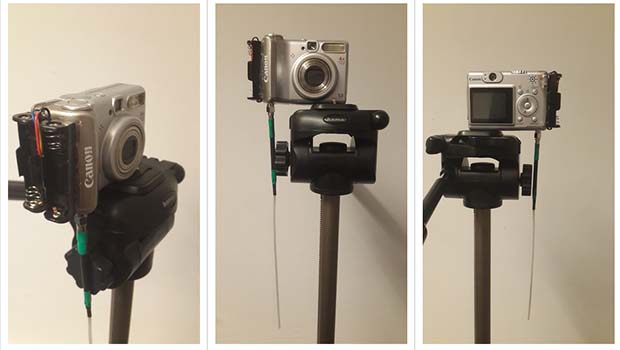
In the arena of high altitude balloons, Canon’s PowerShot series of digicams are the camera du jour for sending high into the stratosphere. There’s a particular reason for this: these cameras can run the very capable CHDK firmware that turns a $100 digicam into a camera with a built-in intervalometer along with a whole bunch of really cool features. It appears this CHDK firmware is much more powerful than we imagined, because [Chris] is now transmitting pictures taken from a Canon a530 to the ground, using only the CHDK firmware and a cheap radio module.

These PowerShot cameras have an ARM processor inside that runs VxWorks, a minimal but very capable OS for embedded devices and Mars rovers. By tying in to the Tx and Rx lines of the camera, [Chris] can issue commands to the OS, change settings, and even install his own code.

With the help of [Phil Heron]’s SSDV encoder written in C, [Chris] was able to get the camera to transmit images  with a small radio transmitter that fits in the battery compartment. Right now, [Chris] has only built the CHDK + SSDV for the Canon a530, but with how useful this build is, we expect to see an improved version very shortly.

The Arduino YUN. YUN Means Cloud.

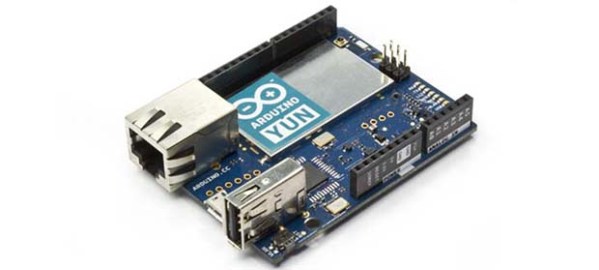
For the longest time, the creators of the Arduino have been looking at how to bring the Arduino platform into the cloud. Ethernet and WiFi shields technically work, but if you’re processing data scraped from a web page, a lowly microcontroller really isn’t the best option. Enter the Arduino YUN. At its core, it’s a regular old Arduino Leonardo. Underneath that metal plate on the board? That’s an SoC running Linux.

Basically, the Linux side of the Yun is pretty similar to a WiFi router running OpenWRT. There’s a USB port for plugging in peripherals, native WiFi support (802.11n, even!), an Ethernet connector, and enough RAM to do all the interesting stuff a small computer connected to the Internet can do.

To make all this web programming easier for Arduino neophytes, the YUN also includes a ‘bridge’ library that automates HTTP transactions between the Linux and microcontroller sides of the YUN. There’s also support for Temboo, an SDK for dozens of APIs that interact with Facebook, Dropbox, FedEx, and hundreds of other web services.

Below you can check out [Massimo] and [David] showing off their wares and going over how the YUN connects to the Internet and interacts with the microcontroller over the ‘bridge’. It’s an interesting device, and something we’ll surely check out at the World Maker Faire.

Continue reading “The Arduino YUN. YUN Means Cloud.”

Fail Of The Week: Laser Cutter That Makes Jagged Edges

This Fail of the Week is really only a failure because of the standards to which [eLabz] holds himself. The rig pictured above is a laser cutter built out of DVD drive parts. It goes above and beyond most of the optical drive CNC projects we see around here — it actually makes cuts! But [eLabz] looks on it as a failure because the steps of the driver motors are visible as jagged edges in those cuts. We see this more as a pausing point in the development process before the next refinement is made.

Continue reading “Fail Of The Week: Laser Cutter That Makes Jagged Edges”

DIY Heatsinking PCBs

pcb heatsink

We have covered many do it yourself PCBs before, but this video guide adds an easy way to sink heat from high power devices, which we think you might find handy.

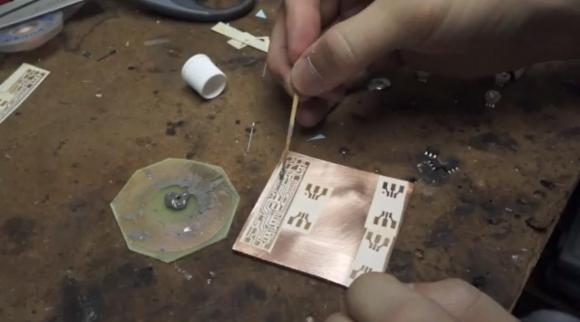
It is a very simple process that [CNLohr] uses to keep his small RGB LED projects from overheating. It starts by using a readily available silicone thermal sheet as the substrate by applying it to copper foil. He then applies a toner-transfer circuit pattern to the copper by running the pair through a modified laminator a few times. He makes note that you have to apply the plastic backing side of the silicone sheet to the copper foil to prevent the laminator from chewing it up.

After the typical ferric chloride etching process is complete, he then uses 220 grit sandpaper to remove the toner pattern. Often steel wool is used, but because of the sensitive nature of the silicone, sandpaper works better to avoid peeling up traces.

We have featured [CNLohr] before, as he does some top-notch tutorials in his workshop — which makes for both a fascinating and distracting backdrop for the videos. This one is a bit long (~20 minutes), but is very thorough and goes through the entire process from start to finish. Check it out after the break.

Continue reading “DIY Heatsinking PCBs”