3D Printed Lens Gears For Pro-grade Focus Pulling

Key Grip, Gaffer, Best Boy – any of us who’ve sat through every last minute of a Marvel movie to get to the post-credits scene – mmm, schawarma! – have seen the obscure titles of folks involved in movie making. But “Focus Puller”? How hard can it be to focus a camera?

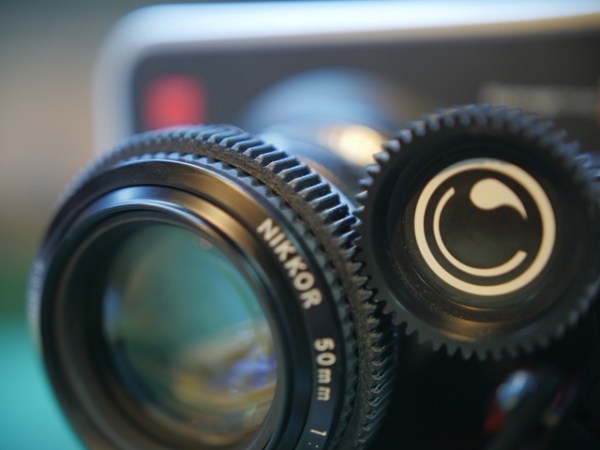
Turns out there’s a lot to the job, and in a many cases it makes sense to mechanize the task. Pro cinematic cameras have geared rings for just that reason, and now your DSLR lens can have them too with customized, 3D printed follow-focus gears.
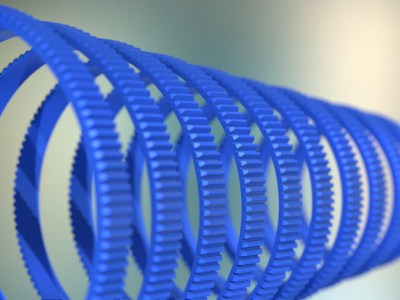
Gear_Selection_01_full_render_preview_featuredUnwilling to permanently modify his DSLR camera lens and dissatisfied with after-market lens gearing solutions, [Jaymis Loveday] learned enough OpenSCAD to generate gears from 50mm to 100mm in diameter in 0.5mm increments for a snug friction fit. Teamed up with commercially available focus pulling equipment, these lens gears should really help [Jaymis] get professional results from consumer lenses. 

Unfortunately, [Jaymis] doesn’t include any video of the gears in action, but the demo footage shown below presumably has some shots that were enabled by his custom gears. And even if it doesn’t, there are some really cool shots in it worth watching.

And for the budding cinematographers out there without access to a 3D printer, there’s always this hardware store solution to focus pulling.

Continue reading “3D Printed Lens Gears For Pro-grade Focus Pulling”

The Gaze-Controlled Wheelchair That Won The Hackaday Prize

The 2015 Hackaday Prize challenged people to build something that matters. Specifically, to solve a problem faced by a lot of people and to make the solution as open as possible. If the average hacker can build it, it puts the power to vastly improve someone’s life in their hands. This is a perfect example of how powerful Open Design can be.

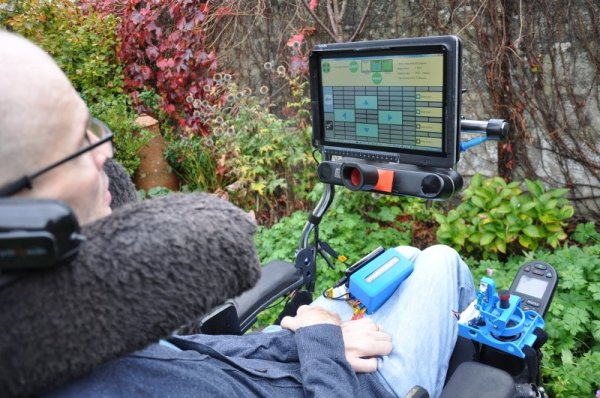
Patrick Joyce, Steve Evans, and David Hopkinson, developed a way to control an electric wheelchair using eye movements. The project, called Eyedrivomatic, is a set of non-invasive hardware modules that connect the wheelchair joystick with existing Eyegaze technology.

You’re probably already familiar with Eyegaze, which allows people suffering from diseases like MND/ALS to speak through a computer using nothing but their eyes. Eyedrivomatic extends this gaze control to drive a wheelchair. The catch is that the wheelchair’s user may not actually own the chair, and so permanent modifications cannot be made.

Thus Eyedrivomatic connects a wheelchair to the existing Eyegaze hardware without permanently altering either. This has never been done before, and the high level to which the team executed this project netted them the Grand Prize of the 2015 Hackaday Prize. The team will receive their choice of a Trip into Space or $196,883.

Check out their acceptance video, then join us after the break to learn what went into this amazing undertaking.

Continue reading “The Gaze-Controlled Wheelchair That Won The Hackaday Prize”

Being Hit In The Virtual World

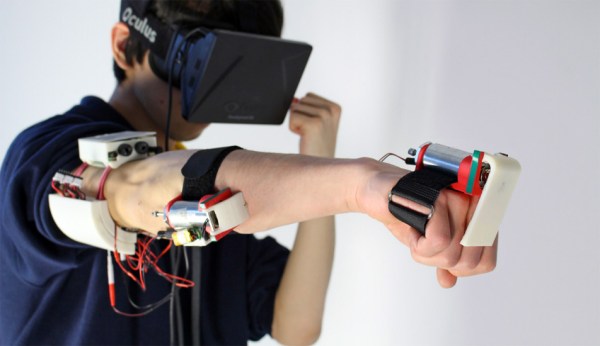
Virtual reality could be the next big thing in the gaming world. And while VR displays and headsets are getting more and more sophisticated, many are forgetting perhaps the biggest feature VR will need to succeed — haptic feedback. [Pedro Lopes], [Alexandra Ion] and [Prof. Patric Baudisch] from the Hasso Plattner Institute is hoping to change that, with a project called Impacto: Simulating Physical Impact by Combining Tactile with Electrical Muscle Stimulation.

We’ve covered lots of haptic feedback devices over the past few years — some use mini gyros to simulate resistance, others blow air on you, but this is the first time we’ve seen one that combines muscle stimulation to really cause a physical effect.

They’re using an Oculus rift, and a Microsoft Kinect to perform the research. For their demonstration they use a basic boxing game that allows the user to feel the computer’s punches — but don’t worry, it doesn’t hit that hard!

Continue reading “Being Hit In The Virtual World”

Simple Devices Protecting Our Water System

We are all used to turning on the faucet and having clean, drinkable water on demand. But think about what happens afterwards in your home: that water is used to wash dishes or water lawns and many other uses that render it undrinkable. What stops this nasty water from flowing back into your pipes and out of your kitchen faucet? A backflow preventer. This simple, but vital, part of your plumbing turns your water pipes into one-way systems that give out clean, drinkable water. This isn’t just about making your water taste nice: backflow preventers protect your water supply from things like brain-eating amoeba and E Coli that could kill.

Continue reading “Simple Devices Protecting Our Water System”

Full-Color Edge-Lit Laser Cut Acrylic

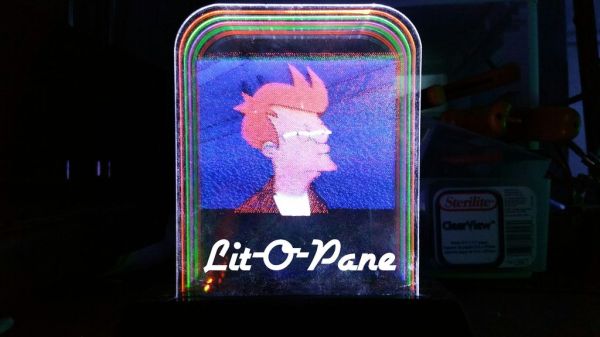
Edge-lit art has been around for a very long time, and most people have probably come across it in a gift shop somewhere. All it takes is a pane of transparent material (usually an acrylic sheet) with the artwork etched into the surface. Shine a light into the sheet from the edge, and refraction takes over to light up the artwork. However, this technique is almost always limited to a single pane, and therefore a single color. [haqnmaq] wanted to take this idea and make it full-color, and has written up a great Instructables tutorial on how to accomplish this.

If you want to make something like this yourself, the only thing you really need is a laser cutter and some basic electronics equipment. The process itself is so straightforward that it’s surprising that it isn’t more common. You start by taking a photo of your choice and use an image editor to break it up into three photos, one for red, one for green, and one for blue. Each of those photos is then etched into an acrylic pane with a laser cutter. When the panes are positioned in front of each other and edge-lit with their respective LEDs, a full-color image comes to life.

This isn’t the first edge-lit artwork project we’ve featured, but it definitely has the highest fidelity. Because [haqnmaq’s] technique uses three colors, you can use his tutorial to reproduce any photo you like. You could even take this a step further and create animated photos by adding more panes and lighting them up in the correct sequence!

Trailblazing Artisans Of Road Building

A lot of us take roads for granted, at least until they are icy or torn up by construction. The concept of creating fixed paths seems to be in our firmware. Finding the shortest distance to food or water and marking a trail to it from home base has always been its own reward.

Roads have come a long way from the simple paths beaten by man and beast. But the basic configuration of paved roads hasn’t changed all that much since the Roman empire. Whatever they’re made of, they need to be able to drain water and support heavy loads.

New issues arose as modes of transportation shifted in favor of the automobile. Road surfaces needed to provide friction against tires. But how did we get from the stone-paved roads of Rome to the asphalt and concrete roads of today?

Continue reading “Trailblazing Artisans Of Road Building”

A Modern 386 Development Board

Some readers out there probably have nostalgic feelings for their first 386 based PC, the beeps and hisses of the modem, and the classic sound of a floppy drive’s stepper motor. Perhaps that turbo button that we could never quite figure out.

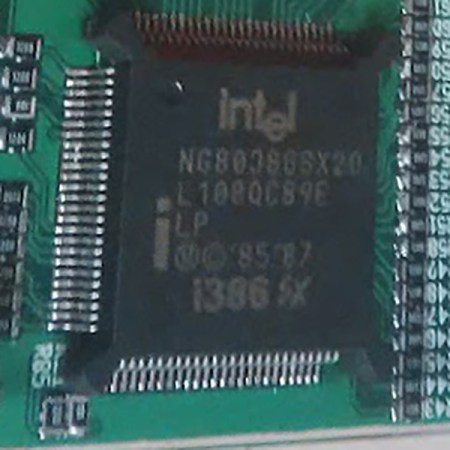
If you want the power of a 386 processor today, you’re in luck: [Pierre Surply] has developed a modern development board for the 80386SX CPU. This board is based on a 386 processor that comes in a LQFP package for “easy” soldering, and an Altera Cyclone IV FPGA.

To allow the CPU to run, the FPGA emulates the chipset you would usually find on a PC motherboard. The FPGA acts as both a bus controller and a memory controller for the CPU. On the board, there’s an SRAM chip and internal memory on the FPGA, which can be accessed through the 386’s bus access protocol.

The FPGA also provides debugging features. A supervisor application running on the FPGA gives debugging functionality via a FTDI USB to UART chip. This lets you control operation of the CPU from a PC for debugging purposes. The FPGA’s memory can be programmed through a JTAG interface.

The project is very well documented, and is a great read if you’re wondering how your old 386 actually worked. It can even be hand soldered, so the adventurous can grab the design files and give it a go. The francophones reading can also watch the talk in the video below.

Continue reading “A Modern 386 Development Board”