drawing of quadcopter in space

Ask Hackaday: Quadcopter In Near Space?

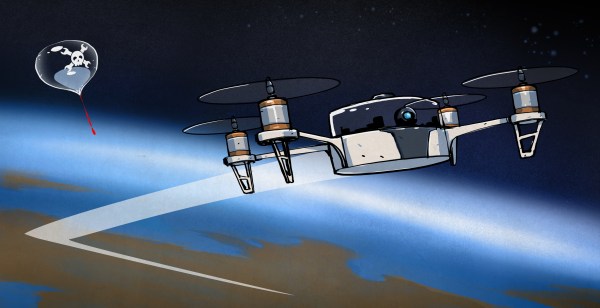
Your mission, should you choose to accept it, is to send a quadcopter to near space and return it safely to the Earth. Getting it there is not that difficult. In fact, you can get pretty much anything you want to near space with a high altitude weather balloon. Getting it back on the ground in one piece is a whole other ballgame.

Why does someone need to do this? Well, it appears the ESA’s StarTiger team is taking a card out of NASA’s book and wants to use a Sky Crane to soft land a rover on Mars. But instead of using rockets to hold the crane steady in the Martian sky, they want to use…you guessed it, a quadcopter. They’re calling it the Dropter.

quadcopter on mars

At first glance, there seems to be a lot wrong with this approach. The atmosphere on Mars is about 100 times less dense than the Earth’s atmosphere at sea level. How do props operate in these conditions? Testing would need to be done of course, and the Earth’s upper atmosphere is the perfect place to carry out such testing. At 100,000 feet, the density of the stratosphere is about the same as that of the Martian surface atmosphere. AND 100,000 feet is prime high altitude balloon territory.  Not to mention the gravity on Mars is about 38% of Earth’s gravity, meaning a 5.5 pound model on Earth could accurately represent a 15 pound model on Mars.

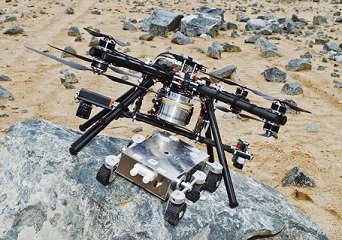
With all of these facts taken into consideration, one can conclude that realistic testing of a scale model Martian quadcopter is within the grasp of the hacker community. We’ve seen some work on high altitude drones before, but never a quadcopter.

Now it’s your turn to do something no one has ever done before. Think you got what it takes to pull such a project off? Let us know what your approach to the challenge would be in the comments.

Continue reading “Ask Hackaday: Quadcopter In Near Space?”

An Apple ][ Emulator On An Arduino Uno

April Fools’ Day may have passed, but we really had to check the calendar on this hack. [Damian Peckett] has implemented an Apple ][, its 6502 processor, and a cassette port, all on an Arduino Uno. If that wasn’t enough, he also uses a PS/2 keyboard for input and outputs analog VGA. [Damian] is doing all this with very few additional components. A couple of resistors, a capacitor and some very clever hacking were all [Damian] needed to convince an Arduino Uno that it was an Apple.

Making all this work boiled down to a case of resource management. The original Apple ][ had 4KB of RAM and 8KB of ROM. The ATmega328 has only 2KB of RAM, but 32KB of Flash. The only way to make this hack work would be to keep as much of the emulation and other routines in Flash, using as little RAM as possible.

The core of this hack starts with the MOS 6502, the processor used in the Apple. [Damian] wrote a simple assembler which translates the 6502 opcodes and address modes to instructions which can be executed by the Arduino’s ATmega328. To keep everything in ROM and make the emulator portable, [Damian] used two large switch statements. One for address modes, and a 352 line switch statement for the opcodes themselves.

A CPU alone is not an Apple though. [Damian] still needed input, output, and the ROM which made the Apple so special. Input was through a PS/2 keyboard. The PS/2 synchronous serial clock is easy to interface with an Arduino. Output was through a custom VGA implementation, which is a hack all its own. [Damian] used the lowly ATmega16u2 to generate the video timing. The 16u2 is normally used as the Arduino Uno’s USB interface. The only external hardware needed is a single 120 ohm resistor.

The original Apples had cassette and speaker interfaces. So does this emulated Apple. [Woz’s] original cassette and speaker interface accurate loops to generate and measure frequencies. One of the trade-offs [Damian] accepted in his 6502 was cycle accuracy, so he couldn’t use the original routines. Not a problem though, as he was able to write simple functions to replace these routines and drop them in place of the Apple’s own ROM calls.

The Apple ][ ROM itself is handled as one giant character array. This includes the system monitor, Mini-Assembler, Sweet-16, and [Woz’s] own Integer Basic. [Damian] caps off this incredible project by booting his new computer, loading a  Mandelbrot set program from cassette -or in this case an audio file stored on his cell phone, and running it. The well-known fractal is displayed in all its glory on a modern LCD monitor, driven by a microcontroller, emulating a computer from nearly 40 years ago.

Continue reading “An Apple ][ Emulator On An Arduino Uno”

Open Hardware For Open Science – Interview With Charles Fracchia

Open Science has been a long-standing ideal for many researchers and practitioners around the world. It advocates the open sharing of scientific research, data, processes, and tools and encourages open collaboration. While not without challenges, this mode of scientific research has the potential to change the entire course of science, allowing for more rigorous peer-review and large-scale scientific projects, accelerating progress, and enabling otherwise unimaginable discoveries.

As with any great idea, there are a number of obstacles to such a thing going mainstream. The biggest one is certainly the existing incentive system that lies at the foundation of the academic world. A limited number of opportunities, relentless competition, and pressure to “publish or perish” usually end up incentivizing exactly the opposite – keeping results closed and doing everything to gain a competitive edge. Still, against all odds, a number of successful Open Science projects are out there in the wild, making profound impacts on their respective fields. HapMap Project, OpenWorm, Sloan Digital Sky Survey and Polymath Project are just a few to name. And the whole movement is just getting started.

While some of these challenges are universal, when it comes to Biology and Biomedical Engineering, the road to Open Science is paved with problems that will go beyond crafting proper incentives for researchers and academic institutions.

It will require building hardware.

Continue reading “Open Hardware For Open Science – Interview With Charles Fracchia”

Wildlife Camera

Remote Controlled Wildlife Camera With Raspberry Pi

If you are interested in local wildlife, you may want to consider this wildlife camera project (Google cache). [Arnis] has been using his to film foxes and mice. The core components of this build are a Raspberry Pi and an infrared camera module specifically made for the Pi. The system runs on a 20,000 mAh battery, which [Arnis] claims results in around 18 hours of battery life.

[Arnis] appears to be using a passive infrared (PIR) sensor to detect motion. These sensors work by detecting sudden changes in the amount of ambient infrared radiation. Mammals are good sources of infrared radiation, so the sensor would work well to detect animals in the vicinity. The Pi is also hooked up to a secondary circuit consisting of a relay, a battery, and an infrared light. When it’s dark outside, [Arnis] can enable “night mode” which will turn on the infrared light. This provides some level of night vision for recording the furry critters in low light conditions.

[Arnis] is also using a Bluetooth dongle with the Pi in order to communicate with an Android phone. Using a custom Android app, he is able to connect back to the Pi and start the camera recording script. He can also use the app to sync the time on the Pi or download an updated image from the camera to ensure it is pointed in the right direction. Be sure to check out the demo video below.

If you like these wildlife cameras, you might want to check out some older projects that serve a similar purpose. Continue reading “Remote Controlled Wildlife Camera With Raspberry Pi”

Restoring A Vintage PDP-11/04 Computer

[MattisLind] spent one and a half years to complete restoration of a Digital Equipment Corporation (DEC) PDP-11/04 including peripherals like a TU60 tape drive and a LA30P Decwriter printing terminal. The computer is now able to run CAPS-11 which is a very simple operating system and also CAPS-11/BASIC. Just like the project itself, his blog post is quite long filled with interesting details. For a tl;dr version, check the video after the break.

This system originally belonged to Ericsson and [MattisLind] received it from Ericsson computer club, EDKX. He was lucky to have access to online resources which made the task easier. But it still wasn’t easy considering the number of hardware faults he had to tackle and the software challenges too. The first task was obviously looking at the Power supply. He changed the big electrolytic capacitors, and the power supply seemed to work well with his dummy load, but failed when hooked up to the backplane of the computer. Some more digging around, and a replaced thyristor later, he had it fixed. The thyristor was part of a crowbar circuit to protect the system from over-voltages should one of the main switching transistors fail.

With the power supply fixed, the CPU still wouldn’t boot. Some sleuthing around, and he pin pointed the bus receiver chip that had failed. His order of the device via a Chinese ebay seller was on the slow boat, so he just de-soldered a device from another board which improved things a bit, but it was still stuck in a loop. A replacement communications board and the system now passed diagnostics check, but failed memory testing. This turned out to be caused be a faulty DIP switch. He next tackled all the software challenges in getting the CPU board up to speed.

Continue reading “Restoring A Vintage PDP-11/04 Computer”

TFT Display

Controlling A Color TFT Display With PIC32

Sometimes it feels like everyone out there is using Arduino. It’s easy to find tutorials and libraries to get things working with Arduino, but if you want to use another platform you might have more trouble. [Tahmid] ran into this problem when he decided to try using a PIC32 to control a 2.2″ color TFT display from Adafruit.

Adafruit is really good about providing tutorials and Arduino libraries for their products. It makes it really easy to get up and running… if you are using Arduino. All of their libraries are open source, which means that the community can take them and modify them as needed. [Tahmid] decided to do exactly this and fork the Adafruit libraries over to the PIC32 platform in C. It’s a great learning experience. You get to see how (good or bad) other people code, and it immerses you in the differences between two different chip families.

He’s released the libraries online for others to use. He says that he’s heavily commented the code to try to make as self-explanatory as possible. The display interfaces with the PIC32 using SPI. The demo video below shows the screen up and running and demonstrates the crisp color graphics. Continue reading “Controlling A Color TFT Display With PIC32”

The Dan64: A Minimal Hardware AVR Microcomputer

[Juan] sent us his writeup of a microcomputer he built using an Arduino UNO (AVR ATmega328p) and some off-board SRAM. This one’s truly minimalistic.

Have a look at the schematics (PDF). There’s an Arduino, the SPI SRAM, some transistors for TV video output, and a PS/2 connector for the keyboard. That’s it, really. It’s easily built on a breadboard in a few minutes if you have the parts on hand. Flash the Dan64 operating system and virtual machine into the AVR and you’re good to go.

Now we’ve seen a few 6502-based retro computers around here lately that use a 6502 paired with a microcontroller for the interfacing, but they’ve all been bulky three-chip affairs. [Juan] wins the minimalism prize by using a 6502 virtual machine implemented in the AVR to reduce the parts count down to two chips for the whole shooting match.

Using a 6502 virtual machine was a crucial choice in the design, because there are 6502 cross compilers that will let you compile and debug code for the microcomputer on your macrocomputer and then load it into the micro to run. This makes developing for the micro less painful.

How does it load programs you ask? The old-fashioned way of course, using audio files. Although rather than using the Kansas City Standard as in days of yore, he encodes the data in short and long pulses of square waves. This might be less reliable, but it sure saves on external hardware.

Continue reading “The Dan64: A Minimal Hardware AVR Microcomputer”