[David Krum] is associate lab director at the Mixed Reality Lab at the Institute for Creative Technologies at USC. That puts him at the intersection of science and engineering: building cool virtual reality (VR) devices, and using science to figure out what works and what doesn’t. He’s been doing VR since 1998, so he’s seen many cool ideas come and go. His lab was at the center of the modern virtual reality explosion. Come watch his talk and see why!
What does a Hackaday writer do when a couple of days after Christmas she’s having a beer or two with a long-term friend from her university days who’s made a career in the technical side of digital broadcasting? Pick his brains about the transmission scheme and write it all down of course, for behind the consumer’s shiny digital radio lies a wealth of interesting technology to try to squeeze the most from the available resources.
In the UK, our digital broadcast radio uses a system called DAB, for Digital Audio Broadcasting. There are a variety of standards used around the world for digital radio, and it’s fair to say that DAB as one of the older ones is not necessarily the best in today’s marketplace. This aside there is still a lot to be learned from its transmission scheme, and from how some of its shortcomings were addressed in later standards. Continue reading “Anatomy Of A Digital Broadcast Radio System”→
If you’ve never set up a telescope in your back yard, you’ve never been truly disappointed. The Hubble can take some great shots of Saturn, nebulae, and other astronomical phenomena, but even an expensive backyard scope produces only smudges. To do astronomy properly, you’ll spend your time huddled over a camera and a computer, stacking images to produce something that almost lives up to your expectations.
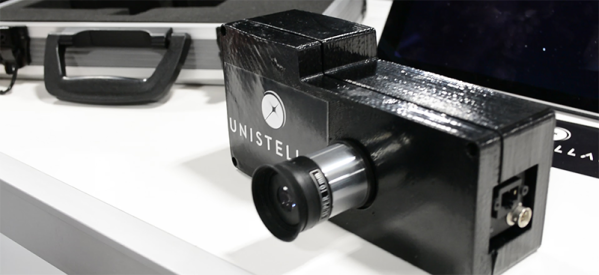
At CES, Unistellar introduced a device designed to fit over the eyepiece of a telescope to do all of this for you.
According to the guys at Unistellar, this box contains a small Linux computer, camera, GPS, and an LCD. Once the telescope is set up, the module takes a few pictures of the telescope’s field of view, stacks the images, and overlays the result in the eyepiece. Think of this as ‘live’ astrophotography.
In addition to making Jupiter look less like a Great Red Smudge, the Unistellar module adds augmented reality; it knows where the telescope is pointing and will add a label if you’re looking at any astronomical objects of note.
While I wasn’t able to take a look inside this extremely cool device, the Unistellar guys said they’ll be launching a crowdfunding campaign in the near future.
It is said that “success has many fathers, but failure is an orphan.” Given the world-changing success of radio in the late 19th and early 20th centuries, it’s no wonder that so many scientists, physicists, and engineers have been credited with its invention. The fact that electromagnetic radiation is a natural phenomenon that no one can reasonably claim to have invented sometimes seems lost in the shuffle to claim the prize.
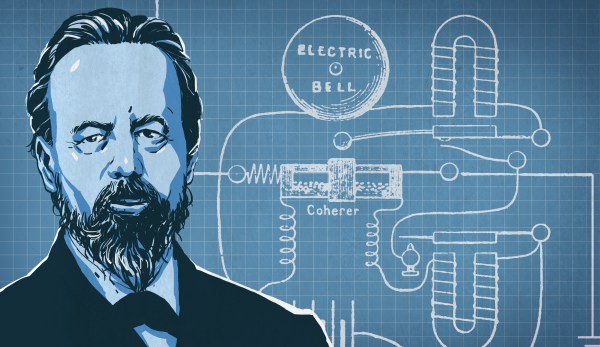
But it was exactly through the study of natural phenomena that one of the earliest pioneers in radio research came to have a reasonable claim to at least be the inventor of the radio receiver, well before anyone had learned how to reliably produce electromagnetic waves. This is the story of how a Russian physicist harnessed the power of lightning and became one of the many fathers of radio.
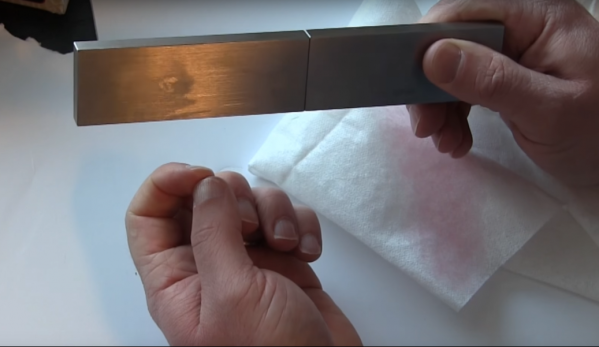
In this age of patent trolls and multi-billion dollar companies that make intellectual property claims on plant genes and photographing objects against a white background, you’d be forgiven for thinking that a patent on a plain steel block would be yet another recent absurdity. But no – [Carl Edvard Johansson] got a patent for his “Gauge Block Sets for Precision Measurement” in 1901. As [AvE] shows us with a video on how gauge blocks can be “wrung” together, there’s more to these little blocks than meets the eye.
Gauge block wringing is probably nothing new to experienced machinists, but for the rest of us, it’s a pretty neat trick. To start the show, [AvE] gives us a little rundown on “Jo blocks” and what they’re good for. Basically, each block is a piece of tool steel or ceramic that’s ground and lapped to a specific length. Available in sets of various lengths, the blocks can be stacked end to end to make up a very precise measuring stick. But blocks aren’t merely placed adjacent to each other – they physically adhere to each other via their lapped surfaces after being wrung together. [AvE] demonstrates the wringing technique and offers a few ideas on how this somewhat mysterious adhesion occurs. It’s pretty fascinating stuff and puts us in the mood to get a gauge block set to try it ourselves.
It’s been a while since we’ve seen [AvE] around Hackaday – last time out he was making carbon foam from a slice of bread. Rest assured his channel has been going strong since then, with his unique blend of laughs and insight into the secret lives of tools. Definitely worth checking out, and still skookum as frig.
A lot of classic synthesizers rely on analog control voltages to vary parameters; this is a problem for the modern musician who may want to integrate such hardware with a MIDI setup. For just this problem, [little-scale] has built a MIDI-controllable DAC for generating control voltages.
It’s a simple enough build – a Teensy 2 is used to speak USB MIDI to a laptop. This allows the DAC to be used with just about any modern MIDI capable software. The Teensy then controls a Microchip MCP4922 over SPI to generate the requisite control voltages. [little-scale]’s video covers the basic assembly of the hardware on a breadboard, and goes on to demonstrate its use with a performance using the MIDI DAC to control a Moog Mother 32 synth. [little-scale] has also made the code available, making it easy to spin up your own.
We can see this project being indispensable to electronic musicians working with banks of modular synths, making it much easier to tie them in with automation in their DAW of choice. This isn’t the first MIDI interfacing hack we’ve seen either – check out this setup to interface an iPad to guitar pedals.
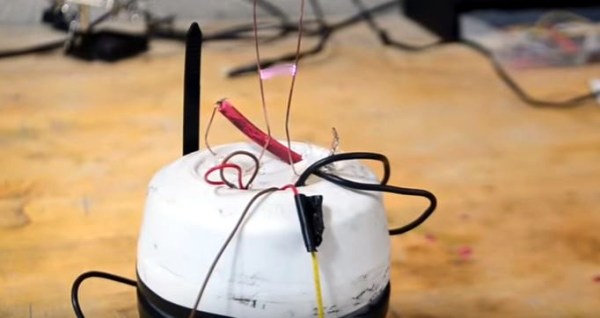
A Jacob´s ladder is a favorite project of high voltage enthusiasts. It makes a visually attractive and fun display of a high voltage electrical arc climbing a pair of electrodes. [Keystone Science] shows us how to make a Jacob´s ladder that runs on 9 V batteries.
The ladder itself is pretty easy to make. It is nothing more than a pair of stiff wires in a V shape, connected to a high voltage power supply. The more difficult part is the HV power supply. [Keystone Science] explains how to build one using a flyback transformer from an old CRT tv and a few other components. It is a pretty simple circuit and can be powered by a 9 V battery. The ladder works because, when HV is applied to the electrodes, an arc is established at the bottom, where they are nearest each other. The arc is at high temperature so the air rises, and the arc starts to climb the ladder. Since the electrodes are further away from each other as the arc rises, at a certain point the distance is too large to sustain the arc and the process repeats.
This is a nice weekend project if you want to try it. In case you don´t want to make your own HV power supply, you can try another ladder project that uses a commercial one.