Open Hardware Summit This Thursday

This Thursday, Hackaday and Tindie are going to be rolling into Denver to attend the 2017 Open Hardware Summit.

What’s the big draw for the Open Hardware Summit? The attendees, of course. These are the people who make all the cool bits and bobs in Open Hardware. [Prusa] will be there, Seeed will be there, OSH Park and OSH Stencils will be there (yeah, they’re different companies), BeagleBoard will be there, and Great Scott Gadgets will be there. This is the place you want to be if you want to meet the heroes of Open Hardware.

Of special interest at the Open Hardware Summit this year will be the state of certification talk. Last year, a certification process for Open Hardware was started. If you’re not aware, this is a nearly intractable problem. Copyright covers design files, not implementation, and design patents only cover ornamental fluff on the stuff that actually makes things go. Creating a certification for Open Hardware is exponentially harder than arguing over an Open Source license, and we’re excited to see how the first year of the Open Hardware Certification went.

If you’re going and hanging around in Denver until Friday, there’s a road trip being planned by Sparkfun to visit the awesome companies along the Front Range. The itinerary includes a trip to Sparkfun, lunch at a brewery, and a trip to Lulzbot. Basically, Sparkfun rented a bus. The deadline to RSVP passed long ago, but I’m renting a van for the Hackaday and Tindie crew, and I’m sure there’s going to be some overflow. After the event on Thursday, there will be a Women Who Hack Dinner and Drinks. Hackaday’s evil overlords are graciously providing the drinks and appetizer there.

3D Printing On The Subway; Or Anywhere Else!

3D-Printed wearable electronics are on the rise, however our own [Naomi Wu] flipped it around and made a wearable 3D printer which not only is portable but also manufactures on the move!

The project starts with a baby carrier that was locally purchased, and the extra fat was trimmed off leaving behind only the primary harness and square frame. This square frame is left intact to provide stability to the mounted printer as well as some level of comfort to the wearer. [Naomi] then drills a number of new holes in the delta printer in question, of which fortunately the top is made of plastic. Using swivel screws and long screws, the upper part connects with the harness. The receptacle clamp for the upper part is 3D-printed as well, and provides a modular rigid fixture for the machine.

The lower part also uses a 3D-printed triangular base that has a slot for the carrier frame which attaches with the bottom part of the delta using screws. The project is powered via two 3 Ah batteries that are kept in place behind the printer using custom clamps made with PLA. The whole project works on the move, as demonstrated by [Naomi] in the video below.

From dissecting the baby carrier to puncturing holes in a harness using a screwdriver heated by a blow torch, this project has a lot of DIY in it. For those looking for a more productive motorised wearable, check out Adding Haptic Feedback For The Disabled. Continue reading “3D Printing On The Subway; Or Anywhere Else!”

The Art Of Blinky Business Cards

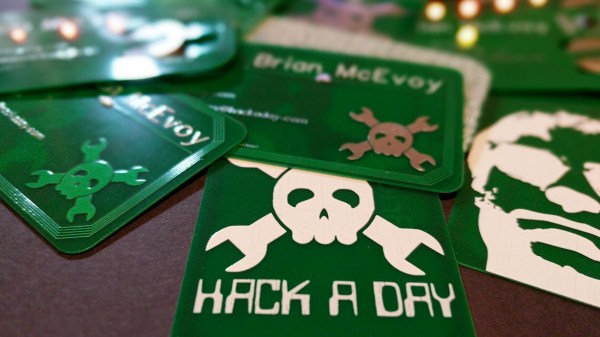
Business cards are stuck somewhere between antiquity and convenience. On one hand, we have very convenient paperless solutions for contact swapping including Bluetooth, NFC, and just saying, “Hey, put your number into my phone, please.” On the other hand, holding something from another person is a more personal and memorable exchange. I would liken this to the difference between an eBook and a paperback. One is supremely convenient while the other is tactile. There’s a reason business cards have survived longer than the Rolodex.

Protocols and culture surrounding the exchange of cards are meant to make yourself memorable and a card which is easy to associate with you can work long after you’ve given your card away. This may seem moot if you are assigned cards when you start a new job, but personal business cards are invaluable for meeting people outside of work and you are the one to decide how wild or creative to make them.

Continue reading “The Art Of Blinky Business Cards”

Rocking Playmobil Wedding

Many of us have put our making/hacking/building skills to use as a favor for our friends and family. [Boris Werner] is no different, he set about creating a music festival stage with Playmobil figures and parts for a couple of friends who were getting married. The miniature performers are 1/24 scale models of the forming family. The bride and groom are on guitar and vocals while junior drums.

Turning children’s toys into a wedding-worthy gift isn’t easy but the level of detail [Boris Werner] used is something we can all learn from. The video after the break does a great job of showing just how many cool synchronized lighting features can be crammed into a tiny stage in the flavor of a real show and often using genuine Playmobil parts. Automation was a mix of MOSFET controlled LEDs for the stage lighting, addressable light rings behind the curtain, a disco ball with a stepper motor and music, all controlled by an Arduino.

Unless you are some kind of Playmobil purist, this is way cooler than anything straight out of the box. This is the first mention of Playmobil on Hackaday but miniatures are hardly a new subject like this similarly scaled space sedan.

Continue reading “Rocking Playmobil Wedding”

Quick And Easy NTP Clock

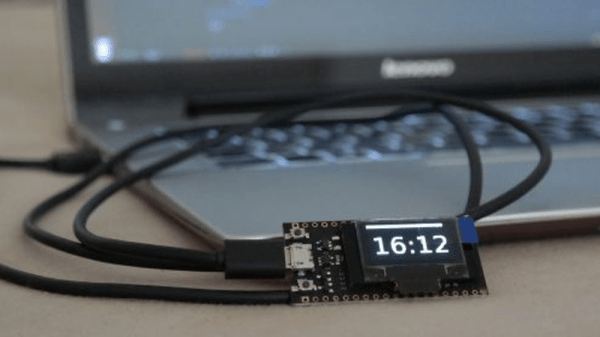
[Danman] got an ESP32 with built-in OLED display, and in the process of getting a clock up and running and trying to get a couple of NodeMCU binaries installed on it, thought he’d try rolling his own.

[Danman] used PlatformIO to write the code to his ESP. PlatformIO allowed [Danman] to browse for a NTP library and load it into his project. After finding the NTP library, [Danman] wrote a bit of code and was able to upload it to the ESP. When that was uploaded [Danman] noticed that nothing was being displayed on the OLED, but that was just a simple matter of tracking down the right address to use when setting up the library for his OLED. Lastly, [Danman] created a large font to display the time with and his mini-clock was done!

It’s always nice to see someone be able to go from buying a board to having a demo put together, and it’s getting easier and easier. Check out this OLED watch, and this pocket watch doesn’t use OLEDs, but it still looks pretty cool.

This Synth Is Okay

While this 3D printed synthesizer might just be okay, we’re going to say it’s better than that. Why? [oskitone] did something with a 555 timer.

The Okay synth from [oskitone] uses a completely 3D printed enclosure. Even the keys are printed. Underneath these keys is a small PCB loaded up with tact switches and small potentiometers. This board runs to another board loaded up with a 555 timer and a CD4040 frequency divider. This, in turn, goes into an LM386 amplifier. It’s more or less the simplest synth you can make.

If this synth looks familiar, you’re right. A few months ago, [oskitone] released the Hello F0 synth, a simple wooden box with 3D printed keys, a few switches, and a single 4046 PLL oscillator. It’s the simplest synth you can build, but it is something that can be extended into a real, proper synthesizer with different waveforms, LFOs, and envelope generators.

The sound of this chip is a very hard square wave with none of the subtleties of A,S,D, or R. Turn down the octave knob and it makes a great bass synth, or turn the octave knob to the middle for some great chiptune tones. All the 3D models for this synth are available on Thingiverse, so if you’d like to print your own, have at it.

You can check out the demo of the Okay synth below.

Continue reading “This Synth Is Okay”

Over-Engineered Mailbox Flag Machined Using Under-Engineered Mini-Lathe

[Tim Nummy] used his cheap, Chinese, bench mini-lathe to make a non-terrible mailbox flag holder (YouTube video, embedded below). Tim posts videos on his channel about garage hobby projects, many of which are built using his mini-lathe, often based on suggestions from his followers. One such suggestion was to do something about his terrible mailbox flag – we’re guessing he receives a lot of old-school fan mail.

He starts off by planning the build around 1 ¼ inch aluminum bar stock, a 688 bearing, three neodymium magnets and some screws. The rest of it is a “think and plan as you go along” project, but essentially, the new holder is in three pieces. An inner piece goes inside the mail box and holds the assembly to the mail box. The middle piece holds the two magnets which act as end-stops or limits for the flags raised and lowered positions. The final, outer piece holds the flag itself, and the bearing which allows it to rotate freely.

This part also has the third magnet embedded in it to work with the other two magnets for the limits. The use of magnets is cool, but a ball catch with two detents would have worked just as well. It’s a great simple project to follow for those who want to wet their feet on lathe work. [Tim] has also posted links to all of the tools and equipment seen in the video, so check that out if anything catches your fancy.

But workshop veterans will almost certainly cringe at several places along the video. The main one that caught our eye is obviously the shaky lathe itself. It could do with a heavier workbench, proper leveling, foundation bolts or anti-vibration mounts. And from the looks of it, the tail stock isn’t any rock steady too. Although the lathe is variable speed, the chuck rpm is set too high for aluminum, and the lack of cutting fluid makes it even more troublesome. Using oil, or even some cutting fluid, while tapping would have been wise too.

We’re not sure if it’s the shaky foundation or poor feed control, but the step cut for mounting the bearing is over-sized by a whole lot more and requires a big goop of retaining compound to glue the bearing in place. But the end result works quite well, including the magnetic catches – a complex solution for a simple problem.

We’re sure our keen-eyed readers will likely spot some more issues in [Tim]’s methods, so go at it in the comments below, but please make sure to rein in the snark and keep your feedback positive.

Continue reading “Over-Engineered Mailbox Flag Machined Using Under-Engineered Mini-Lathe”