Hot rod camera dolly

Slow Down That Hot Rod Camera Dolly

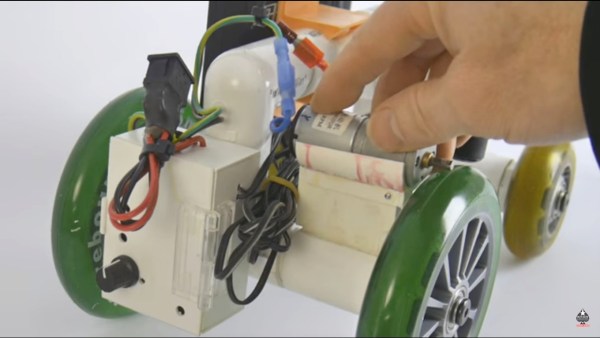
[Eric Strebel]  uses a small homemade vehicle with his camera mounted on it to get great tracking shots for the intros to his videos. If the movement is slow enough then the effect is quite professional looking. But he wanted it eight times slower. We not only like the simple way he did it, along with how he machined parts for it, but the result makes it look like a hot rod, hence his name for it, the dolly hot rod. He also has an elegant mechanism for disengaging the motor while he repositions the dolly.

Machining Bondo body filler cylinder

The are many ways to slow down a rotation. We’re assuming he was already at the minimum speed for the vehicle’s 8 RPM motor transmission and electronic speed controller. Gears or pulleys would probably be the next options. But [Eric] went even simpler, switching from roller blade wheels to larger diameter scooter wheels.

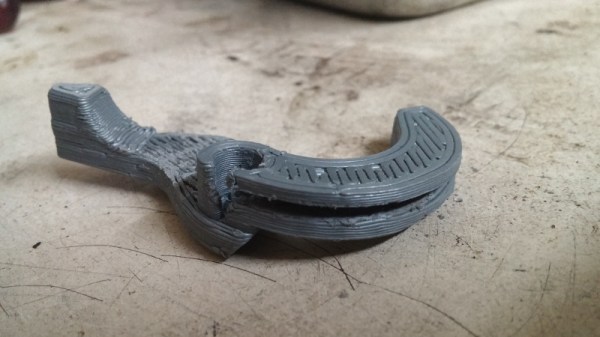
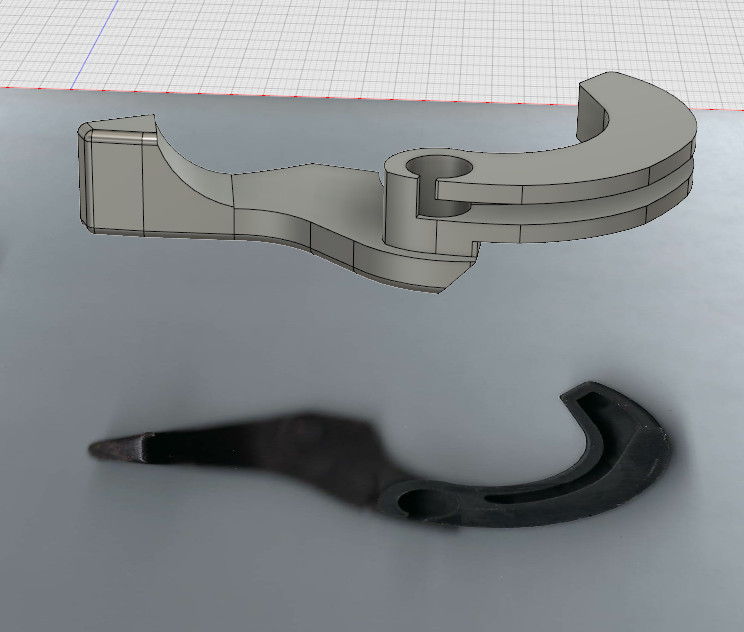
As simple as that sounds though, it led to that age-old conundrum, how to attach the wheels to the vehicle. The axle is made up of PVC tubes. So he machined square the ends of some PVC plugs and bolted the plugs to the wheel bearings. That left only to push the PVC plugs into the axle’s tubes. There are a number of ways he could have machined the PVC plugs, and the full explanation of the one he chose is best left to his video below. But basically, it involved first machining a Bondo body filler cylinder with a bolt embedded in it and then using the cylinder to hold onto the PVC plug while he machined that.

Continue reading “Slow Down That Hot Rod Camera Dolly”

There’s Now A New MIDI Spec, And Drones

MIDI, the Musical Instrument Digital Interface, was released in 1983 in a truly bizarre association between musical instrument manufacturers. At no other time, before or since, has there been such cooperation between different manufacturers to define a standard. Since then, the MIDI spec has been expanded with SysEx messages, the ability to dump samples via MIDI, redefining the tuning of instruments via MIDI to support non-Western music, and somewhere deep in the spec, karaoke machines.

Now there’s a new update to the MIDI spec (Gearnews link, here’s the official midi.org announcement but their website requires registration and is a hot garbage fire). At this year’s NAMM, the place where MIDI was first demonstrated decades ago,  the MIDI Manufacturers Association announced an update to MIDI that makes instruments and controllers smarter, and almost self-learning.

There are three new bits to the new update to the MIDI spec. The first is Profile Configuration, a way to auto-configure complex controller mappings, described as, ‘MIDI Learn on steroids’. The second update is Property Exchange, and allows MIDI devices to set device properties like, ‘product name, configuration settings, controller names, and patch data’. This is effectively setting metadata in controllers and devices. The third new bit is Protocol Negotiation, a way to automatically push future, next-gen protocols over a DIN-5 connector.

What does this all mean? Drones. No, I’m serious. The MIDI association is tinkering around with some Tiny Whoops and Phantoms, and posted a video of drones being controlled by a MIDI controller. Play a glissando up, and the drone goes up. You can check out a video of that below.

Continue reading “There’s Now A New MIDI Spec, And Drones”

Pulling Music Out Of Thin Air With A Raspberry Pi

Pianos are great instruments, but being rather heavy and requiring a fair amount of space they are certainly not known for their convenience. Sure, there are more portable varieties available, but they rarely resemble the elegance and classiness of a grand piano. One option is of course to build a downscaled version yourself — and since you’re already customizing the instrument, why stop at the way you play it. [2fishy] didn’t stop there either and ended up with a wooden, space friendly, light controlled piano housing a Raspberry Pi.

Inspired by the concept of a laser harp, [2fishy] followed the same principle but chose a simpler and safer alternative by using LEDs instead. For each playable tone, a LED is mounted opposite a light dependent resistor, creating an array of switches that is then connected to the Raspberry Pi’s GPIO pins. A Python script is handling the rest, polling the GPIO states and — with a little help from pygame, triggering MIDI playback whenever the light stream is interrupted.

There are enough LED/LDR pairs to play one full octave and have some additional control inputs for menu and octave shifting. This concept will naturally require some adjustments to your playing — you can get an idea of it in the demonstration video after the break. And if this design is still not the right size for you, or if you prefer to play in total darkness, this similar MIDI instrument using ultrasonic distance sensors could be of interest.

Continue reading “Pulling Music Out Of Thin Air With A Raspberry Pi”

Learn About Waveforms Interactively

We’ll be honest: If you are a regular Hackaday reader, you probably won’t learn much new information about waveforms from this website. However, the presentation is a great example of using React on a webpage and — who knows — you might just pick up something interesting. At the very least, it’ll be a great resource the next time you try to help someone starting out.

The animated waveform is cool enough. It is also interesting that it changes based on where you are in the text. The really interesting part though is that you can press the M key to unmute your audio and hear what the wave sounds like. You can also use adjustments to control the frequency and amplitude of the wave.

Continue reading “Learn About Waveforms Interactively”

Building An Arduino Smart IC Tester For $25

There’s no question that you can get a lot done with the classic multimeter; it’s arguably the single most capable tool on your bench. But the farther down the rabbit hole of hacking and reverse engineering you go, the more extravagant your testing and diagnostic gear tends to get. For some of us that’s just an annoying reality of the game. For others it’s an excuse to buy, and maybe even build, some highly specialized equipment. We’ll give you one guess as to which group we fall into here at Hackaday.

[Akshay Baweja] is clearly a member of the second group. He’s recently published a guide on building a very slick intelligent Integrated Circuit tester with a total cost of under $25 USD. Whether you’re trying to identify an unknown chip or verifying your latest parts off the slow-boat from China actually work before installing them in your finished product, this $25 tool could end up saving you a lot of time and aggravation.

[Akshay] walks readers through the components and assembly of his IC tester, which takes the form of a Shield for the Arduino Mega 2560. The custom PCB he designed and had manufactured holds the 20 Pin ZIF Socket as well as the 2.4 inch TFT touch screen. The screen features an integrated micro SD slot which is important as you need the SD card to hold the chip database.

With an IC to test inserted into the ZIF socket, the user can have the tester attempt to automatically ID the chip or can manually enter in a part number to lookup. The source code for the Arduino as well as the chip ID database is up on GitHub for anyone looking to add some more hardware to the device’s testing repertoire.

The importance of good test equipment simply cannot be overstated. Between highly specialized gear like this IC tester to classic instruments such as the oscilloscope, your bench is going to be full of weird and wonderful pieces of equipment before too long.

Continue reading “Building An Arduino Smart IC Tester For $25”

Student 3D Prints Eyes

[Ondřej Vocílka] is a student at the Brno University of Technology in the Czech Republic.  In addition, the 23-year-old lost his vision in his left eye. While attending a lecture on 3D printing, he wondered if he could 3D print an ophthalmic prosthesis — an artificial eye. Turns out, he could. If you don’t speak Czech, you’ll need to call on a translation service like we did.

Unlike conventional glass or plastic eyes, it is trivial to change parameters like color when 3D printing the prosthetic. This is especially important with the iris and the finished product takes about 90 minutes to print. There is additional time required to coat the product with an acrylic layer to mimic the gloss of a natural eye.

Continue reading “Student 3D Prints Eyes”

Printed Motorcycle Choke Lever Goes The Distance

We all dread the day that our favorite piece of hardware becomes so old that spare parts are no longer available for it, something about facing that mechanical mortality sends a little shiver up the hacker’s spine. But on the other hand, the day you can’t get replacement hardware is also the same day you have a valid excuse to make your own parts.

3D rendering above the 2D scan

That’s the situation [Jonathan] found himself in when the choke lever for his Suzuki motorcycle broke. New parts aren’t made for his bike anymore, which gave him the opportunity to fire up Fusion 360 and see if he couldn’t design a replacement using a 2D scan of what was left of the original part.

[Jonathan] put the original part on his flatbed scanner as well one of his credit cards to use for a reference point to scale the image when he imported it into Fusion 360. Using a 2D scanner to get a jump-start on your 3D model is a neat trick when working on replacement parts, and one we don’t see as much as you might think. A proper 3D scanner is cool and all, but certainly not required when replicating hardware like this.

The choke lever is a rather complex shape, one of those geometries that doesn’t really have a good printing orientation because there are overhangs all over the place. That combined with the fact that [Jonathan] printed at .3mm layer height for speed gives the final part an admittedly rough look, but it works. The part was supposed to be a prototype before he reprinted it at higher resolution and potentially with a stronger material like PETG, but after two years the prototype is still installed and working fine. This isn’t the first time we’ve seen a “temporary” 3D printed part become a long-term solution.


This is an entry in Hackaday’s

Repairs You Can Print contest

The twenty best projects will receive $100 in Tindie credit, and for the best projects by a Student or Organization, we’ve got two brand-new Prusa i3 MK3 printers. With a printer like that, you’ll be breaking stuff around the house just to have an excuse to make replacement parts.