As we’ve said many times in the past, the creation of custom cases and enclosures is one of the best and most obvious applications for desktop 3D printing. When armed with even an entry-level printer, your projects will never again have to suffer through the indignity of getting hot glued into a nondescript plastic box. But if you’re printing with basic PLA, you need to be careful that nothing gets too hot inside.
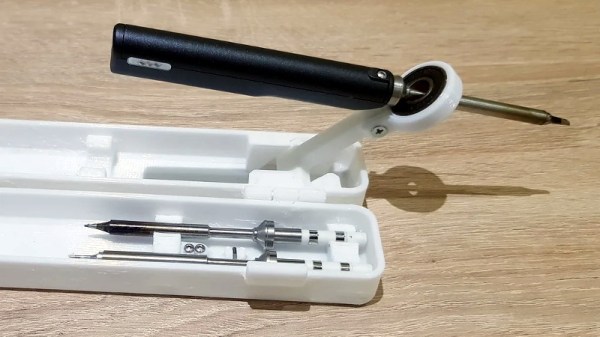
Which was a problem when [Oleg Vint] started work on this 3D printed case for the popular TS100 soldering iron. But with the addition of a standard 608 bearing, the case provides a safe spot for the iron to cool off before it gets buttoned back up for storage. Of course, you can also use the flip-out perch to hold the iron while you’re working.

As [Oleg] explains on the Thingiverse page for the case, he actually blended a few existing projects together to arrive at the final design. Specifically, the idea of using the 608 bearing came from a printable TS100 stand originally designed in 2017 by [MightyNozzle]. Released under Creative Commons, [Oleg] was able to mash the bearing stand together with elements from several other printable TS100 cases to come up with his unique combined solution.
In a physical sense, this project is a great example of the sort of bespoke creations that are made possible by desktop 3D printing. But it’s also a testament to the incredible community that’s sprung up around this technology. While the logistics of it still could use some work, seeing hackers and makers swap and combine their designs like this is extremely inspiring.
[Thanks Arturo182]
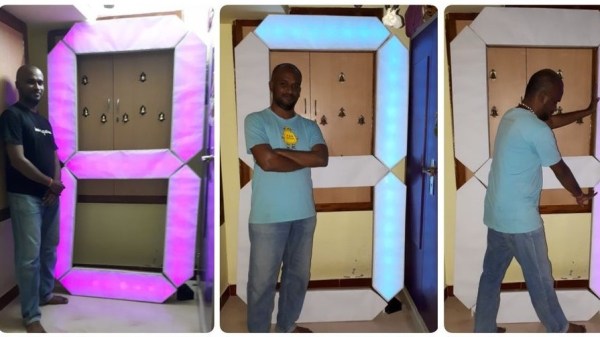
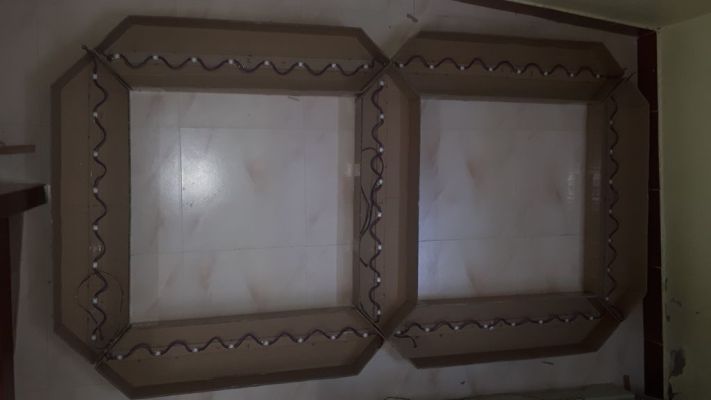 Apparently, the plan is to build a giant clock so he started off by making the first digit. To keep it cheap and simple the segments are made from corrugated cardboard which was carefully cut, folded, and then glued together. The light-diffusing lid is simply made from white paper. He used the ubiquitous WS2812B strips to light up the segments, but things turned out to be more complicated as he was not able to get enough strips to fill up all the segments. This forced him to cut up the strip into individual pieces and space them out by reconnecting the LEDs with wires. Cutting, stripping, and soldering 186 wires took him almost 10 hours. An Arduino Uno serves as the brains of the device and there is a nice Android app to control it via Bluetooth.