Benchtop Injection Molding For The Home Gamer

When we think injection molding, the first thing that comes to mind is highly automated production lines pumping out thousands of parts an hour. However, the very same techniques are able to be scaled down to a level accessible by the DIYer, as [The CrafsMan] demonstrates.

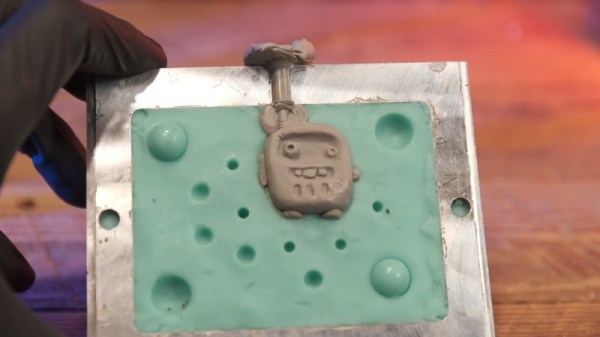
Using a compact, hand-actuated injection moulder, [The Crafsman] demonstrates the basic techniques behind small-scale injection molding. The PIM-Shooter Model 150A in question is designed to work with low melting point plastics like polypropylene and low density polyethylene, and can use aluminium molds which are much cheaper to make than the typical steel molds used in industry.

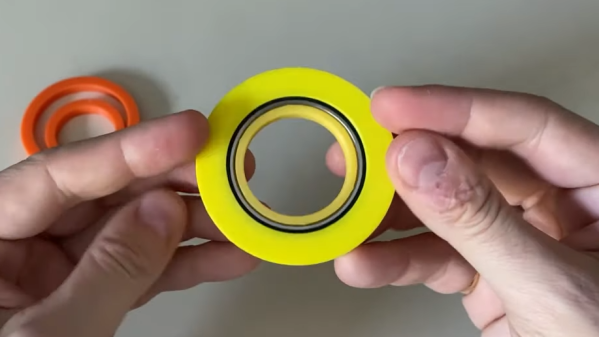
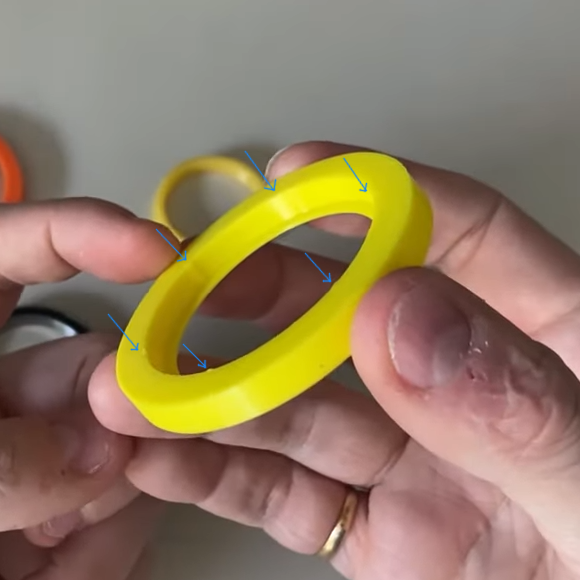
However, the real game changer is when [The Crafsman] busts out his silicone mold making techniques, and applies them to injection molding. By making molds out of silicone, they can be created far more cheaply and easily without the requirement of heavy CNC machinery to produce the required geometry. With the right attention to detail, it’s possible to get good results without having to invest in a custom aluminium mold at all.

Injection molding is a process that can achieve things 3D printing and other techniques simply can’t; it can even be used to produce viable lenses. Video after the break.

Continue reading “Benchtop Injection Molding For The Home Gamer”

This Week In Security: BleedingTooth, Bad Neighbors, And Unpickable Locks

This week, the first details of BleedingTooth leaked onto Twitter, setting off a bit of a frenzy. The full details have yet to be released, but what we know is concerning enough. First off, BleedingTooth isn’t a single vulnerability, but is a set of at least 3 different CVEs (Shouldn’t that make it BleedingTeeth?). The worst vulnerability so far is CVE-2020-12351, which appears to be shown off in the video embedded after the break.

Continue reading “This Week In Security: BleedingTooth, Bad Neighbors, And Unpickable Locks”

Shocking Tinnitus Therapy Is Music To Sufferers’ Ears

Do you suffer from tinnitus? We were surprised to learn that 15-20% of people have this condition that amounts to constant ringing in the ears. Science doesn’t fully understand the ringing part, but one possible explanation is that the brain is compensating for the frequencies it can’t hear any more.

Causes of tinnitus. Image via Drugs.com

[Hubert Lim], a biomedical engineer at the University of Minnesota discovered that the brain can be stimulated to the point of suppressing tinnitus for as long as one year. [Lim] discovered this by accident while doing deep brain stimulation on a patient with tinnitus. The electrode strayed a bit, touching other areas of the brain and the patient suddenly exclaimed that they couldn’t hear their tinnitus anymore.

Then [Lim] and his team tested guinea pigs, searching here, there, and under the armpits for the best place to suppress tinnitus. As it turns out, the tongue is one of the best places when used along with a specific soundscape. So then they did a human trial with 326 people. Each person had a small paddle electrode on their tongue and headphones on their ears.

As the electrodes sparkled like Pop Rocks against their tongues, the trial participants listened to pure frequencies played over a background of sound resembling vaporwave music. The combination of the two overstimulates the brain, forcing it to suppress the tinnitus reaction. This discovery certainly seems like a game changer for tinnitus sufferers. If we had tinnitus, we would be first in line to try this out given the chance. Armed with the soundscape, we’re left to wonder how many 9V batteries we’d have to lick to approximate the paddle.

Speaking of taste, have you ever experienced all five at once? Here’s a device that simulates them all.

Jetson Nano Robot

[Stevej52] likes to build things you can’t buy, and this Jetson Nano robot falls well within that category. Reading the project details, you might think [Stevej52] drinks too much coffee. But we think he is just excited to have successfully pulled off the Herculean task of integrating over a dozen hardware and software modules. Very briefly, he is running Ubuntu and ROS on the PC and Nano. It is all tied together with Python code, and is using Modbus over IP to solve a problem getting joystick data to the Nano. We like it when existing, standard protocols can be used because it frees the designer to focus more on the application. Modbus has been around for 40 years, has widespread support in many languages and platforms.

This is an ongoing project, and we look forward to seeing more updates and especially more video of it in action like the one found below. With the recent release of a price-reduced Jetson Nano, which we covered last week, this might be an excellent project to take on.

Continue reading “Jetson Nano Robot”

Clear PS2 Is The Crystal Edition We Deserved

Every so often, console manufacturers release a crystal edition of their hardware that never really lives up to the hype. The manufacturing realities of producing optically clear plastic mean the expense is rarely justified, even for a special edition. Instead, we get hazy, smoky translucent cases that are comparatively underwhelming. Here to rectify that, [BitHead1000] delivers on a properly transparent PlayStation2.

While the title calls it a Glass PS2, the cutting tools used and the labels on the material make it pretty clear (pun intended) that this build uses acrylic. Regardless, it’s an attractive material all on its own, and much more suited for such a build. To get the best possible visual effect, the internal shielding is removed and tossed in the bin, with plastic standoffs used to hold things in place instead. The case is then assembled around the components, giving an unparalleled view of the hardware inside.

It’s undeniably cool to watch the optical drive doing its thing inside the case when it’s switched on, and a few internal LEDs only add to the spectacle. We’ve seen [BitHead1000] pull off other casemodding feats, too, such as the fire breathing N64. Video after the break.

Continue reading “Clear PS2 Is The Crystal Edition We Deserved”

Room Temperature Superconductor? Yes, But Not So Fast…

There’s good news and there’s bad news in what we’re about to tell you. The good news is that a team of physicists has found a blend of hydrogen, carbon, and sulfur that exhibit superconductivity at 59F. Exciting, right? The bad news is that it only works when being crushed between two diamonds at pressures approaching that of the Earth’s core. For perspective, the bottom of the Marianas trench is about 1,000 atmospheres, while the superconductor needs 2.6 million atmospheres of pressure.

Granted, 59F is a bit chilly, but it is easy to imagine cooling something down that much if you could harness superconductivity. We cool off CPUs all the time. However, unless there’s a breakthrough that allows the material to operate under at least reasonable pressures, this isn’t going to change much outside of a laboratory.

Continue reading “Room Temperature Superconductor? Yes, But Not So Fast…”

Adding Crush Ribs To 3D Printed Parts For A Better Press Fit

[Dan Royer] shared a tip about how to get a reliably tight fit between 3D printed parts and other hardware (like bearings, for example.) He suggests using crush ribs, a tried-and-true solution borrowed from the world of injection molding and repurposed with 3D printing in mind. Before we explain the solution, let’s first look at the problem a little more closely.

Imagine one wishes to press-fit a bearing into a hole. If that hole isn’t just the right size, the bearing won’t be held snugly. If the hole is a little too big, the bearing is loose. Too small, and the bearing won’t fit at all. Since a 0.1 mm difference can have a noticeable effect on how loose or snug a fit is, it’s important to get it right.

Crush rib locations highlighted with blue arrows.

For a 3D printed object, a hole designed with a diameter of 20 mm (for example) will come out slightly different when printed. The usual way around this is to adjust printer settings or modify the object until the magic combination that yields exactly the right outcome is found, also known as the Goldilocks approach. However, this means the 3D model only comes out right on a specific printer, which is a problem for a design that is meant to be shared. Since [Dan] works on robots with 3D printed elements, finding a solution to this problem was particularly important.

The solution he borrowed from the world of injection molding is to use crush ribs, which can be thought of as a set of very small standoffs that deform as a part is press-fit into them. Instead of a piece of hardware making contact with the entire inside surface of a hole, it makes contact only with the crush ribs. Press fitting a part into crush ribs is far easier (and more forgiving) than trying to get the entire mating surface exactly right.

Using crush ribs in this way is a bit of a hack since their original purpose in injection molding is somewhat different. Walls in injection-molded parts are rarely truly flat, because that makes them harder to eject from a mold. Surfaces therefore have a slight cant to them, which is called a draft. This slight angle means that press fitting parts becomes a problem, because any injection-molded hole will have slanted sides. The solution is crush ribs, which — unlike the walls — are modeled straight. The ribs are small enough that they don’t have an issue with sticking in the mold, and provide the mating surface that a press-fit piece of hardware requires. [Dan] has a short video about applying this technique to 3D printed objects, embedded below.

Continue reading “Adding Crush Ribs To 3D Printed Parts For A Better Press Fit”