Arming With An OS

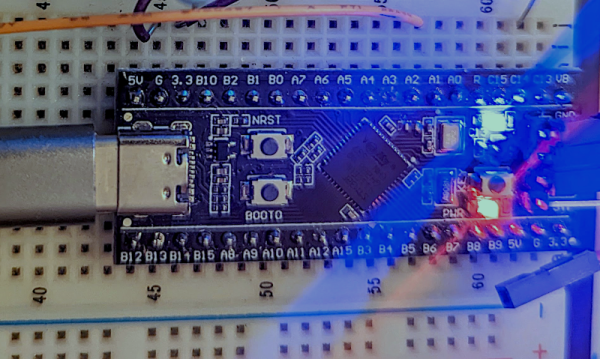
We see tons of projects with the infamous “Blue Pill” STM32 boards. They are cheap and plentiful and have a lot of great features, or at least they were before the chip shortage. I recently picked up a “Black Pill”, which is very similar but has an even more powerful processor. For a few bucks, you get an ARM CPU that can run at 100 MHz (but with USB, probably 96 MHz). There’s 512 kB of flash and 128 kB of RAM. There’s a USB type C port, and even a button and an LED onboard. The thing fits on a breadboard and you can program it with a cheap STLink dongle which costs about $10.
The Black Pill module on a breadboard.

Of course, you then have to consider the software. The STM32Cube stuff is a lot to set up and learn but it does let you do just about anything you can imagine. Then there is the STM32Duino plug-in that lets you use it as a beefy Arduino. That works and is easy enough to set up. However, there’s also Mbed. The only problem is that Mbed doesn’t work right out of the box. Turns out, though, it isn’t that hard to set up. I’ll show you how easy it is to get things going and, next time, I’ll show you a practical example of a USB peripheral that uses the mBed RTOS features.

First Steps

Obviously, you are going to need a Black Pill. There are at least two choices but for as cheap as they are there is little reason not to get the STM32F411 version that has more memory. The DIP form factor will fit in whatever breadboard you happen to have and a USB C cable will power the board so unless you are driving a lot of external circuitry, you probably don’t need an external supply.

Continue reading “Arming With An OS”

NASA Hardware Techniques: Soldering Space Electronics Like It’s 1958

[PeriscopeFilms] on YouTube has many old TV adverts and US government reels archived on their channel, with some really interesting subjects to dive in to. This first one we’re highlighting here is a 1958 film about NASA Soldering Techniques (Video, embedded below), which has some fascinating details about how things were done during the Space Race, and presumably, continue to be done. The overall message about cleanliness couldn’t really be any clearer if they tried — it’s so critical it looks like those chaps in the film spend far more time brushing and cleaning than actually wielding those super clean soldering irons.

Of particular note are some of the details of wire stripping and jointing with components, such as the use of a hot-wire device to remove the insulation from wire, rather than use the kind of stripper we have lying around that cuts into the insulation and slightly distorts the wire in the process. That just won’t do. If they did have to use a cutting-type stripper, it must be precisely the right size for job, and calibrated daily.

The road to the Moon is paved with calibrated wire strippers.

When soldering a pre-tinned wire to a leaded component, a clamp is required to prevent movement of the wire, as is a thermal shunt on the component lead to protect the delicate component from excess heat. They even specify how much to wrap a wire around a terminal to be soldered, never bending the wire more than 180 degrees.

The bottom line in all this is, is that the work must be as perfect as is possible, as there is very little chance of sending someone up to fix a dodgy soldering job, once the assembly is hurtling around the planet. They call it too much of a science to be called an art and too much art to be called a science, and we can sure appreciate that.

As you would expect (and it’s not exactly a big secret) NASA has some very exacting standards for assembly of all hardware, like this great workmanship standard, which is well worth studying. Soldering is an important subject for many of us, we’ve covered the subject of solder metallurgy, as well as looking at how ancient hardware hackers soldered without the benefit of much modern knowledge.

Continue reading “NASA Hardware Techniques: Soldering Space Electronics Like It’s 1958”

Desktop Soundbar Is Ideal For PC Use

Soundbars are a rather strange category of speaker, most typically used with televisions to add some punch that the drivers crammed into a flatscreen TV simply can’t match. [Matt] of DIY Perks wanted a soundbar that was better suited to use on a computer desk rather than in a loungeroom, and set about creating one.

Regular soundbars aren’t great for a computer desk as they tend to deliver sound directed at one’s chest rather than one’s ears. [Matt]’s design instead angles its speakers slightly upwards, aimed at the user’s head as it should be. The build uses reclaimed wooden flooring for a cheap source of pretty wood that isn’t as ugly or flaky as MDF.

The design acts as a monitor stand and keyboard hutch, raising the screen to a comfortable height for viewing. The speakers themselves are in acoustic enclosures mounted on either side, also helping to provide good stereo separation. A subwoofer is also built into the shelf to add some bass response, with an impressively-neat bass chamber design. Finished off with some LED lights and a USB hub, the design delivers great sound along with a lovely desk environment for getting work done.

[Matt] does love a nice DIY build; his water-cooled outdoor TV is a particular delight. Video after the break.

Continue reading “Desktop Soundbar Is Ideal For PC Use”

Lego Fourteen-Segment Display Needs Plenty Of Motors

Hackers love 7-segment displays, and will gladly wax lyrical about the silly words you can almost spell on them and so on. Less appreciated are their bigger cousins, the fourteen and sixteen segment displays, which get all alphanumeric about things and are thus much easier for humans to read. You can even build the former out of Lego, as [ord] demonstrates.

A look at the mechanism driving the display.

The “segments” are made up of Lego shafts that are pushed up through a yellow matrix of holes when they are switched “on.” A full seven motors are used to make the single-character display work, each one driving two segments. Two Lego Powered Up controller bricks are required to drive everything going on here, making the final design not just mechanically complicated, but electronically complicated as well.

Amusingly, those don’t come cheap, either; the parts total cost of this build is likely somewhere between $50-100 US. You probably don’t want to build an entire scrolling message board using this design, even if it does look resplendent in black and taxi yellow.

We’ve seen [ord]’s work before, too, in the form of these mechanically magnificent 7-segment Lego displays. Video after the break.

Continue reading “Lego Fourteen-Segment Display Needs Plenty Of Motors”

Hacking An Experimental ESA Satellite

Hacking these days means everything from someone guessing your password and spamming your contacts with toxic links, to wide-scale offensive cyberattacks against infrastructure by sophisticated operators backed by nation states. When it comes to hacking satellites, though, [Didelot Maurice-Michel] found himself tangling with some hardware belonging to the European Space Agency. 

As part of an event called HackCYSAT, hackers were invited to attack the ESA’s OPS-SAT, a CubeSat intended to demonstrate improved techniques for mission control and more advanced satellite hardware. The computer hardware on board is ten times more powerful than other existing ESA satellites, and aims to take satellite technology on a new leap forward.

Continue reading “Hacking An Experimental ESA Satellite”

Bungee-Corded Bass Zither Really Slaps

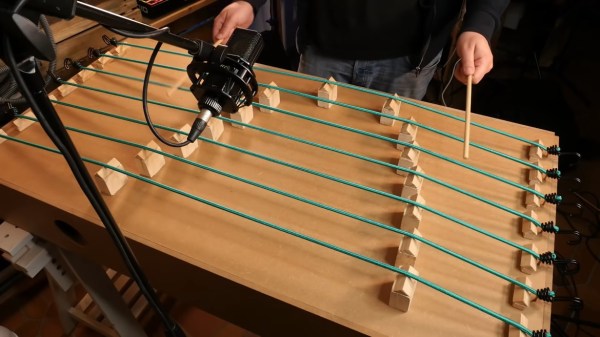
Surely we’ve all played some bass riffs on a stretched-out rubber band before, right? [Nicolas Bras] found that the ultimate musical rubber bands are bungee cords, and used seven of them to build a double-bass zither that can be plucked or struck with drumsticks. Be sure to check it out in the build/demo video after the break.

[Nicolas] is what you might call a hardware store hacker. This is not his first instrumental rodeo by far; in fact, he has spent the last 15 years building instruments from stuff like PVC and other commonly-available items.

One thing in this build that’s not so commonly available is the large sound box [Nicolas] built to strap the bungee cords across. He also made custom bridges for the bungees that are topped with triangular wood, which makes them look like little row houses.

In order to actually play the thing, [Nicolas] arranged the row houses in a 2-point bridge system for dual-note strings, which sound good between the bridges and the bungee hooks, but not so much between the bridges themselves. Overall, the zither has a great, mellow sound no matter how he plays it, and we just might have to string one of these up ourselves.

Not a strings person? Then you might be sated by [Nicolas]’ PVC pipes, which play “Popcorn” perfectly.

Continue reading “Bungee-Corded Bass Zither Really Slaps”

Hall Effect Module Knows Where Your Motor Is

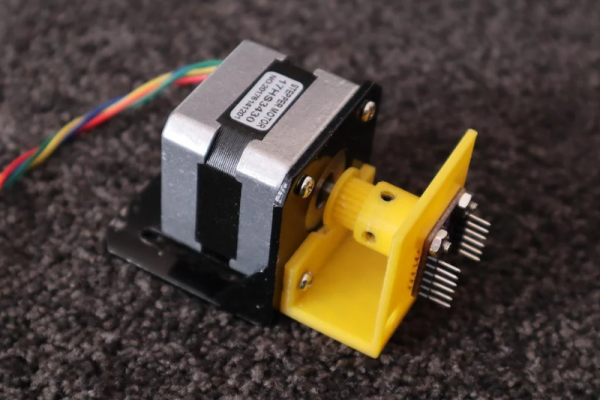
If you have a motor and you’d like to know where the shaft position is, you are likely to turn to an optical encoder scheme. However, as [lingib] points out, you can also use a magnet and a magnetometer. You can see how it works in the video below.

The MLX90393 is a 3-axis hall effect device and, with a magnet on the shaft, the X and Y outputs of the spinning magnet will form a quadrature output that you can easily read.

Continue reading “Hall Effect Module Knows Where Your Motor Is”