Casting Custom Resin Buttons For The Steam Deck

If you play games on multiple consoles, you’re probably familiar with the occasional bout of uncertainty that comes with each system’s unique button arrangement. They’re all more or less in the same physical location, but each system calls them something different. Depending on who’s controller you’re holding, the same button could be X, A, or B. We won’t even get started on colors.

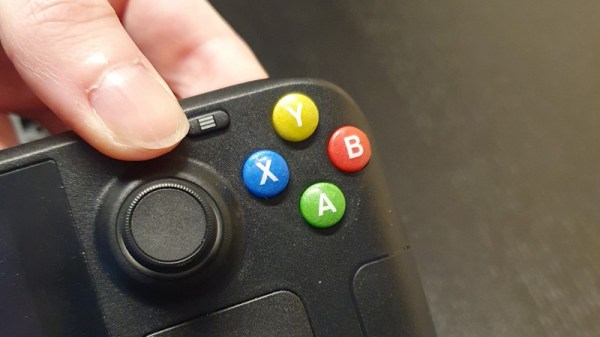
Overhearing her partner wish the buttons on his Steam Deck matched the color scheme of the Xbox, [Gina Häußge] (of OctoPrint fame) decided to secretly create a set of bespoke buttons for the portable system. There was only one problem…she had no experience with the silicone molding process or epoxy resins which would be required for such an operation.

Toothpicks were used to make channels in the mold.

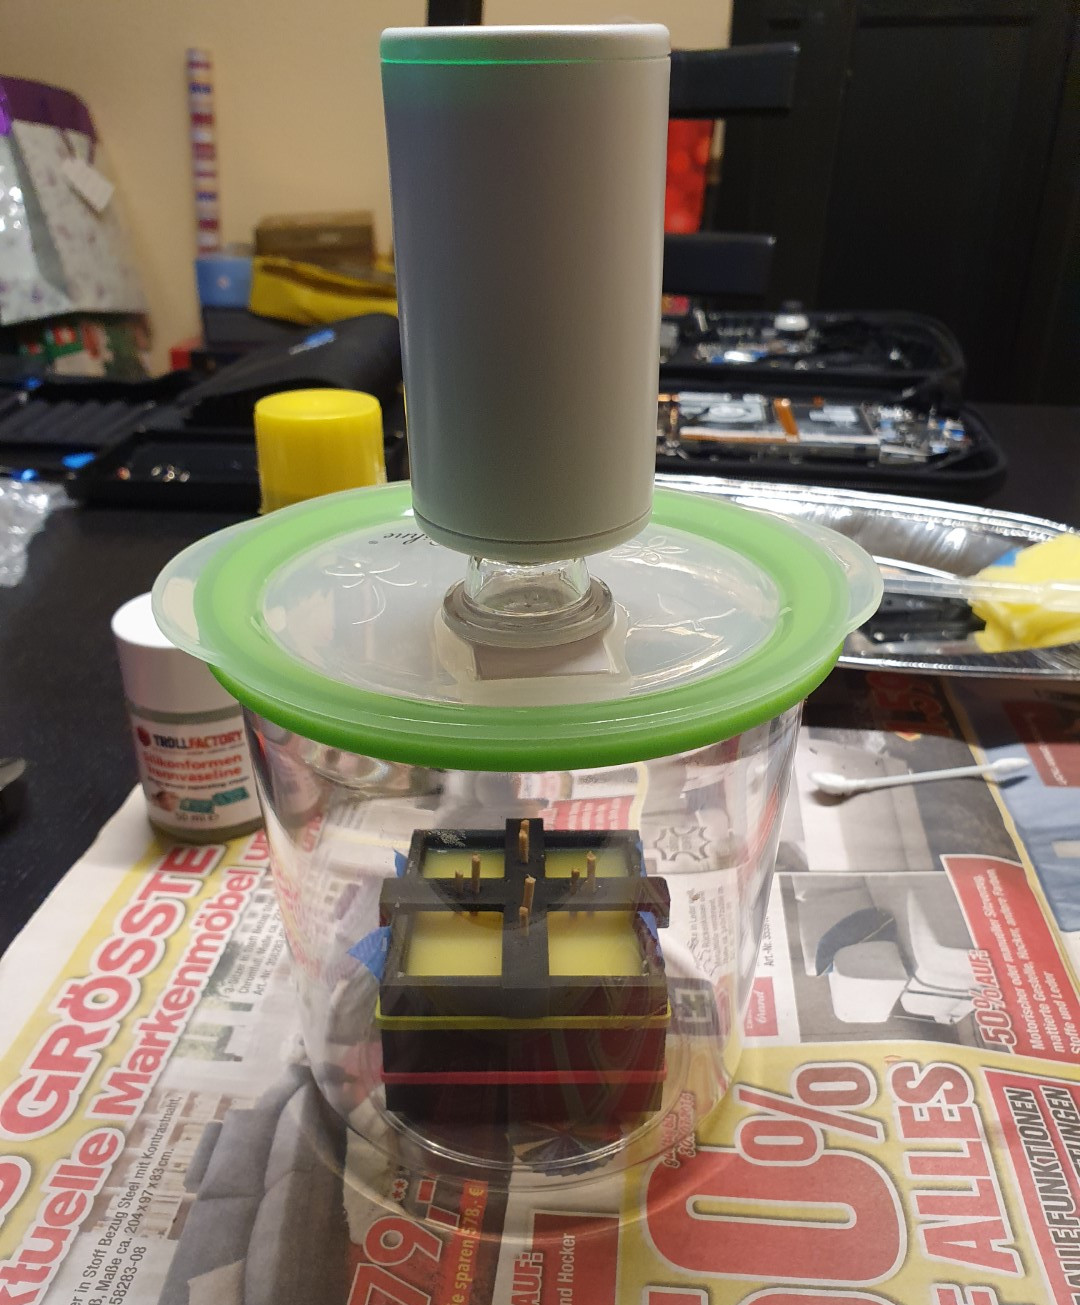
Luckily we have the Internet, and after researching similar projects that focused on other consoles, [Gina] felt confident enough to take apart Steam’s handheld and extract the original plastic buttons. These went into a clever 3D printed mold box, which was small enough to put into a food vacuum container for degassing purposes. The shape of the buttons necessitated a two-piece mold, into which [Gina] embedded two channels: one to inject the resin, and another that would let air escape.

The red, green, blue, and yellow resins were then loaded into four separate syringes and forced into the mold. It’s critically important to get the orientation right here, as each button has a slightly different shape. It sounds like [Gina] might have mixed up which color each button was supposed to be during an earlier attempt, so for the final run she made a little diagram to keep track. After 24 hours she was able to peel the mold apart and get a look at the perfectly-formed buttons, but it took 72 hours before they were really cured enough to move on to the next step.

[Gina] applied the legends with a sheet of rub-on lettering, which we imagine must have been quite tricky to get lined up perfectly. Since the letters would get worn off after a few intense gaming sessions without protection, she finally sealed the surface of each button by brushing on a thin layer of UV resin and curing it with a flashlight of the appropriate wavelength.

There are a fair number of steps involved, and a fair bit of up-front cost to get all the materials together, but there’s no denying the final result looks phenomenal. Especially for a first attempt. We wouldn’t be surprised if the next time somebody wants to head down this particular path, it’s [Gina]’s post that guides them on their way.

ADS-B Exchange Sells Up, Contributors Unhappy

In the news among aviation enthusiasts, the ADS-B data aggregation and aircraft tracking site ADSB-Exchange has been sold by its founder to JETNET for a reported $20,000,000. This type of routine financial news is more at home in the business media than on Hackaday, but in this case there’s something a little different at play. ADS-B Exchange is a community driven site whose data comes from thousands of enthusiasts worldwide connecting their ADS-B receivers to its feed API. The sale to a commercial flight data company has not gone down well with this community who are unsurprisingly unimpressed that their free contributions to the website have been sold.

This certainly isn’t the first time a site built on community data has flipped into big business, and while it’s unclear whether JETNET will do a full CDDB and boot out anyone not paying to play, we can understand the users feeling that their work has been sold from under them. On the other hand, how many of us can truly claim their open source beliefs wouldn’t start to buckle once somebody slides a $20m check across the table?

It’s evidently too late for anyone aggrieved by their ADS-B data being sold, but perhaps there’s something else to think about here. We have an established way to recognize open source software in the many well-known software libre licences, but we don’t for crowd-sourced data. Perhaps it’s time for the open-source community to consider this problem and come up with something for future sites like ADS-B Exchange whatever field they may be in, a licence which clearly defines the open terms under which contributors provide the data and those under which site owners can use it. Otherwise we’ll be here again in a few years writing about another aggrieved community, and we think that doesn’t have to happen.

All About USB-C: Framework Laptop

Talking about high-quality USB-C implementations, there’s a product that has multiple selling points designed around USB-C, and is arguably a shining example of how to do USB-C right. It’s the Framework laptop, where the USB-C expansion cards take the center stage.

Full disclosure – this article is being typed on a Framework laptop, and I got it free from Framework. I didn’t get it for Hackaday coverage – I develop Framework-aimed hardware as hobby, specifically, boards that hack upon aspects of this laptop in fun ways. As part of their community developer support effort, they’ve provided me with a laptop that I wouldn’t otherwise be able to get for such a hobby. By now, I’m part of the Framework community, I have my own set of things I like about this laptop, and a set of things I dislike.

This is not an article about how I’m satisfied or dissatisfied with the Framework laptop – there’s plenty of those around, and it would not be fair for me to write one – I haven’t paid for it in anything except having lots of fun designing boards and hanging out with other people designing cool things, which is something I do willingly. I’m an all-things-laptops enthusiast, and the reason I’d like to talk about Framework is that there is no better example of USB-C, and everything you can do with it, in the wild. Continue reading “All About USB-C: Framework Laptop”

Exploring The Hall Effect For Haptic Feedback PS4 Joysticks

Modern gaming console controllers aren’t without their annoyances — Joy-Con drift, anyone? The problems might stem from design deficiencies, but we suspect that user enthusiasm and the mechanical stress it can introduce might play a significant role as well. Either way, [Marius Heier] decided to take a look at what would be required to build a better joystick and came up with some interesting results.

The first video below lays the basic groundwork, with a bunch of experiments with 3-axis Hall effect sensors, specifically the Texas Instruments TMAG5273 and TMAG5170. They’re essentially the same sensor with different interfaces — SPI for the 5170 and I2C for the 5273. Using just one of these sensors, he was able to build a joystick with the usual X- and Y- axis control, but also with a rotary axis. What’s more, he built a motorized version using two NEMA 17 steppers to mechanically drive the stick back to center.

The joystick is bulky, but it looks like he’s got plans for a much smaller one with [Carl Bugeja]-style PCB motors that should fit into a PS4 controller. That’s the subject of the second video below, which uses a different Hall sensor — an Allegro A1304 — and is mainly concerned with getting the output of a non-motorized but considerably miniaturized joystick stick talking the language that the controller expects. It’s not a simple process, but it seems to be coming along nicely, and we’ll be watching progress closely.

Continue reading “Exploring The Hall Effect For Haptic Feedback PS4 Joysticks”

Do You Need The Raspberry Pi Camera Module V3?

This month came the announcement of some new camera modules from Raspberry Pi. All eyes were on version 3 of their standard camera module, but they also sneaked out a new version of their high quality camera with an M12 lens mount. The version 3 module is definitely worth a look, so I jumped on a train to Cambridge for the Raspberry Pi Store, and bought myself one for review.

There’s nothing new about a Pi camera module as they’ve been available for years in both official and third party forms, so to be noteworthy the new one has to offer something a bit special. It uses a 12 megapixel sensor, and is available both in autofocus and wide angle versions in both standard and NoIR variants. Wide angle and autofocus modules may be new in the official cameras, but these are both things which have been on the third-party market for years.

So if an autofocus camera module for your Pi isn’t that new, what can we bring to a review that isn’t simply exclaiming over the small things? Perhaps it’s better instead to view the new camera in the context of the state of the Pi camera ecosystem, and what better way to do that than to turn a Pi and some modules into a usable camera! Continue reading “Do You Need The Raspberry Pi Camera Module V3?”

Better Macro Images With Arduino Focus Stacking

If you’ve ever played around with macro photography, you’ve likely noticed that the higher the lens magnification, the less the depth of field. One way around this issue is to take several slices at different focus points, and then stitch the photos together digitally. As [Curious Scientist] demonstrates, this is a relatively simple motion control project and well within the reach of a garden-variety Arduino.

You can move the camera or move the subject. Either way, you really only need one axis of motion, which makes it quite simple. This build relies on a solid-looking lead screw to move a carriage up or down. An Arduino Nano acts as the brains, a stepper motor drives the lead screw, and a small display shows stats such as current progress and total distance to move.

The stepper motor uses a conventional stepper driver “stick” as you find in many 3D printers. In fact, we wondered if you couldn’t just grab a 3D printer board and modify it for this service without spinning a custom PCB. Fittingly, the example subject is another Arduino Nano. Skip ahead to 32:22 in the video below to see the final result.

We’ve seen similar projects, of course. You can build for tiny subjects. You can also adapt an existing motion control device like a CNC machine.

Continue reading “Better Macro Images With Arduino Focus Stacking”

Adding Electronic Shifter Functionality To Bicycle Derailleur

For the overwhelming majority of bicycles out there that feature multiple gears, switching between these is done purely mechanically, with a cable. Generally this uses a derailleur, which forms part of the gear switching and chain tensioning mechanism. As a mechanical system, it’s reliable when well maintained, but tuning it can be a real hassle. This is where an electronic shifter should be able to provide faster, more reliable and quieter shifting, and is also where [Jesse DeWald]’s electronic shifting project begins.

As [Jesse] points out in the introductory article on electronic shifting, it’s not a new concept, with everyone from Shimano (Di2) to Archer and others coming up with their own version. Some of these require replacing the existing derailleur, while others should allow for non-destructive modification. What [Jesse] did not find among this constellation of options was a version that’d work with existing derailleurs, did not require destructive modifications and have a long battery life.

[Jesse]’s design omits the servo present in Archer’s design, and uses the existing derailleur spring, with the reasoning explained in a nice spring physics refresher. Instead a stepper is used along with a matched balancer spring that in testing managed over 3 months of standby time with a 3,700 mAh Li-ion battery and thousands of shifts. At the core of the system is an Arduino Pro Mini board, the code for which is available along with the design plans.

The project is not done at this point, of course, with a whole range of improvements still to be added, including a case, so that the shifter can be used outside in the rain.