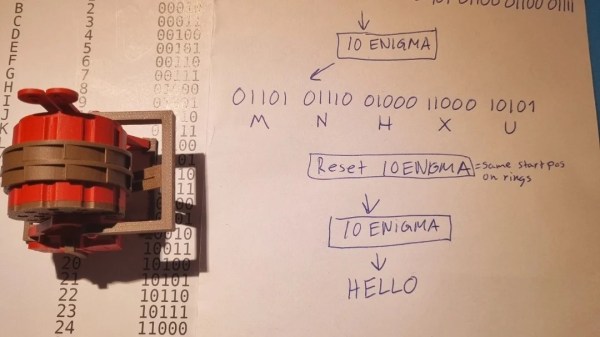
The Enigma machine is the most well-known encryption tool used by German forces in World War II, mostly because it was so famously cracked by the Allies to great effect. Like many hackers, [christofer.jh] was intrigued by the design of the Enigma, and felt compelled to build a binary version of his own design.
The original Enigma machine was designed to scramble the 26 letters in the Latin alphabet. This design is altogether simpler. Instead of 26 letters, it will scramble 1s and 0s of binary code based on the initial settings of the scrambler rings.
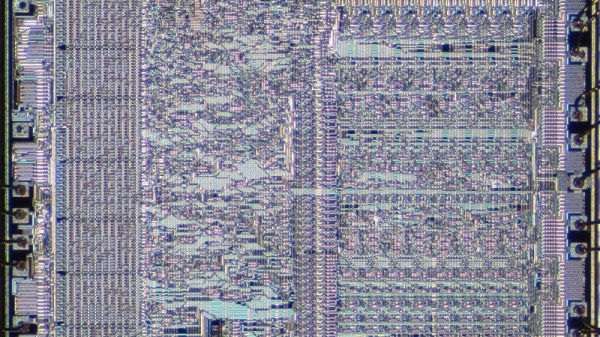
As I’m sure many of you know, x86 architecture has been around for quite some time. It has its roots in Intel’s early 8086 processor, the first in the family. Indeed, even the original 8086 inherits a small amount of architectural structure from Intel’s 8-bit predecessors, dating all the way back to the 8008. But the 8086 evolved into the 186, 286, 386, 486, and then they got names: Pentium would have been the 586.
Along the way, new instructions were added, but the core of the x86 instruction set was retained. And a lot of effort was spent making the same instructions faster and faster. This has become so extreme that, even though the 8086 and modern Xeon processors can both run a common subset of code, the two CPUs architecturally look about as far apart as they possibly could.
So here we are today, with even the highest-end x86 CPUs still supporting the archaic 8086 real mode, where the CPU can address memory directly, without any redirection. Having this level of backwards compatibility can cause problems, especially with respect to multitasking and memory protection, but it was a feature of previous chips, so it’s a feature of current x86 designs. And there’s more!
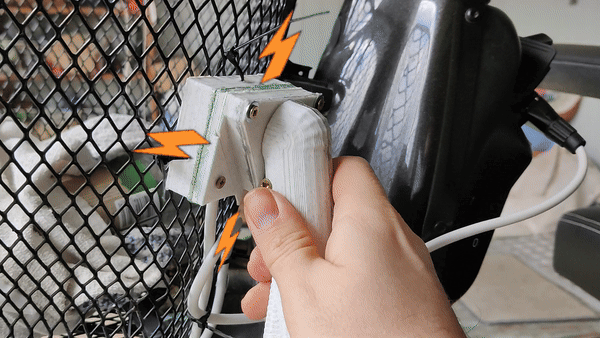
Sometimes, you have to wonder what major manufacturers of assistive tech are thinking when they design their products. [Niklas Frost]’s father has MS and uses an electric mobility scooter to get around. It’s a good solution to a terrible problem, except it stops short of the most important part — the charging scheme. Because of the aforementioned mobility issues, [Niklas]’s father can’t plug and unplug it without assistance. So much for independence.
And so [Niklas] gave it some thought and came up with an incredibly easy way that Dad can charge his scooter. It’s even non-intrusive — all it took was a handful of off-the-shelf components and some 3D printed parts to make what’s essentially an extension cord between the charger and the scooter. Really, there’s nothing more to it than three 10 A magnetic connectors, an XLR female port, an XLR male connector, and some very helpful plastic.
Something interesting to note: [Niklas] spent a year or so tinkering with a robot that could drive the plug over to the charger and plug it in. A book on the subject made him destroy that robot, however, when he realized that he was being driven more by cool technologies than solving the problem at hand. Within a few days of changing course, [Niklas]’ dad was charging his own scooter.
Now, if [Niklas] wants to see about making the scooter move a whole lot faster, we have just the thing.
We are always fascinated when someone can take something and extend it in a clever way without changing the original thing. In the computer world, that’s old hat. New computers improve, but can usually run old software. In the real world, the addition of stereo to phonograph records and color to photography come to mind.
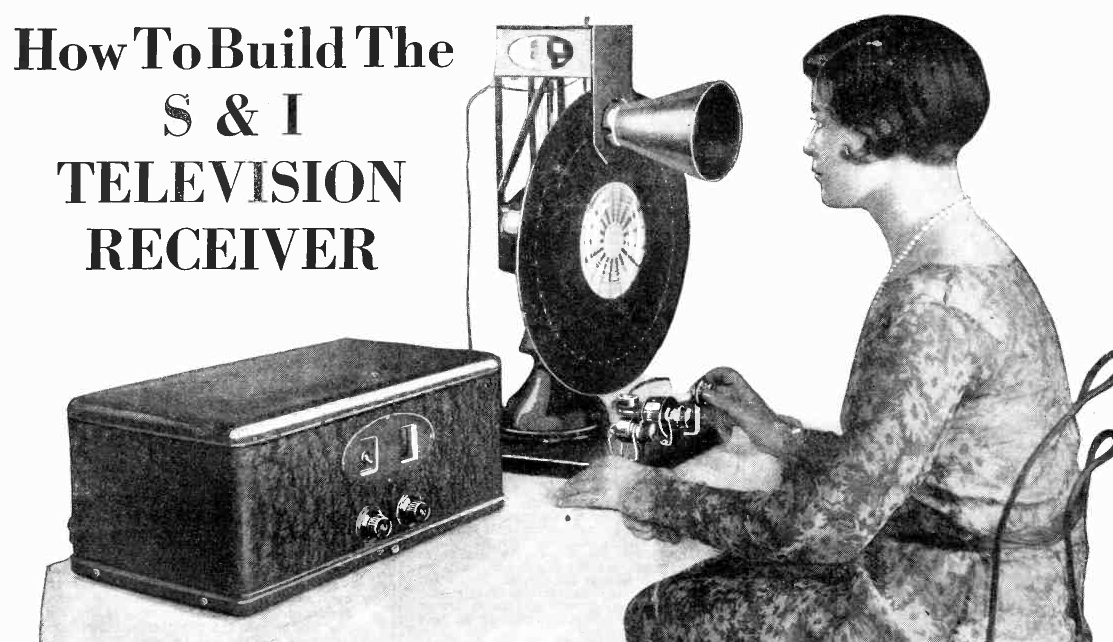
But there are few stories as strange or wide-ranging as the path to provide color TV. And it had to be done in a way that a color set could still get a black and white picture and black and white sets could still watch a color signal without color. You’d think there would be a “big bang” moment where color TV burst on the scene — no pun involving color burst intended. But there wasn’t. Instead, there was a long, twisted path with many competing interests and ideas to go from a world in black and white to one tinted with color phosphor.
Background
In 1928, Science and Invention magazine had plans for building a mechanical TV (although not color)
It is hard to imagine, but John Logie Baird transmitted color images as early as 1928 using a mechanical scanner. Bell Labs had a demonstration system, also mechanical, in 1929. Baird broadcast using his system in 1938. Even earlier, around 1900, there were attempts to create mechanical color image systems. Those systems were fickle or impractical, though.
Electronic scanning was the answer, but World War II froze most consumer electronics development. Baird showed an electronic color system in late 1944. However, it would be 1953 before NTSC (the National Television System Committee) adopted the standard color TV signal for the United States. It would be almost 20 years later before SECAM and PAL were standardized in other parts of the world.
Of course, these are all analog standards. The world’s gone digital now, but for nearly 50 years, analog color TV was the way people consumed TV in their homes. By 1941, NTSC produced a standard in the United States, but not for color TV. TV adoption didn’t really take off until after the war. But by 1950, the US had some 6 million TV sets.
This was both a plus — a large market — and a negative. No one wanted to obsolete those 6 million sets. Well, at least, the government regulators and consumers didn’t. But most color systems would be incompatible with those existing black and white sets. Continue reading “The Long Strange Trip To US Color TV”→
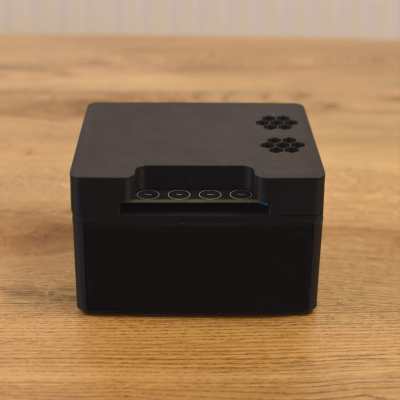
Voice assistants are neat — they let us interface with computers without having to bother with touching them at all. Still, many decry the perceived privacy intrusion these devices present, as they’re always trucking data off to corporate servers for all kinds of opaque reasons. Building your own standalone assistant is a way to get around that, and that’s precisely what [Tristram] did.
The build is based on an ESP32 Lyrat development board. Unlike most devboards, this one has two 3 watt audio outputs and mics on board, making it perfect for a build like this one. The Lyrat was paired with some NeoPixel LEDs and a pair of Dayton Audio 1.5″ speakers to enable it to interact with the user both audibly and visually.
[Tristram] steps through not only how to set up the voice assistant, but also how to build it into a simple and attractive enclosure that won’t unduly stand out in the average house. The Lyrat simply has to be flashed with firmware that enables it to work as a voice aid with Home Assistant platform.
If you’re unfamiliar, Home Assistant is a smart home architecture that you can run yourself on your own hardware, without having everything live in the cloud of some murky corporation.
Home Assistant has grown in popularity in recent years as a less intrusive smarthome solution. You can even use it to monitor your hot tub! Video after the break.
The displays inside the Apple Vision Pro have 3660 × 3200 pixels per eye, but veteran engineer [Karl Guttag]’s analysis of its subtly blurred optics reminds us that “resolution” doesn’t always translate to resolution, and how this is especially true for things like near-eye displays.
The Apple Vision Pro lacks the usual visual artifacts (like the screen door effect) which result from viewing magnified pixelated screens though optics. But [Karl] shows how this effect is in fact hiding in plain sight: Apple seems to have simply made everything just a wee bit blurry thanks to subtly out-of-focus lenses.
The thing is, this approach of intentionally de-focusing actually works very well for consuming visual content like movies or looking at pictures, where detail and pixel-to-pixel contrast is limited anyway.
Clever loophole, or specification shenanigans? You be the judge of that, but this really is evidence of how especially when it comes to things like VR headsets, everything is a trade-off. Improving one thing typically worsens others. In fact, it’s one of the reasons why VR monitor replacements are actually a nontrivial challenge.
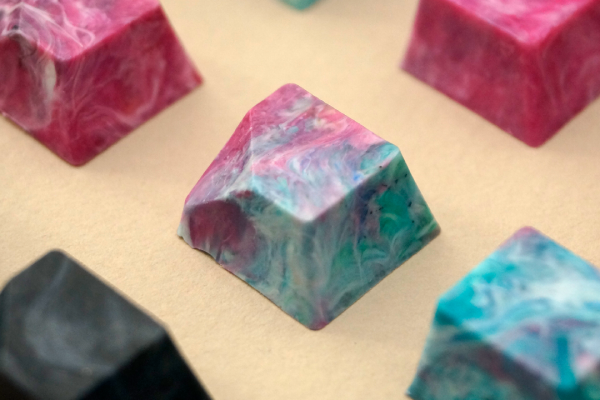
Artisan keycaps are generally meant to replace your Escape key, though they can be used anywhere you like (as long as they fit, of course). Keycap maker [tellybelly] of jankycaps has been experimenting with making keycaps out of 100% recycled plastic, and offers an interesting post detailing their development and production process.
What do you do when normal injection molding tooling is out of your budget, and silicone molds simply won’t do? You turn to 3D printing if you can. In this case, [tellybelly] and company found a resin designed to withstand high temperatures.
[tellybelly] was able to design the mold using a plethora of online resources, and even verified the flow using a special program. Although the first two versions worked, they had some flaws. Third time’s the charm, though, and then it was time to sort plastic and fire up the shredder.
After heating up the shreds to 200 °C or so, it was time to start the injecting. This part isn’t exactly a cakewalk — mixing different plastics together can vary the workable temperature range that doesn’t degrade the plastic. Although it sounds like the end, [tellybelly] reports that they spent just as much time here as they did at the drawing board, experimenting with pressure on the mold, various cool-down methods, and how long to wait before opening the mold.


 The build is based on an ESP32 Lyrat development board. Unlike most devboards, this one has two 3 watt audio outputs and mics on board, making it perfect for a build like this one. The Lyrat was paired with some NeoPixel LEDs and a pair of Dayton Audio 1.5″ speakers to enable it to interact with the user both audibly and visually.