A Honda car behind a gate, with its turn signals shown blinking as it's being unlocked by a portable device implementing the hack in question. Text under the car says "Rolling Pwned".

Unlock Any (Honda) Car

Honda cars have been found to be severely  vulnerable to a newly published Rolling PWN attack, letting you remotely open the car doors or even start the engine. So far it’s only been proven on Hondas, but ten out of ten models that [kevin2600] tested were vulnerable, leading him to conclude that all Honda vehicles on the market can probably be opened in this way. We simply don’t know yet if it affects other vendors, but in principle it could. This vulnerability has been assigned the CVE-2021-46145.

[kevin2600] goes in depth on the implications of the attack but doesn’t publish many details. [Wesley Li], who discovered the same flaw independently, goes into more technical detail. The hack appears to replay a series of previously valid codes that resets the internal PRNG counter to an older state, allowing the attacker to reuse the known prior keys. Thus, it requires some eavesdropping on previous keyfob-car communication, but this should be easy to set up with a cheap SDR and an SBC of your choice.

If you have one of the models affected, that’s bad news, because Honda probably won’t respond anyway. The researcher contacted Honda customer support weeks ago, and hasn’t received a reply yet. Why customer support? Because Honda doesn’t have a security department to submit such an issue to. And even if they did, just a few months ago, Honda has said they will not be doing any kind of mitigation for “car unlock” vulnerabilities.

As it stands, all these Honda cars affected might just be out there for the taking. This is not the first time Honda is found botching a rolling code implementation – in fact, it’s the second time this year. Perhaps, this string of vulnerabilities is just karma for Honda striking down all those replacement part 3D models, but one thing is for sure – they had better create a proper department for handling security issues.
LoRa Helps With Remote Water Tank Level Sensing

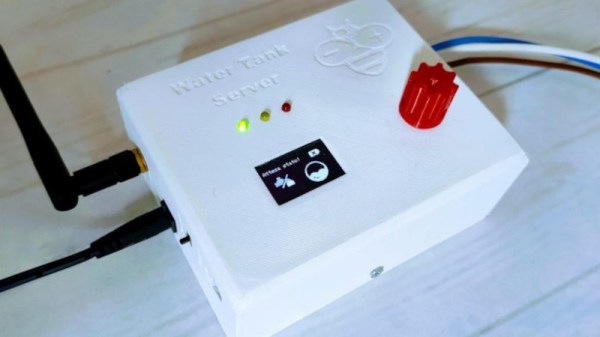
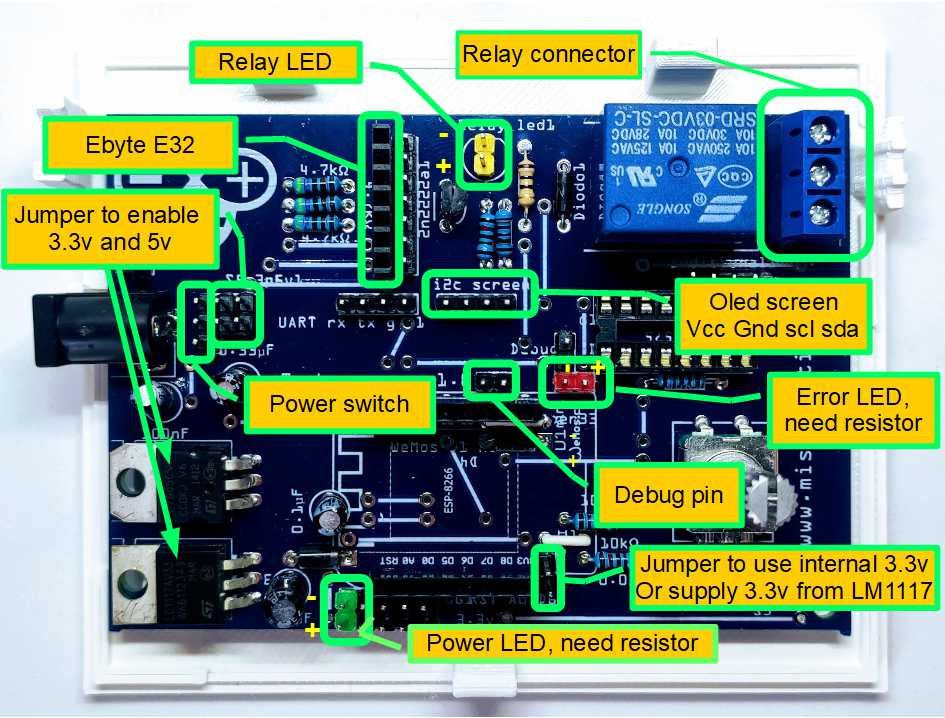
[Renzo Mischianti]’s friend has to keep a water tank topped up. Problem is, the tank itself is 1.5 km away, so its water level isn’t typically known. There’s no electricity available there either — whichever monitoring solution is to be used, it has to be low-power and self-sufficient. To help with that, [Renzo] is working on a self-contained automation project, with a solar-powered sensor that communicates over LoRa, and a controller that receives the water level readings and powers the water pump when needed.

[Renzo] makes sure to prototype every part using shields and modules before committing to a design, and has already wrote and tested code for both the sensor and the controller, as well as created the PCBs. He’s also making sure to document everything as he goes – in fact, there’s whole seven blog posts on this project, covering the already completed software, PCB and 3D design stages of this project.

These worklogs have plenty of explanations and pictures, and [Renzo] shows a variety of different manufacturing techniques and tricks for beginners along the way. The last blog post on 3D designing and printing the sensor enclosure was recently released, and that likely means we’ll soon see a post about this system being installed and tested!

[Renzo] has been in the “intricately documented worklogs” business for a while. We’ve covered his 3D printed PCB mill and DIY soldermask process before, and recently he was seen adding a web interface to a 3D printer missing one. As for LoRa, there’s plenty of sensors you can build – be it mailbox sensors, burglar alarms, or handheld messengers; and now you have one more project to draw inspiration and knowledge from. [Renzo] has previously done a LoRa tutorial to get you started, and we’ve made one about LoRaWAN!

Continue reading “LoRa Helps With Remote Water Tank Level Sensing” →

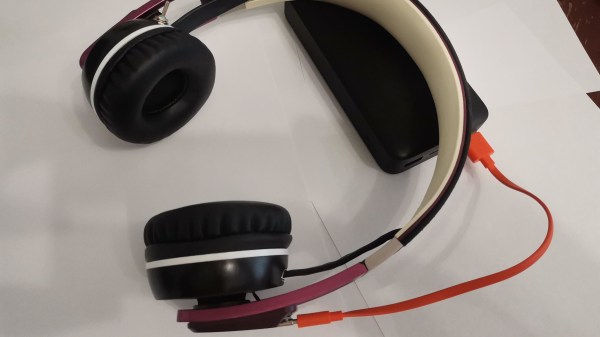
Headphones described in article, charging off a powerbank through an orange USB cable

Headphone Cable Trouble Inspires Bluetooth Conversion

[adblu] encountered the ever-present headphone problem with their Sennheiser Urbanite headphones – the cable broke. These headphones are decent, and despite the cable troubles, worth giving a new life to. Cable replacement is always an option, but [adblu] decided to see – what would it take to make these headphones wireless? And while they’re at it, just how much battery life could they get?

Armed with a CSR8635 Bluetooth audio receiver breakout module and a TP4056 charger, [adblu] went on rewiring the headphone internals. The CSR8635 already has a speaker amplifier inside, so connecting the headphones’ speakers didn’t require much effort – apart from general soldering difficulties, as [adblu]’s soldering iron was too large for the small pads on the BT module. They also found a 2400mAh battery, and fit it inside the headphone body after generous amounts of dremel work.

The result didn’t disappoint – not only does everything fit inside the headphone body, the headphones also provided 165 hours of music playback at varying volume. Electronics-wise, it really is that easy to retrofit your headphones with Bluetooth, but you can always go the extra mile and design an intricate set of custom PCBs! If firmware hacks are more to your liking, you can use a CSR8645 module for your build and then mod its firmware.

Companies Rumored To Harvest Washing Machines For ICs

Wired and SCMP are reporting on interesting trivia from the realm of chip shortages. Apparently, some large conglomerate out there is buying new washing machines and scavenging the chips they can’t obtain otherwise. My imagination pictures skilled engineers in a production room, heavy-duty electric screwdrivers and desoldering toolkits on the floor next to them, and a half-torn-down washing machine about to reveal its control board with an STM32 right in the middle. This might not be the most skilled job, but it’s a change of pace, and hey, as long as the rate stays the same?

Whichever company is doing this, they’re in a conundrum for sure. One of the articles offers an example of a $350,000 spectrometer manufacturing being stalled by lack of a $0.50 part – while this feels exaggerated, it’s within the realm of possibility. For car manufacturers, the difference isn’t as dire, but still severe enough, and not meeting the production targets has ramifications other than the financial ones. It might indeed make sense to buy a $150 washing machine in order to finally be able to move a $30,000 car off the assembly line.
Continue reading “Companies Rumored To Harvest Washing Machines For ICs” →

render of the MNT Pocket Reform on a desk

MNT Reform Goodness, Now Even Smaller With Pocket Reform

You might have already seen the pretty pictures in pastel colors online — a small netbook-like computer with a full-size keyboard. This, while a render, is what the MNT Pocket Reform is going to look like. Reminiscent of the netbook aesthetic in all the right ways, it’s a small device with a mechanical keyboard taking as much space as possible, trackball for navigation, and we assume, exactly the kind of screen that’d be comfortable to use.

We’ve reviewed the MNT Reform a year ago, and this device inherits a lot of its good parts. The motherboard’s connectivity is likely subject to change, but on the motherboard renders, we can spot three USB-C ports, a Micro HDMI port, a microSD card slot, ix Industrial Ethernet, and M.2 B-key and M-key slots for WWAN and SSD cards respectively.

If you expected computational specs, there isn’t really a specific CPU+RAM configuration announced – for a good reason. The Pocket Reform takes advantage of the CPU card concept designed into the MNT Reform – able to take a card with an NXP i.MX8M CPU, Raspberry Pi CM4, Pine SOQuartz, a Kintex-7 FPGA, or any of the cards yet to be developed. The design files are open-source, the prototype motherboards have been ordered, mechanical usability aspects have been worked through. This is a very compelling project, and we can’t wait to see it bear fruit!

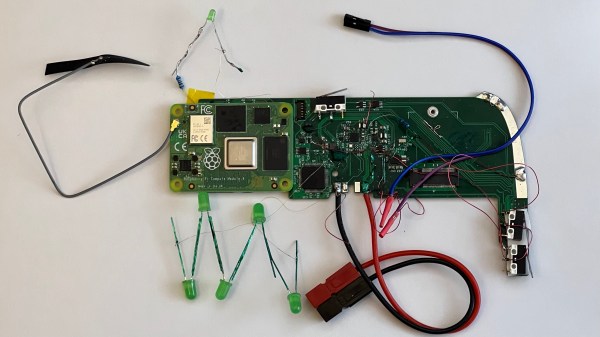
Motherboard on the desk, with a CM4 plugged into it, and all kinds of wires connected to it for purposes of debugging

Hackaday Prize 2022: A CM4 Upgrade For Your Old IPad

There’s no shortage of nicely built tablets out there, but unfortunately many of them are powered by what are by now severely outdated motherboards. Since manufacturers releasing replacement motherboards for their old hardware doesn’t look like its likely to be common practice anytime soon, the community will have to take things into their own hands. This is where [Evan]’s project comes in — designing a Raspberry Pi CM4-powered motherboard for the original iPad. It aims to have support for everything you’d expect: display, touchscreen, audio, WiFi, Bluetooth, and even the dock port. Plus it gives you way more computing power to make use of it all.

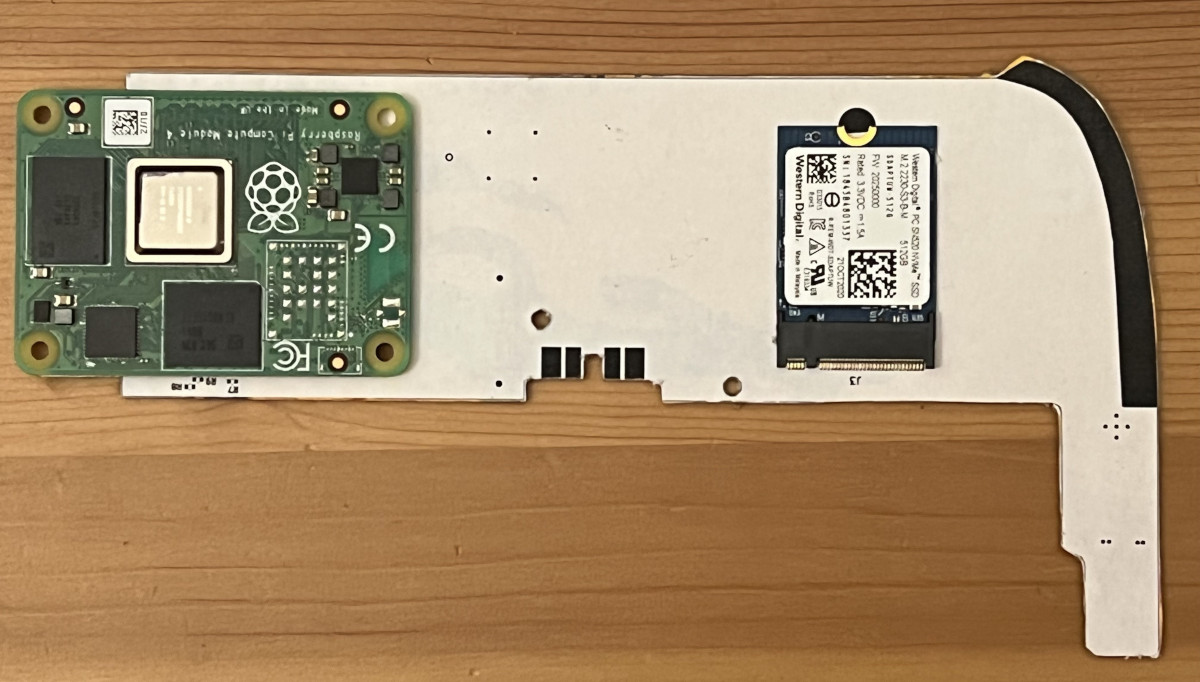
Testing part fitment with some cardboard CAD.

The original iPad got a lot of things right, a factor definitely contributing to its success back when it was released. [Evan]’s high-effort retrofit works with the iPad’s plentiful good parts, like its solid shell, tailored lithium-ion battery, eye-friendly LCD, and reliable capacitive touchscreen. You’d have to fit the new motherboard inside the space available after these parts all come together, and [Evan] has shaped his PCBs to do exactly that – with room for CM4, and the numerous ICs he’s added so as to leave no function un-implemented.

This project has been underway for over a year, and currently, there’s fourteen information-dense worklogs telling this retrofit’s story. Reverse-engineering the capacitive touchscreen and the LCD, making breakouts for all the custom connectors, integrating a custom audio codec, debugging device tree problems, unconventional ways to access QFN pins left unconnected on accident, and the extensive power management design journey. [Evan] has a lot to teach for anyone looking to bring their old tablet up to date!

The hardware files are open-source, paving the way for others to reuse parts for their own retrofits, and we absolutely would like to see more rebuilds like this one. This project is part of the Hack it Back round of the 2022 Hackaday Prize, and looks like a perfect fit to us. If you were looking for an excuse to start a similar project, now is the time.

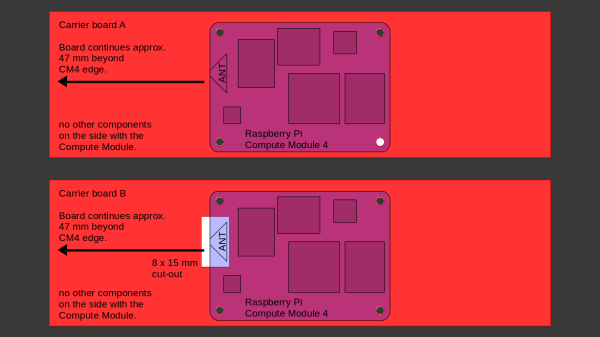
Sketch of the two proprietary carriers showing their differences - one of them has a cutout under the antenna, while the other one does not.

Design Your CM4 Carrier With WiFi Performance In Mind

The Raspberry Pi Compute Module 4 has a built-in WiFi antenna, but that doesn’t mean it will work well for you – the physical properties of the carrier board impact your signal quality, too. [Avian] decided to do a straightforward test – measuring WiFi RSSI changes and throughput with a few different carrier boards. It appears that the carriers he used were proprietary, but [Avian] provides sketches of how the CM4 is positioned on these.

There’s two recommendations for making WiFi work well on the CM4 – placing the module’s WiFi antenna at your carrier PCB’s edge, and adding a ground cutout of a specified size under the antenna. [Avian] made tests with three configurations in total – the CMIO4 official carrier board which adheres to both of these rules, carrier board A which adheres to neither, and carrier board B which seems to be a copy of board A with a ground cutout added.

Graph plotting WiFi RSSI for each of the three carriers in each of the six locations. CMIO4 consistently outperforms both, while carrier B outperforms the carrier A, but by a more narrow margin.After setting up some test locations and writing a few scripts for ease of testing, [Avian] recorded the experiment data. Having that data plotted, it would seem that, while presence of an under-antenna cutout helps, it doesn’t affect RSSI as much as the module placement does. Of course, there’s way more variables that could affect RSSI results for your own designs – thankfully, the scripts used for logging are available, so you can test your own setups if need be.



If you’re lucky to be able to design with a CM4 in mind and an external antenna isn’t an option for you, this might help in squeezing out a bit more out of your WiFi antenna. [Avian]’s been testing things like these every now and then – a month ago, his ESP8266 GPIO 5V compatibility research led to us having a heated discussion on the topic yet again. It makes sense to stick to the design guidelines if WiFi’s critical for you – after all, even the HDMI interface on Raspberry Pi can make its own WiFi radio malfunction.