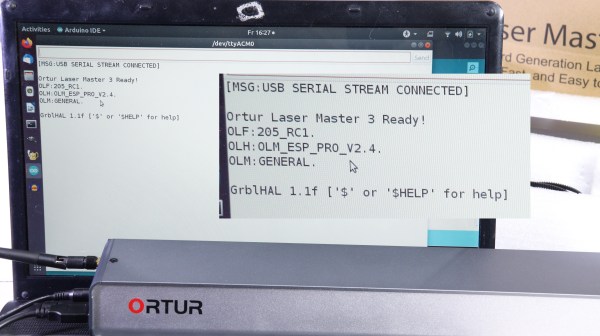
Showing an Ortur lasercutter control module in front of a screen. There's a serial terminal open on the screen, showing the "Ortur Laser Master 3" banner, and then a Grbl prompt.

Watch Out For Lasercutter Manufacturers Violating GPL

For companies that build equipment like CNC machines or lasercutters, it’s tempting to use open-source software in a lot of areas. After all, it’s stable, featureful, and has typically passed the test of time. But using open-source software is not always without attendant responsibilities. The GPL license requires that all third-party changes shipped to users are themselves open-sourced, with possibility for legal repercussions. But for that, someone has to step up and hold them accountable.

Here, the manufacturer under fire is Ortur. They ship laser engravers that quite obviously use the Grbl firmware, or a modified version thereof, so [Norbert] asked them for the source code. They replied that it was a “business secret”. He even wrote them a second time, and they refused. Step three, then, is making a video about it.

Unfortunately [Norbert] doesn’t have the resources to start international legal enforcement, so instead he suggests we should start talking openly about the manufacturers involved. This makes sense, since such publicity makes it way easier for a lawsuit eventually happen, and we’ve seen real consequences come to Samsung, Creality and Skype, among others.

Many of us have fought with laser cutters burdened by proprietary firmware, and while throwing the original board out is tempting, you do need to invest quite a bit more energy and money working around something that shouldn’t have been a problem. Instead, the manufacturers could do the right, and legal, thing in the first place. We should let them know that we require that of them.

Continue reading “Watch Out For Lasercutter Manufacturers Violating GPL” →

Open Firmware For PinePhone LTE Modem – What’s Up With That?

In their monthly announcement, among all the cool things Pine64, they talked about the open firmware for PinePhone’s LTE modem. The firmware isn’t fully open – a few parts remain closed. And Pine emphasizes that they neither pre-install nor officially endorse this firmware, and PinePhones will keep shipping with the vendor-supplied modem firmware image instead.

That said, the new firmware is way more featureful – it has less bugs, more features, decreased power consumption, and its proprietary parts are few and far between. I’d like to note that, with a special build of this firmware, the PinePhone’s modem can run Doom – because, well, of course.

And with all that, it’s become way easier to install this firmware – there’s fwupd hooks now! You can think of fwupd as the equivalent of Windows Update for firmware, except not abusive, and aimed at Linux. A perfect fit for keeping your open-source devices as functional as they can be, in other words.

What’s the deal? If open firmware is that much cooler, why don’t more of our phones have open firmware options available? Continue reading “Open Firmware For PinePhone LTE Modem – What’s Up With That?” →

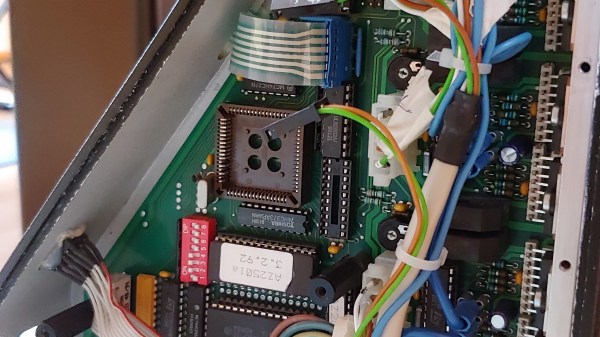
photo of the CNC controller, with the PLCC socket for the CPU, surrounded by driver ICs

Old CNC Brain Swapped With An Arduino

[Sebastian] and [Stefan Shütz] had a ISEL EP1090 CNC machine at home, sitting unused, and they decided to bring it to life. With pretty good mechanical specs, this CNC looked promising – alas, it was severely constrained by its controller. The built-in CPU’s software was severely outdated, had subpar algorithms for motor driving programmed in, and communication with the CNC was limited because the proprietary ISEL communications protocol that isn’t spoken by other devices.The two brothers removed the CPU from its PLCC socket, and went on to wiring a grbl-fueled Arduino into the controller box.

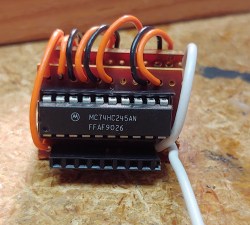
The interposer PCB, with an extra 74HC245 buffer on itThey reverse-engineered the motor driver connections – those go through a 74HC245 buffer between the original CPU and the drivers. Initially, they put an Arduino inside the control box of the CNC and it fit nicely, but it turned out the Arduino’s CPU would restart every time the spindle spun up – apparently, EMC would rear its head. So, they placed the Arduino out of the box, and used two CAT7 cables to wire up the motor and endstop signals to it.
For tapping into these signals, they took the 74HC245 out of its socket, and made an interposer from two small protoboards and some pin headers – letting them connect to the STEP and DIR lines without soldering wires into the original PCB. There’s extensive documentation, GRBL settings, and more pictures in their GitHub repo, too – in case you have a similar CNC and would like to learn about upgrading its controller board!

After this remake, the CNC starts up without hassles. Now, the brothers shall CNC on! Often, making an old CNC machine work is indeed that easy, and old controller retrofits have been a staple of ours. You can indeed use an Arduino, one of the various pre-made controller boards like Gerbil or TinyG, or even a Raspberry Pi – whatever helps you bridge the divide between you and a piece of desktop machinery you ought to start tinkering with.

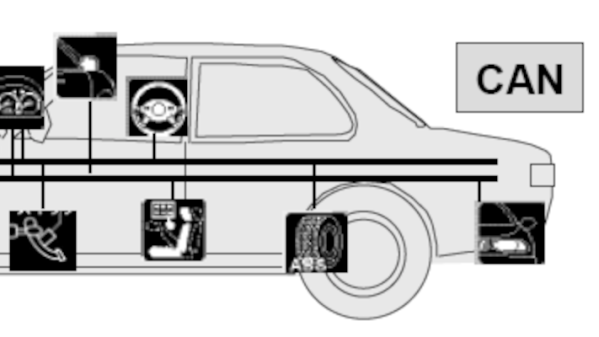
Part of a picture showing all kinds of different CAN devices in a car

CAN Peripheral For RP2040, Courtesy Of PIO

[Kevin O’Connor] writes to us about his project, can2040 – adding CAN support to the RP2040. The RP2040 doesn’t have a CAN peripheral, but [Kevin] wrote code for the RP2040’s PIO engine that can receive and send CAN packets. Now we can all benefit from his work by using this openly available CAN driver. This library is written in C, so it’s a good fit for the lower-level hackers among us, and in all likelihood, it wouldn’t be hard to make a MicroPython wrapper around it.

The CAN bus needs a peripheral for the messages to be handled properly, and people have been using external chips for this purpose until now. These chips, [Kevin] tells us, have lately been unavailable due to the chip shortage, making this project more valuable. The documentation is extensive and accessible, and [Kevin] details how to best use this driver. With such a tool in hand, you can now turn your Pico into a CAN tinkering toolkit, or wire up some CAN devices for use in your own projects!

[Kevin] says this code is already being used in Klipper, a framework powering 3D printers and other machines like them. As for your own purposes, you can absolutely use such a CAN tool to hack on your car – here’s a treasure trove of car hacking documentation, by the way! Thanks to the PIO engine, there seems to be no end to the RP2040’s versatility – you can even drive HDMI monitor with this PIO-based DVI code.

Continue reading “CAN Peripheral For RP2040, Courtesy Of PIO” →

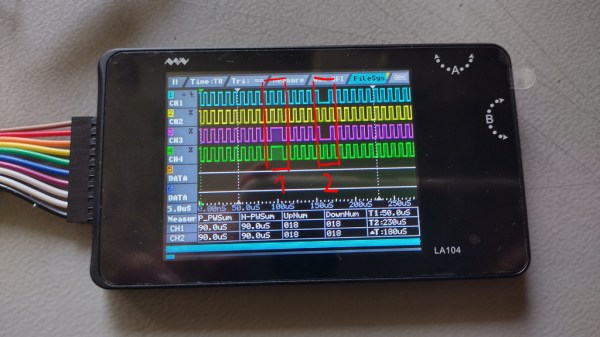
Mis-captured signal transitions shown on the screen of the LA104, with problematic parts circled in red.

When Your Logic Analyzer Can’t Tell Good And Bad Signals Apart

[Avian] has picked up a Miniware LA104 – a small battery-powered logic analyzer with builtin protocol decoders. Such analyzers are handy tools for when you quickly need to see what really is happening with a certain signal, and they’re cheap enough to be sacrificial when it comes to risky repairs. Sadly, he stumbled upon a peculiar problem – the analyzer would show the signal glitching every now and then, even at very low bitrates. Even more surprisingly, the glitches didn’t occur in the signal traces when exported and viewed on a laptop.

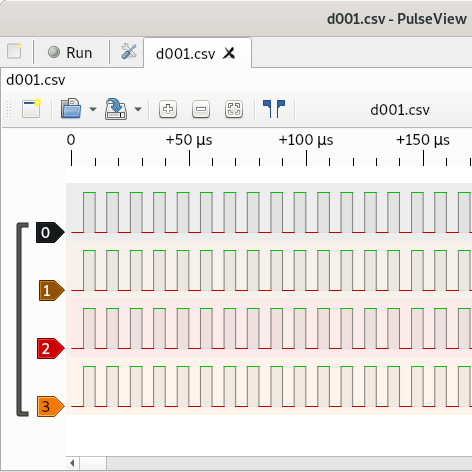
A Pulseview window showing that the problem is not present in the exported capturesHe dug into the problem, as [Avian] does. Going through the problem-ridden capture files helped him realize that the glitch would always happen when one of the signal edges would be delayed by a few microseconds relative to other signal edges — a regular occurrence when it comes to digital logic. This seems to stem from compression being used by the FPGA-powered “capture samples and send them” part of the analyzer. This bug only relates to the signal as it’s being displayed on the analyzer’s screen, and turned out that while most of this analyzer’s interface is drawn by the STM32 CPU, the trace drawing part specifically was done by the FPGA using a separate LCD interface.

It would appear Miniware didn’t do enough testing, and it’s impossible to distinguish a good signal from a faulty one when using a LA104 – arguably, the primary function of a logic analyzer. In the best of Miniware traditions, going as far as being hostile to open-source firmware at times, the FPGA bistream source code is proprietary. Thus, this bug is not something we can easily fix ourselves, unless Miniware steps up and releases a gateware update. Until then, if you bought a LA104, you can’t rely on the signal it shows on the screen.

When it comes to Miniware problems, we’ve recently covered a Miniware tweezer repair, requiring a redesign of the shell originally held together with copious amount of glue. At times, it feels like there’s something in common between glue-filled unrepairable gadgets and faulty proprietary firmware. If this bug ruins the LA104 for you, hey, at least you can reflash it to work as an electronics interfacing multitool.

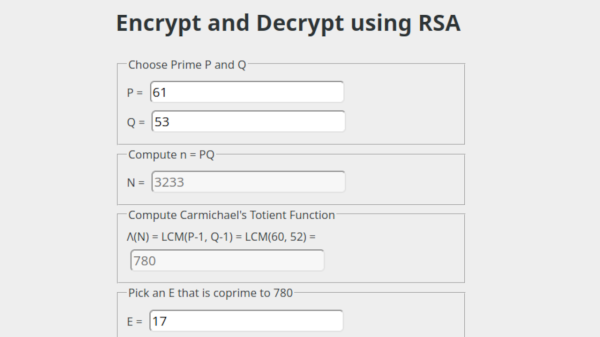
Screenshot of the RSA calculator, showing the fields that you can fill into and the results as they propagate through the calculation

Lift The Veil On RSA With This RSA Calculator

Encryption algorithms can be intimidating to approach, what’s with all the math involved. However, once you start digging into them, you can break the math apart into smaller steps, and get a feel of what goes into encryption being the modern-day magic we take for granted. Today, [Henry Schmale] writes to us about his small contribution to making cryptography easier to understand – lifting the veil on the RSA asymmetric encryption technique through an RSA calculator.

With [Henry]’s calculator, you can only encrypt and decrypt a single integer, but you’re able to view each individual step of an RSA calculation as you do so. If you want to understand what makes RSA and other similar algorithms tick, this site is an excellent starting point. Now, this is not something you should use when roll your crypto implementations – as cryptographers say in unison, writing your own crypto from scratch is extremely inadvisable. [Henry] does say that this calculator could be useful for CTF players, for instance, but it’s also undeniably an accessible learning tool for any hacker out there wishing to understand what goes on under the wraps of the libraries we use.

In modern day, cryptography is instrumental to protecting our freedoms, and it’s a joy to see people work towards explaining the algorithms used. The cryptography tools we use day-to-day are also highly valuable targets for governments and intelligence agencies, willing to go to great lengths to subvert our communication security – so it’s even more important that we get acquianted with the tools that protect us. After all, it only takes a piece of paper to encrypt your communications with someone.

The OpenMV board inside a security camera shell on the left, an AprilTag on smartphone's screen on the right

Use AprilTags To Let Guests Open Your Front Gate

[Herb Peyerl] is part of a robotics team, and in his robotics endeavours, learned about AprilTags; small QR-code-like printable patterns that are easily recognizable by even primitive machine vision. Later on, when thinking about good ways to let his guests through his property’s front gate, the AprilTags turned out to be a wonderful solution. Now all he needs to do is send his guest a picture of the appropriate AprilTag, which they can present to the camera at his front gate using their smartphone.

He used an OpenMV board for this – thanks to its wide variety of available libraries, the AprilTag recognition is already baked in, and the entire script is merely a hundred lines of MicroPython. An old surveillance camera gave up its dome-shaped housing, and now the OpenMV board is doing guest access duty on a post in front of his property’s front gate. He’s shared the code with us, and says he’s personally running a slightly modified version for security reasons — not that a random burglar is likely to stumble upon this post anyway. Besides it looks like the gate would be easy for a burglar to jump over without any need for security bypass, and the convenience benefits of this hack are undeniable.

In the unlikely chance a burglar is reading this, however, don’t be sad. We do happen to have a bunch of hacks for you, too. There’s far less secure systems out there, from building RFID keyfobs to gated community access control systems, sometimes all you need is a 12 V battery. If you’re not into burglary, that’s okay too — we’ve covered other guest access hacks before, for instance, this ESP8266-powered one.