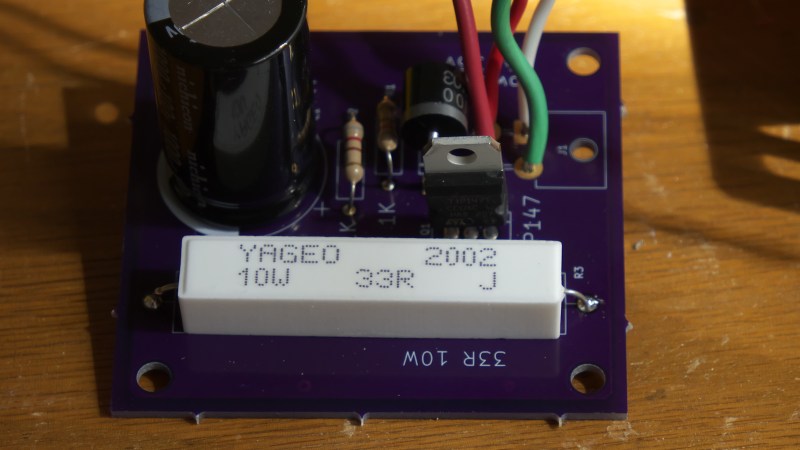
The circuit, assembled on a purple PCB, with a large capacitor and a sizeable white resistor, wires soldered to holes in the PCB

Protect Your Drivers When The Motor Stalls

[Mark Rehorst] tells us about a tragic incident involving an untimely demise of $200 worth of motor driving hardware, and shares a simple circuit so that we can prevent such tragedies in the future. His Arrakis sand table project has quite a few motors involved, and having forgotten to add limits into the software, he slammed a motor-driven mechanism into a well-fixed part of the table. The back EMF of the motor created a burst of energy, taking out the motor driver, the controller board, and the power supply.

With the postmortem done, he had to prevent this from happening again – preferably, in hardware. Based on a small appnote from Gecko Drives, he designed a simple PCB that shunts the motor with a high-power resistor, as soon as the current starts flowing into a direction it’s not supposed to flow into. He goes in depth about the way that the circuit works and the reasoning behind parts selection, as well as shows an LTSpice simulation and shares the PCB files. This was his first time designing PCBs in KiCad, and we believe he’s done a great job! This worklog is certainly worth reading if you’d like to understand how such circuits work and what goes into building one.

He dubs this a “bank account protection” circuit, and we can absolutely relate. It’s not just CNC tables that need such protections of course – we’ve seen a solution for small hacky makeshift electric vehicles, for instance. A motor’s generative properties aren’t always a problem, however – here’s just one example of a hacker trying to put them to good use.

Continue reading “Protect Your Drivers When The Motor Stalls” →
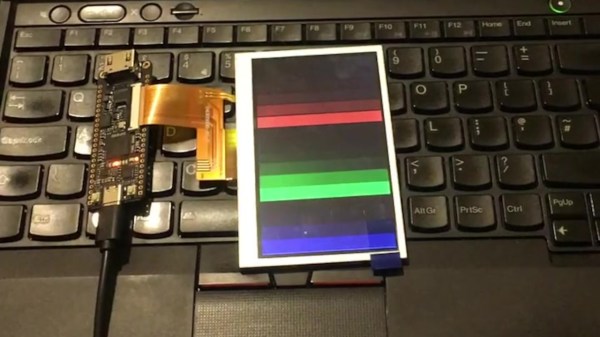
A Sipeed Tang Nano 9k board on a Thinkpad keyboard, with an LCD panel attached to it

An Open Toolchain For Sipeed Tang Nano FPGAs

[Sevan Janiyan] shares their research on putting an open FPGA toolchain together. Specifically, this is an open toolchain for the Sipeed Nano Tang FPGAs, which are relatively cheap offerings by Sipeed from China. The official toolchain is proprietary and requires you to apply for a license that’s to be renewed every year. There’s a limited educational version you can use more freely, but of course, that’s not necessarily sufficient for comfortable work.

This toolchain relies on the apicula project, an effort to reverse-engineer, reimplement and document the Gowin FPGA bitstream format, as well as the gowin integration for nextpnr (an open tool for FPGA place-and-route). With a combination of yosys, apicula, nextpnr and openFPGAloader, [Sevan] put together a set of commands you can use to build gateware for your Nano Tang FPGAs – without any proprietary limitations blocking your way. They show a basic blinkie demo, and also a demo that successfully operates a parallel LCD connected to the board.

The availability of open toolchains for FPGAs has always been somewhat of a sore point. Wondering about open FPGA toolchains? This Supercon 2019 talk by Tim [Mithro] Ansell will get you up to speed!

We thank [feinfinger (sneezing)] for sharing this with us!

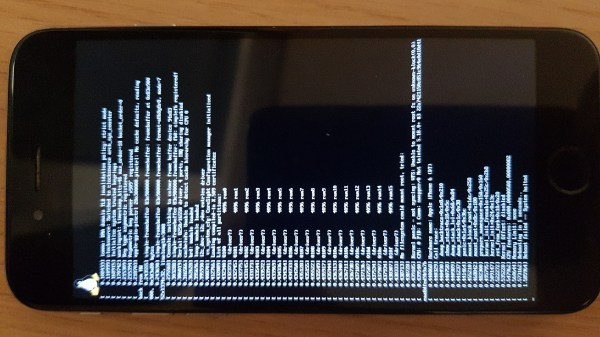
iPhone 6 with Linux boot log on its screen

Boot Mainline Linux On Apple A7, A8 And A8X Devices

[Konrad Dybcio] tells about his journey booting Linux on A7/8/8X processors, playing around with an old iPhone 5 he’s got in a drawer. It’s been a two-year “revisit every now and then” journey, motivationally fueled by the things like Linux on M1 Macs announcement. In the end, what we have here is a way to boot mainline Linux on a few less-than-modern but still very usable iPhones, and a fun story about getting there.

[Konrad]’s work is based on the Sandcastle project research, but he couldn’t quite figure out how to make their code work, and had to make sense of it as he went. At some point, he got stuck on enabling the MMU, which was the main roadblock for a while. Joined by another developer intrigued by Apple hardware, they were hacking away at it, developing tools and neat tricks on their way, but to no avail. With the framebuffer accessible and no other decent debugging methods in sight, he tells about a code snippet they wrote that printed register values as valid barcodes Continue reading “Boot Mainline Linux On Apple A7, A8 And A8X Devices” →

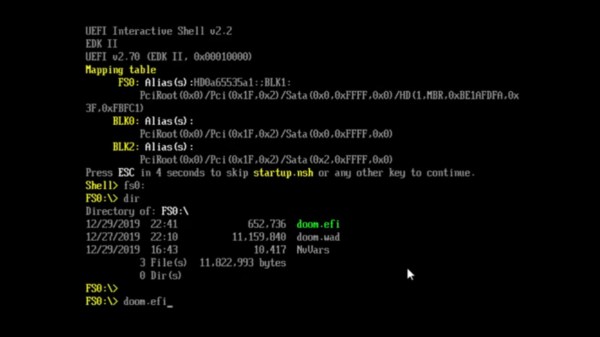
Screenshot of the EFI shell, showing doom.wad and doom.efi in 'ls' command output, and then doom.efi being loaded

DOOM? In Your BIOS? More Likely Than You Think!

We’ve seen hackers run DOOM on a variety of appliances, from desk phones to pregnancy tests. Now, the final frontier has been conquered – we got DOOM to run on an x86 machine. Of course, making sure we utilize your PC hardware to its fullest, we have to forego an OS. Here are two ways you can run the classic shooter without the burden of gigabytes of bloated code in the background.

[nic3-14159] implemented this first version as a payload for coreboot, which is an open-source BIOS/UEFI replacement for x86 machines. Some might say it’s imperfect — it has no sound support, only works with PS/2 keyboards, and exiting the game makes your computer freeze. However, it’s playable, and it fits into your BIOS flash chip.

But what if your computer hasn’t yet been blessed with a free BIOS replacement? You might like this UEFI module DOOM port instead, originally made by [Warfish] and then built upon by [Cacodemon345]. To play this, you only need to compile the binary and an UEFI shell, then use the “Load EFI Shell” option in your UEFI menu – something that’s widely encountered nowadays. This version also lacks sound, but is a bit more fully featured due to all the facilities that UEFI provides for its payloads.

Of course there’s far more efficient ways to slay demons on your computer, but even if they aren’t necessarily practical from a gaming standpoint, these two projects serve as decent examples of Coreboot and UEFI payloads. BIOS replacements like coreboot take up so little space, we’ve even seen Windows 3.1 fit alongside coreboot in the BIOS chip. Wondering what UEFI is, even? Here’s a primer for you. And, if you don’t mind the exceptional bloat of a stripped-down Linux install, here’s a Linux image built from the ground up to run DOOM specifically.

Continue reading “DOOM? In Your BIOS? More Likely Than You Think!” →

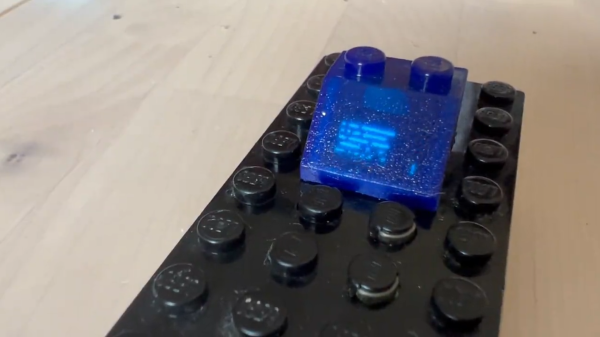
The blue LEGO brick described, with the OLED inside shining through the 3D-printed and subsequently cast brick body. The picture on the small OLED imitates the lines of text shown on the brick that this is an imitation of.

Computer-Shaped LEGO Brick Brought To Life

In childhood, many of us wondered — wouldn’t it be cool if our miniature toys had “real” functions? Say, that our toy cars actually were able to drive, or at least, that the headlights could light up. [James Brown] captures some of this childhood expectation of magic, recreating the 2×2 45°-sloped Lego bricks with computer screens and panels drawn on them by building a LEGO brick (thread, nitter) with an actual display inside of it.

This is possible thanks to an exceptionally small OLED display and a microcontroller board that’s not much larger. It’s designed to plug onto a LEGO platform that has an internal 9V battery, with power exposed on the brick’s studs. [James] has taken care building this — the brick was built with help of a tiny 3D-printed form, and then, further given shape by casting in what appears to be silicone or resin.

We’ve yet to hear more details like the microcontroller used — at least, the displays look similar to the ones used in a different project of [James]’, a keyboard where every keycap has a display in it (thread, nitter). Nevertheless, it is lovely to witness this feat of micro-engineering and fabrication. It reminds us of an another impressive build we covered recently — a 1/87 scale miniature Smart Car that’s as functional as you can get!

Continue reading “Computer-Shaped LEGO Brick Brought To Life” →

EC Hacking: Your Laptop Has A Microcontroller

Recently, I stumbled upon a cool write-up by [DHowett], about reprogramming a Framework laptop’s Embedded Controller (EC). He shows us how to reuse the Caps Lock LED, instead making it indicate the F1-F12 key layer state – also known as “Fn lock”, AKA, “Does your F1 key currently work as F1, or does it regulate volume”. He walks us through adding custom code to your laptop’s EC firmware and integrate it properly into the various routines the EC runs.

The EC that the Framework uses is a MEC1521 chip from Microchip, and earlier this year, they open-sourced the firmware for it. Now, there’s a repository of microcontroller code that you can compile yourself, and flash your Framework laptop’s motherboard with. In a comment section of HackerNews, a Framework representative has speculated that you could add GPIOs to a Framework motherboard through EC firmware hacking.

Wait… Microcontroller code? GPIOs? This brings us to the question – what is the EC, really? To start with, it’s just a microcontroller. You can find an EC in every x86 computer, including laptops, managing your computer’s lower-level functions like power management, keyboard, touchpad, battery and a slew of other things. In Apple land, you might know them as SMC, but their function is the same.

Why have we not been reprogramming our ECs all this time? That’s a warranted question, too, and I will tell you all about it.

Continue reading “EC Hacking: Your Laptop Has A Microcontroller” →

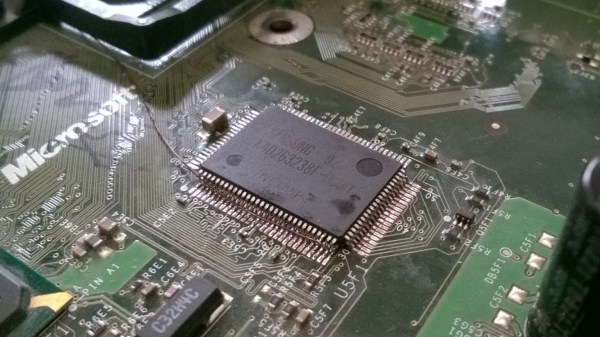
Picture of the modification as it's being performed, with an extra chip stacked on top of the original, extra magnet wire connection going to the chip select line pin

Original XBox V1.6 RAM Upgrade Stacks TQFP Chips

RAM upgrades for the original XBox have been a popular mod — you could relatively easily bump your RAM from 64MB to 128MB. While it wouldn’t give you any benefit in most games written to expect 64MB, it does help with emulators, game development, and running alternative OSes like Linux. The XBox PCB always had footprints for extra RAM chips, so RAM upgrades were simple – just get some new RAM ICs and solder them onto the board. However, in the hardware revision 1.6, these footprints were removed, and RAM upgrades on v1.6 were always considered impossible.

[Prehistoricman] brings a mod that makes RAM upgrades on v1.6 possible using an old trick from the early days of home computers. He’s stacking new RAM chips on top of the old ones and soldering them on in parallel. The overwhelming majority of the RAM lines are shared between chips, which is what makes this mod possible – all you need to connect to the extra chips is magnet wire for extra RAM chip select lines, which are, thankfully, still available on the board. He shares a tutorial with plenty of illustrations, so it should be easier for you to perform this mod, in case you’re stuck with a newer console that doesn’t have the RAM chip footprints left onboard.

We just covered an original XBox softmodding tutorial, so this is as timely as ever! If you’re looking to read about the 128MB mod, this is a good place to start.

We thank [DjBiohazard] for sharing this with us!